
When I first heard about the charcoal snake method in grilling, I wondered why anyone would call a smoking technique by such an objectionable word?
When the word “snake” is said out loud around a grill — or pretty much anywhere — people start grabbing up the kids and running for the house. Screaming may be involved. A 2001 Gallup poll found 51 percent of Americans feared snakes, more than spiders, flying, or being in the dark.
But I digress…
In this article, we’re going to discuss the charcoal snake method of fire management, what it is, why you might want to use it, and it’s pros and cons compared to other fire management techniques.
Let’s get cracking!
Jump to:
- 1 You Must Use Charcoal — And it Should Be Briquettes
- 2 Video Demonstration of The Snake Charcoal method
- 3 The Charcoal Snake Method — Step-by-Step
- 4 What is the Snake Method of Cooking?
- 5 When and Why Would You Use the Snake Method?
- 6 What Are The Benefits Of Using this Technique?
- 7 Influencing Factors on Effectiveness and Use
- 8 Conclusion
You Must Use Charcoal — And it Should Be Briquettes

Charcoal is the fuel of choice because the method calls for a progressive low fire along the length of the snake and this is very hard to achieve with wood or any other fuel.
And it should be quite obvious that a gas grill won’t work.
I’ll be referring to the coal as charcoal briquettes through this article for a reason. Both lump and briquette charcoal have their pros and cons, but especially related to the snake method briquettes win out because:
- Briquettes are formulated for a longer burn time compared to lump.
- Briquettes naturally want to burn low and slow, while lump wants to burn hot and fast
- Lump comes in different sizes, creating uneven burning and hence uneven cooking temperatures.
- Briquettes come in uniform size and shape, producing a consistent burn and
The biggest objection to briquettes is rapidly burning away since the demand for all things natural and organic has made it possible to find briquettes free of traditional additives like starch, sodium nitrate (aka Chile saltpeter), limestone, or borax.
As for the higher amount of ash left by briquettes, it shouldn’t be as much of an issue since you’ll only use a few dozen pieces in a snake.
You can find out more as experts weigh in on one of grilling’s ongoing debates in our article discussing: lump vs briquettes?
Video Demonstration of The Snake Charcoal method
A picture’s worth a thousand words, and a video is worth a thousand pictures. In fact, that’s just what it is more or less, right?
For a good demonstration of successfully setting up for and using the charcoal snake method, check out this easy-to-follow video from Aussie Guy:
The Charcoal Snake Method — Step-by-Step
What You’ll Need
- Marinated meat, poultry, or fish, prepared ahead of grill time.
- A clean grill — Making sure it’s free of previous grilling sessions spent fuel and grease will prevent blocked vents and flare-ups which will can both throw off the temperature.
- Drip pan (baking pan / aluminum pan)
- Hot water for the drip pan — If it’s already heated, the grill won’t have to waste energy heating it.
- Oil for the grate
- Long handled tongs
- Fire: Matches or lighter
- Starter cubes or charcoal chimney
- Foil for building a heat block, if such becomes necessary
- Digital grill or smoker thermometer, to check the grill temperature
- Instant read probe thermometer, to test the food for doneness
Building the Snake

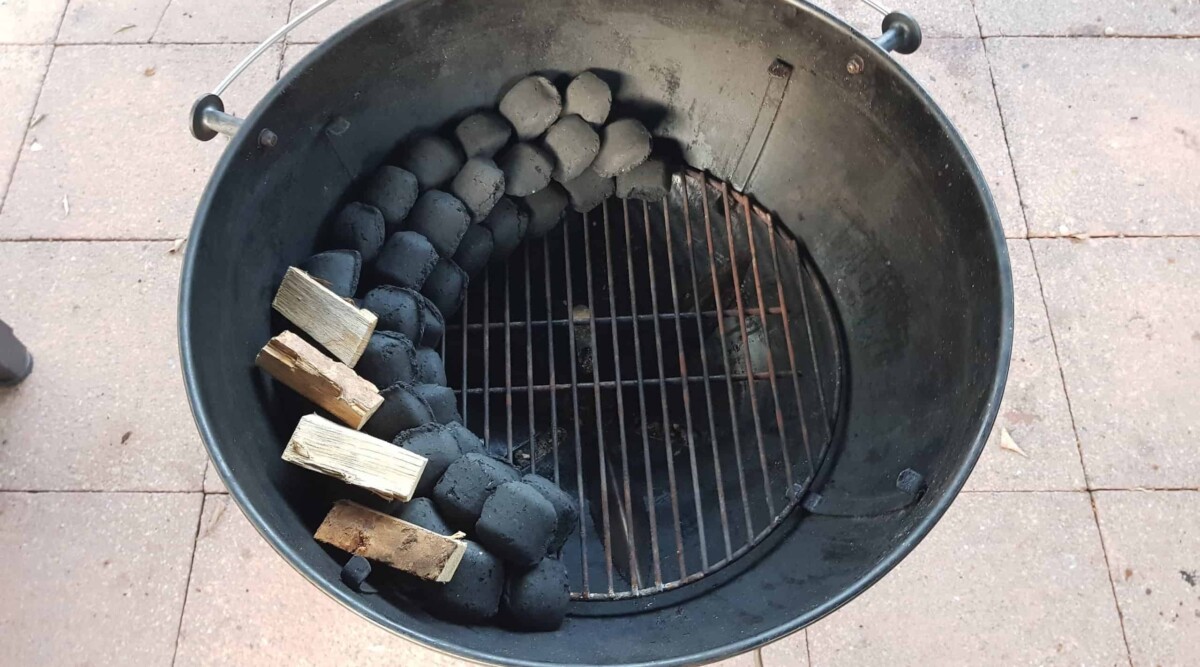
Basically you’re building a long charcoal fuse. While there are variations on how much charcoal to use, the basics are:
- Arrange two rows of briquettes about a third of the way around the perimeter of the grill. Make sure the rows overlap.
- Arrange a second layer of briquettes on top of the first, again making sure the briquettes overlap. Although it looks more like a woven basket to me, you should see some semblance of a black snake when you’re done. The goal is to give the fire a steady supply of charcoal to consume.
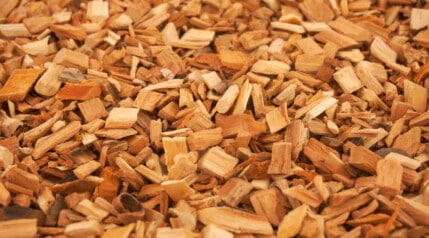
- Place your smoking wood on top of the briquettes, preferably chunks, though chips will suffice. The blocks should be arranged on the end of the snake where the fire begins (cold meat absorbs more smoke flavor at the start of a cook.)
Lighting the Snake
- Heat about 8 briquettes either by Placing them in a pile on the grill, away from the snake coiled against the side of the grill and placing a starter cube in to OR, put 8 briquettes in a charcoal chimney starter and light.
- While waiting for the briquettes to heat, assemble the water pan and your grate.
- When the briquettes are ashed over and glowing red at their center, use tongs to stack the lit coals against the end of the snake where the wood is. Make sure some are overlapping the unheated briquettes.
- Simpler still, light one end of the snake with an electric lighter like a Looftlighter, watch to ensure the fire is progressing along the line and the grill interior is above 220 °F.
Using The Snake
- Place a water pan half or three-quarters filled with hot water away from the snake.
- Place the oiled cooking grate into your grill.
- Let the temperature build to what’s optimal for the food (usually 225 to 250f.)
- Place your food onto the grate, positioning it over the water pan.
- Put on the grill lid with the vents opposite the snake. In this way, the smoke from the wood will be drawn across the food on its way out.
- Have aluminum foil on hand in case one end of the meat starts cooking too fast. Create a heat shield, folding the foil a few times and placing it under and in front of the meat to block the heat radiating from the coals.
The beauty of the snake method is that, once it’s going, it doesn’t need constant checking. In fact, removing the lid disrupts the humid environment that creates great smoked food.
So relax and let it go its slow and steady way, fire progressing from one briquette to the next.
At the end of your cooking time, you should see a gray snake lining the side of the grill. During cooking, use a probe thermometer to test food for doneness and internal temp.
When cooled, clean up the grate, water pan, and snake. Enjoy some awesomely good smoked food.
What is the Snake Method of Cooking?
Using indirect heat, where the food sits away from the fire, this is a low heat process for smoking food for a long length of time, anything from 4 to 20 hours.
The name describes how the briquettes are arranged: Generally, 2 to 3 layers of slightly overlapping briquettes are laid in a long line around one side of the grill (looking like a snake). You then place heated briquettes on one end and, over the course of hours, the fire makes its way across the whole pile, like the slow-burning of a fuse.
The charcoal snake is a key technique you want to master if you want to turn your charcoal grill into a smoker, a method every griller should have in their arsenal if they want to master using a charcoal grill.
When and Why Would You Use the Snake Method?

If you want the equivalent of a Crockpot meal from your grill, the snake method is one of the low and slow ways to go.
You can put something on, get it going and come back hours later — the next morning after a good night’s sleep or in the evening come home to a beautifully smoked brisket dinner.
If you’re not planning to smoke on a regular basis, your grill can stand in just fine as an indirect smoker. Then you won’t have to buy something which will probably end up spending more time being a yard ornament.
What Are The Benefits Of Using this Technique?
- Economical. A minimal amount of charcoal is used, one bag could cover several smoking sessions.
- Low maintenance. Probably the most you’d need to check for is to see whether the end closest to the fire is cooking too fast. If so, a bit of folded foil tucked around it can serve as a heat shield. If the wind and outside temperature are calm, there’s little need to keep checking the grill.
- Avoid clutter (if you only smoke infrequently). Because you can use your grill as a smoker, you don’t necessarily need to buy a smoker. This is one less thing to figure out how and where to store, clean, maintain, use often enough to warrant the purchase, or have the spouse grouse about…
There are other low/slow methods out there, such as the minion method. And Steve Raichlen briefly describes the top-down burn, Minion, domino/fuse, and ember methods. The difference is in how the charcoal and wood are arranged.
Some are tossed together, some neatly laid out with the wood sprinkled on top. They all deliver a steady, low heat just right for smoking.
What Types of Grill Would You Use it in?
This method is most often associated with kettle-type grills (such as the infamous weber kettle grills) as a way to turn them into effective charcoal fueled smokers, but by design, an offset grill or smoker could work well.
A bullet or kamado, because of the narrow bottom, would limit the size of the food that could be smoked. But any grill where you can fit in a semi-ring of charcoal away from the food will work.
Rectangular shaped grills? A ring could work, but I’m curious what would happen if the charcoal rows went in a straight line, along the rim of a rectangular grill. But it couldn’t be called a snake then, could it?
Since we’re talking about sustaining heat for hours, obviously a light grill — okay, let’s just say cheap — is a bad idea.
But consider how the environment might affect the grill. Cold or windy weather can make it hard to keep a steady temperature inside if the walls of the grill are thin.
Which Would You NOT Use it in?
You can slow cook on a gas grill, but for prolonged, low n slow smoking it doesn’t work for two main reasons:
- Smoke escapes too easily from the wide back vents before it can flavor the food. The wide vents are a safety measure, preventing gas from building up and causing a potentially lethal explosion. This is NOT the time to get creative and figure out how to block the vent to capture the smoke.
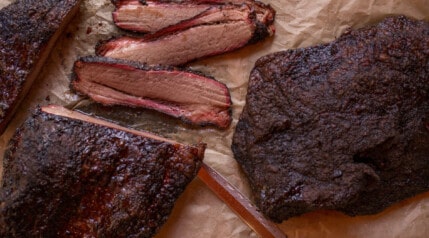
- Because you cannot load in much wood, it can’t deliver the hallmarks of smoked food: the crusty bark, crimson smoke ring, and rich smoke flavor.
You also cannot use the snake in any smaller, or travel style portable charcoal grills, there’s just not enough room to create the snake and to have the food far enough away from the heat source for indirect cooking.
Influencing Factors on Effectiveness and Use
Outside Temperature Vs. Grill Wall Thickness
Grilling in cold weather can be a challenge, depending on the material and thickness of your grill.
A thick-walled grill can better protect the internal temperature, maintaining the low and slow temperature needed for long cooks.
Thicker walls = more insulated walls. And this means more stable temperatures, and more fuel efficiency, whatever the weather.
Snake Length
Obviously a large, dense meat will take more time than a smaller cut or poultry, so you will need a longer snake. But how long?
This comes down to experience and will vary from grill to grill. So the best advice is to start with as long as a snake as you can build, and see what’s left at the end of your cook.
Any unburned coal can be used again, and by seeing roughly how far the snake burns over a cook, you will have a better idea of how long it needs to be next time.
If your meat isn’t done, but the snake nearly is, instead of finishing in the kitchen oven, simply add more briquettes to the unlit end to prolong the burning time of the snake.
Or you can start out with more briquettes by creating more rows at the start.
Vent and Temperature Control
This also seems to be directed by what’s cooking and the type of grill being used.
This is an area you’ll want to experiment with since vents vary from one grill to another. A key point to remember is Commandment 9 of the Barbecue Bible’s 10 Commandments of Smoking:
More air equals higher heat; less air equals lower heat.
Give in, read the owners’ manual for your grill to see what it recommends for vent settings while smoking.
Conclusion
Although the name may give pause, the lure of smoky goodness cannot be denied. I was going to misquote Shakespeare here but, you know where I’m going with “A roast by any other name…”
Think of the dozen or so ways to use the snake method; from the marinade to food choice to wood choice to the length of the snake.
How have you used the snake method — in a rectangular grill? If you get to it before I do, let me know how that works out, huh? Have you beaten the odds and found success with lump charcoal? Tell us about it in the comments below!
Happy grilling!


Does the snake method damage the exterior finish of a weber kettle? Trying to pick a color and might choose black if there is damage
Hi Fernando,
Not at all, no. I have a black one, and a second bronze colored one (you can see them on my about page), and both still look as good as new after a clean, and they’ve been used for everything from low n slow smoking with snake, to high heat searing with lumpwood charcoal (500f ), and rotisserie roasting with lid both off and on.
Whatever color you choose, the enamel will not discolor with use, it will be fine.
Thanks,
Mark.
Hello Mark, after reading your article on the snake method I am
trying it. I have a kettle grill, and I am cooking a rack of pork ribs. Just started and all seems fine so far. Thank you, for the information.
Brian.
Hi Brian,
Excellent stuff! You’ve opened your grill up to a whole new world of cooking! By controlling the heat with the snake method, you can basically cook anything in your grill that you would normally cook in your kitchen, and give it a lick of smoke. As well as now being able to do all the famous low n slow foods like brisket, pulled pork, etc.
Let me know how you get on with it, and if you have any questions, please do ask I’ll be happy to help!
My brother demonstrated the method at about 13 degrees C this fall with great results. 4 rib racks for 2 hours of smoke and then to the oven to finish as the outside temp was falling. I am now climbing My Everest in Northern Ontario, outside temp -10 degrees C! I constructed a 3 sided insulated box for my Webber kettle grill and will fire it up in an hour for a round of ribs. Wish me luck! Note: we did a pork butt in a classic Rocky Mountain water smoker at -30 degrees a few years back in the same insulated box.
FYI
I do this in a tabletop Smokey Joe. Yes, real estate is minimal, but cooking for 2, it works. At same time, I’ve did (2 servings each) chicken thighs, butterfly chops, and boneless rib meat at same time.