
In this article, we’re going to learn the best ways to pack up and store cooked ribs. We’ll also cover how to reheat ribs the best ways possible, so they’re just as succulent and delicious as the day they were made.
For cost efficiency, it’s always best to load up your smoker when cooking anything, and that leads to leftovers. So you’re going to have to learn how to reheat ribs, reheat brisket, and reheat pulled pork and more during your life as a pitmaster.
And that’s what we’re covering in detail today: Reheating ribs, with the ultimate goal of keeping them moist, with a quality as if freshly cooked.
Let’s get to it.
One Style Does Not Fit All
There are many types of ribs available to enjoy, and how you reheat your leftovers will depend somewhat on the particular ribs you cooked.
So here are detailed instructions for reheating several of the most popular rib varieties.
Best way to Reheat Baby Back Ribs

Baby back ribs are tender, but they’re not especially meaty. They have less fat content than spare/St. Louis ribs, so they’re more at risk of drying out, especially if they’ve already been cooked once.
Handled with care, however, your bonus baby backs can still come out tasty and pleasing to the palate. If you can’t control the craving anymore, try this speedy method, and see what you think.
- Place thawed ribs on a broiling pan bone side up. You can add more sauce if you like.
- Adjust your top rack, so that the ribs will be between 4 and 5 inches below the broiling element. Insert the pan.
- Leave them under the broiler about 3 minutes, or until the sauce starts bubbling.
- Remove the pan and flip the ribs over. Continue heating for about another 3 minutes.
- Take the pan out and loosely cover the ribs with foil. Let them rest for about 4 minutes before serving.
Watch your timing on the broiler method very carefully — at high temperatures, ribs will go from bubbling and juicy to charred and tough in the blink of an eye. You might prefer to eyeball them than to rely on a timer.
If you have more time, you might get slightly better results from reheating your ribs in the oven by using a lower temperature, say 225 °F to 250 °F.
Repaint the ribs with sauce (remember, baby backs will benefit from extra moisture), wrap them in a tight double layer of foil, and heat for about 40 minutes, or up to an hour for a large rack. They should come out hot and steamy and ready to eat!
If you prefer the grill, or if you’re cooking outside anyway, you can use either technique described above.
For the broil method, get your grill scorching hot and give the ribs just a couple of minutes per side, starting with the bone side down this time.
To do it more slowly, fire it up to low temperature, 250 °F max, and place your foil-wrapped ribs on the grill away from the flames. The timing should be the same as with the oven.
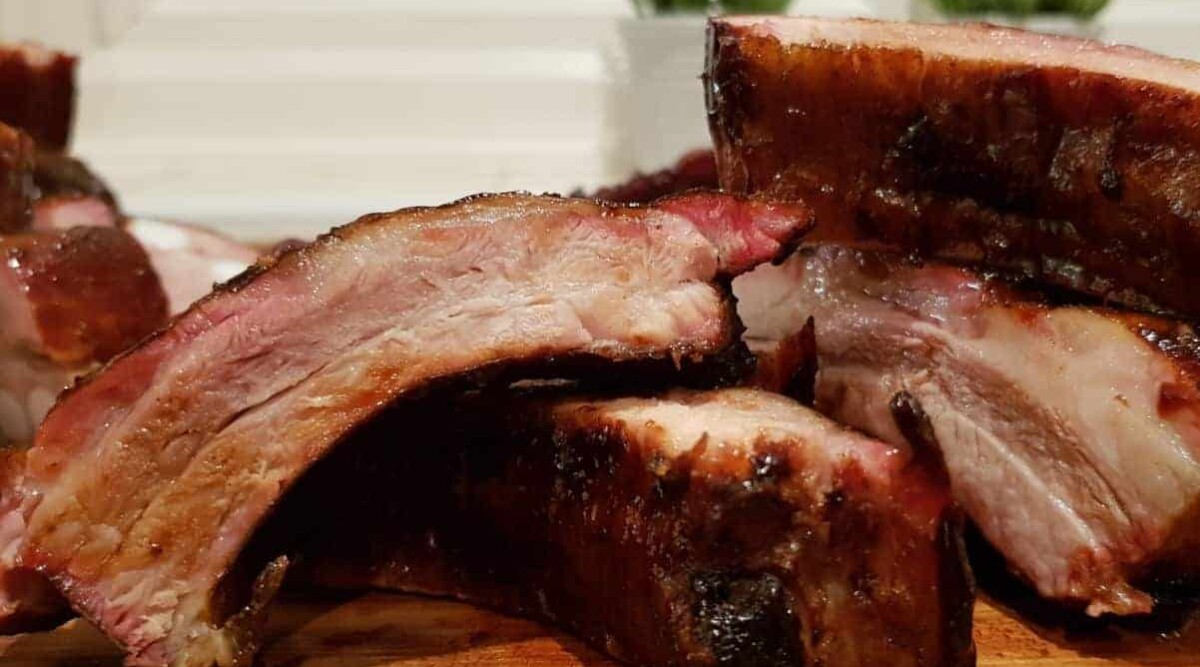
Spare ribs/St. Louis style

These ribs have more fat content than other pork ribs, which means they should have more natural moisture, even after cooking. As such, they need to be reheated slightly differently.
Go ahead and paint on some BBQ sauce, but maybe not as thick as you would with baby backs, then wrap them in foil. Go with the low temperatures again, no more than 250 °F, but leave them on a bit longer. It’s ok — the extra fat will keep them nice and juicy!
Reheating Beef Ribs

If it’s raining out, and/or you have no access to your grill, fear not! You can warm these little beauties up in the oven and enjoy a delicious platter of ribs in short order.
- Set your oven to 250 °F and let it get up to temperature. Yes, you could do it more quickly at a higher temperature, but you’d lose all the moisture.
- Tear off a sheet of aluminum foil large enough to completely wrap around the ribs, but not fit tightly. You want to leave some airspace for the moisture to do its work. Place the ribs on the sheet.
- Here’s where you add the moisture. Pour about a ¼ cup of water into the foil, and then enclose the ribs by wrapping the foil around them like an over-sized envelope. You could opt for some beef broth or another flavored fluid, if you want to make your leftovers seem like an entirely new meal.
- Place the package on a baking sheet and slide it into the oven once it has reached a medium heat of 250.
- Allow the ribs as much time as it takes to get up to 165F inside. (Probably about 30 minutes.) Use your meat thermometer to ensure the temperature is where it should be, so you know the ribs are safe to eat.
- Take ‘em out and serve ‘em up!
You might also try putting them in a baking pan, adding ¼ cup of water and covering with foil.
Of course, this is a barbecue site, and we encourage using your grill whenever possible!
If you’d prefer to warm up your leftover ribs on your BBQ, here’s what you want to do.
- Preheat your grill to about 250 °F
- Wrap your ribs tightly in piece of aluminum foil, and then wrap a second layer around the first one to really lock in the moisture.
- Place them on the grill in an indirect heat zone, and warm them to an internal temperature of 165F, using a meat thermometer for accuracy.
- Sauce and serve!
Alternatively…
Sous Vide — The Best Way to Reheat any Ribs

If you’re not familiar with the term, let me acquaint you. Sous vide is a cooking technique that professional chefs have been using for ages, but never bothered to share with the rest of us. It’s pretty simple — you use hot water to cook food.
The temperature of water in a pot on a stove is pretty easy to control. You know it boils at 212F (100C), so you know it’s not going to get any hotter than that. By immersing meat in a seal bag in the water, you get even, all-over cooking at temperatures that won’t burn the meat, no matter how long you cook. You just have to wait for the meat to be done to your liking.
You can use this same technique to reheat ribs without exposing them to heated elements or fire, which can dry out your ribs if you’re not careful.
Here’s a great video showing how it’s done, and what the results can be:
What you want to do is get your water up to a temperature a bit below the original cooking temperature.
So, if you did your ribs to 160 °F, heat the water to about 155 °F and hold it there. If you vacuum sealed your ribs before putting them away, you can toss the package right in the water. If you didn’t, seal them up in a watertight, sealable plastic bag before putting in the water.
You may need up to an hour to reheat them in this way, but the results are worth it. You won’t lose any moisture at all. If you need more time, set the water to a lower temperature and leave them for 2 or 3 hours, if you like.
Sous vide might not give you a nice crust, but it will deliver moist, fall-off-the-bone leftover ribs. Who know, maybe you’ll start cooking a few dishes this way?
To Nuke, or Not to Nuke? Reheating Ribs in the Microwave

The microwave might be the most used kitchen appliance of them all. There’s no need to go on about the incredible convenience they offer, or how they revolutionized societies approach to leftovers and meals in general.
Having said that, they don’t come without a little controversy, and I’m not talking about the possibility of exposure to radiation. The fact is, many cooks and chefs turn their noses up at the lowly microwave, and certainly legions of hardcore grillers would never dream of putting their meat in the nuker.
So, what’s our verdict? Is it acceptable to reheat your ribs in 30 seconds instead of 30 minutes?
A microwave doesn’t heat food the way an oven or a grill does. Microwaves fire radio waves through the food to agitate water molecules. Agitated molecules vibrate and generate heat. The heat spreads through the food and, in short order, the whole piece of food is hot.
While marvelously efficient, microwaves do not do great things for flavor. Rather than crusting nicely, sauce is more likely to just slide off and pool up on the plate. Or, it might explode and splatter all over the inside the microwave, leaving a sticky mess for you to clean up.
I suppose if you just want a quick and effortless snack, blasting your ribs in the microwave is acceptable. As for reheating a bunch of ribs and then actually sitting down to enjoy them, I’d say head for the oven or the grill and choose quality over speed.
Leftover Leftovers: Can I Reheat Ribs a Second Time?
We’ve all done it, cooked way more food than we actually needed for the event or meal. That’s most likely why you’re reading this article in the first place. Now that we’ve gone over how to store and reheat your leftover ribs, there still remains one last possibility to cover: putting your uneaten leftovers away for a second time.
Sometimes it happens that even after enjoying some leftover ribs, you STILL have leftovers. Are they only fit for compost, or can they be put away a second time and enjoyed for a third?
There are two answers to this question: yes, and no. If you thaw your leftovers in the fridge and then choose to cook only a portion, you can safely return the balance to the freezer for later use because the ribs never had the chance to get back into the over 40 °F danger zone.
If, however, you thawed and reheated everything, but still had leftovers, you could theoretically refreeze the remaining portion. You will have a greater risk of contamination, however, because of the additional time spent between 40 °F and 140 °F.
Also worth considering is what all these freezing, thawing, and reheating does to the quality of the meat. Maybe you’re more practical than fussy, and you just want to save your food. In that case, go ahead and put ‘em back on ice.
If you’re here at this site, however, you probably have great love and respect for your ribs, and you want them as tasty as possible. If that’s the case, then my advice is to finish them off after the first thaw (or extraction from the fridge) and compost anything left over.
Tips On Reheating Ribs
The biggest concern with reheating ribs is actually the same as the biggest concern with cooking ribs: drying them out.
If you’ve ever had the misfortune to have really dried out ribs, you know they’re not even fit for your dog. (My dog would eat them gleefully, but I wouldn’t feel good about it.) Nothing quite like the disappointment of tearing stringy, chewy, flavorless meat off a bone. Yum.
The trick is to cook them long enough to get them to a safe temperature, but not so long that you lose whatever moisture is still left in them. Master that, and you’ll never hesitate to put away your leftover ribs after a cookout.
Is There a Safe Temperature for Reheated Ribs?
Anyone who cooks meat is aware that there are minimum temperatures different kinds of meat need to reach for them to be safe to eat. But surely reheated meat doesn’t have to be so hot, because it has already been cooked, right?
The USDA wants you to cook your beef and pork to at least 145F. No problem, in fact you will probably cook your ribs even hotter than that, most likely around 160 °F. That kills all the bacteria, making them safe to eat. Once dead, they stay dead. There will be no microscopic zombie apocalypse.
Problem is, new bacteria can find its way to your meat after you cook it, but before it gets to a frozen or refrigerated state. This happens as the meat cools down gradually after cooking.
If you put your meat away in the fridge right after cooking, and sealed it up nicely, you could pull it out and eat it cold if you want. Certainly some folks enjoy cold ribs, though I personally don’t get it.
However, if you’re not so sure about when you put the leftovers away (because leftovers are rarely planned), you’d be better off getting them right back up to the safe zone before you eat. I feel it’s important to reiterate here that you can’t leave your cooked meat out longer than 2 hours.
All in all, it’s up to you, but I recommend reheating to a minimum of 145F. Not only is it going to be safe, it’ll be a closer approximation of the original experience.
Adding Moisture
It’s ok to give your ribs a little assistance on the moisture front. Adding some water into the foil, or in a broiling pan will help steam some moisture into the meat. Brushing on a new layer of barbecue sauce can help, too. Lots of folks save the juices and drippings from the original cooking and add them back in for the reheat.
If you feel like getting a little creative, you can try other liquids in place of water. Apple juice, or apple cider works very nicely on pork ribs. You can even try spritzing it all over the ribs with a spray bottle.
For beef ribs, you might try beef broth, beer, or cola to infuse them with a new burst of flavor. You can pour the liquid of your choice over the ribs, and/or let it pool up in the bottom of the foil wrap. If you use cola, keep a close watch to make sure it doesn’t burn.
Tips On Storing Ribs to Reheat Later

Before you learn how to walk, you must first learn how to crawl. Don’t put the horse before the cart. And so on with pithy sayings.
But, of course, it only makes sense to look at how to actually store your cooked ribs for later before learning how to reheat them.
Proper storage of your ribs will prevent all your hard work from going to waste. So, let’s get ready to chill out!
How Soon Do I Have to Freeze/Refrigerate My Ribs?
It’s very important to get your leftover ribs put away in a timely fashion. Cooked meat cannot sit out for long before it begins to dry out and collect bacteria. Evidently, there’s just bacteria strolling around the neighborhood looking for BBQ to go live on.
Cooked meat must be held at over 140 °F or below 40 °F to be safe. That’s why your fridge has a maximum recommended temperature of no more than 40 °F.
Once off the grill, cooked meat cools off and enters the “danger zone.” Put your extra ribs away ASAP, making sure not to wait more than 2 hours. In fact, if it’s really warm outside, say 90 °F or warmer, you’ve got even less time. Bacteria like it warm, so in the peak of summer in most of the world, you’ll want them dealt with within an hour to be safe.
Getting your ribs down below 40 °F as quickly as possible is important, and large racks of ribs may not cool quickly! Try to cut them down into reasonable serving sizes before they go into storage. Not only will they chill faster, they’ll also be in manageable portions for reheating.
How Long Can I Store Cooked Ribs?
Properly stored pork ribs are good for 3 to 4 days in the fridge, although some people feel they are safe for up to a week. My advice? Err on the side of caution and stick to 4 days at most. Not only are older ribs potentially contaminated, they will likely be a lot less tasty.
Frozen ribs are technically “good” indefinitely, so long as they stay frozen. There are many stories, though all are suspect, of people and dogs dining on Wooly Mammoth steaks many thousands of years old. While I don’t care to test the edibility of prehistoric ribs, anything you put in your freezer is likely to be safe to eat for many years.
Good, of course, is not the same as desirable. Just about any food will become rather unpalatable after a prolonged freezing. Your best bet is to eat your frozen ribs within 2-3 months.
You can reasonably expect smoked beef ribs to last just as long as pork ribs, again assuming they were put away properly.
You can check out my short guide to how long smoked meat lasts if you’d like further information
How Can I Tell if My Stored Meat is Bad?
If you pull your ribs from the fridge and they have a sour smell, that’s a solid indicator they are past the “best before” date. Also watch for a slimy coating on the surface of the ribs.
Many foods look and smell “bad” before they are actually unsafe to eat. They won’t taste any good, so why bother taking the risk, though? It’s clichéd but true: “when in doubt, throw it out!”
Best Ways to Store Cooked Ribs
How you store your ribs will have a significant impact on how well they reheat. As we already discussed, you need to get them where they’re going quickly. But what is the best way to store them until you need them again?
Storing Ribs in the Refrigerator
If you plan on eating your leftover ribs within a few days, by all means, put them in the refrigerator. Make sure your fridge is no warmer than 40 °F, the maximum safe temperature for storing meat. Personally, I keep mine at 38 °F, so there’s never any doubt.
The key is sealing your ribs tightly to keep out air and trap moisture on the inside. If you have a plastic container that seals tightly, that should do, as will a zipper-style plastic bag. Plastic wrap wrapped tightly with an outer layer of aluminum foil will also do the trick.
If you have a vacuum sealer, that’s the best solution, because it’s guaranteed to be airtight. As an added bonus, it’s ready for sous vide right out of the fridge!
To add extra flavor and moisture, seal your ribs away with barbecue sauce, the original drippings (if you saved them) or some other flavor-enhancing fluid.
Storing Ribs in the Freezer
Perhaps you have no plans to eat your extra ribs anytime soon? In that case, you’ll want to put them on ice until you need them again.
As with the fridge, and perhaps even more so, a tight seal is essential for a good freeze. All the fridge methods will work, though I personally have had bad luck with plastic tubs. They always seem to lose their seal and get frosty inside. Vacuum packed is best, but if you wrap the ribs in plastic and foil, or zipper bags, that will also work.
Before freezing, put the sealed meat in the fridge to cool them down from their cooked temperature. The freezing process will be quicker and more efficient with pre-cooled meat.
By the way, if you have any sauce you want to hang on to, go ahead and freeze that, too!
Good to the Last Rib
There you have it folks, everything you need to know on how to reheat ribs, on getting the most out of your cooks and charcoal use, by filling your grates with ribs and then properly storing and carefully reheating them.
A lot of work goes into grilling or smoking really great ribs, and no one wants their efforts to go to waste. Hopefully the techniques you’ve learned here will come in handy, and you won’t be afraid of disappointing yourself with sad, dry, tasteless warmed-over ribs.
If you have any special techniques of your own that weren’t covered here, please let us all in on the secret! We’re always open to suggestions and tricks of the trade from the grilling community, and we welcome your questions and comments, too.
Just like leftover ribs, this article is also good when shared a second time, so feel free to pass it along to your family and fellow BBQ’ers.
Happy grilling!


Regarding reheating pork back ribs, which side is the “curved side” as you refer to it? In my experience, both sides of a rack of ribs are curved.
Haha … That’s a very fair point. Now I read it, I realize that was a bit of a stupid thing to say and as clear as mud!
I meant ‘bone side’. I’ve now edited the article to clarify. Thank you, for pointing that out 🙂
Whenever I want to thaw meat, I always use cold tap water. Cover it, change the water every 30 minutes until thawed. I thawed some bacon yesterday, and it only took about 20 minutes in the water. I would imagine that ribs would only be 30-45 minutes… If they’re not completely thawed by then, they’d be pretty darn close and you could toss them on the egg.
Why is EVERY article on the WWW 900 paragraphs long? It’s so lame. Just get to the point.
Some people want short and sharp answers — that’s why I provide a ‘table of contents’ to take you directly to the part you are interested in and want to know, without having to read stuff you’re not interested in.
However, some people want a full on informational article to learn everything they can, covering all the who, what, why, where and when of the topic they are researching.
It’s hard to find the balance sometimes. But creating long form, deep and all-encompassing articles on a topic satisfies many people, and for the time starved who want a direct answer (which is often me, too!) there is a table of contents to jump straight to the point.
The best of both worlds!
Please don’t compost meat and bones unless you have a system specifically designed to, or you know what you’re doing. Meat and bones don’t compost well in regular garden compost. They create an environment perfect for harmful bacteria and they will attract unwanted vermin. You can safely compost meat and bones, but do your research. Bokashi is one method that works.