
When you hear the phrase “seasoning a new smoker,” it may give a mental image of sprinkling salt and pepper over a metal box. But that would be silly.
Choose any dictionary, it won’t tell you anything remotely helpful either.
The two standard definitions involve flavoring food and treating wood for use as timber.
Seasoning a smoker isn’t quite the same as seasoning a cast iron skillet to create a non-stick finish. But somewhere in there lies one of the principles for treating a surface food doesn’t touch.
You may also hear this process described as pre-seasoning or curing.
For the latter, most dictionaries confine themselves to concepts around medical or spiritual care and food preservation. But the Business Dictionary offers a glimmer of relevancy, defining a process that strengthens a material.
Let’s take it from there and get a good definition of what seasoning (or pre-seasoning or curing) a smoker really means in the Land of Grills and Smokers. Then we’ll learn why it’s necessary and then go step-by-step in the process of how to season a smoker.
Jump to:
Why Season Your Smoker?
Personally, I like learning about the origin of words. But there are times when it doesn’t add anything but confusion. Because it doesn’t help to know the word ‘season’ comes from an Old Latin word for ‘sowing,’ does it? No, can’t even stretch that one to fit.
So bottom line, the process is called seasoning because that’s what it’s called. If anyone can shed light on this, please chime in with a comment.
There are two main reasons why a smoker should be seasoned:
- Post manufacturing clean up
- Rust prevention
Cleaning After the Manufacturing is Over
When your newly built smoker goes into its box ready for the sales floor, it brings with it remnants of its — I’d say birth, but that’s not a pretty word image.
Uncured paint, solvents, adhesives, oils, and dirt from the manufacturing process linger on the finished product, particularly those made from metal such as offset smokers and pellet grills. Some of those chemicals can be toxic; at the least, they add an unpleasant flavoring to your smoked goods.
Seasoning easily removes those manufacturing remnants and accomplishes a second objective of protecting the smoker. Alaska Granny provides a pretty thorough video explaining why and how to season a smoke (or pre-season or cure.)
To Extend the Life of Your Smoker
Of all the oils and finishes applied during the manufacturing process, nothing was added to rust-proof your smoker. The continual presence of moisture during each smoking session will quickly age your smoker, leaving it vulnerable to rust.
Seasoning lays down a protective coating that prevents rust on the steel. Seasoning coats the walls with carbon and smoke so condensation will drip off. Moisture is relevant in defining the seasoning process, it’s a way to keep it from seeping into the metal of the smoker, causing it to rust.
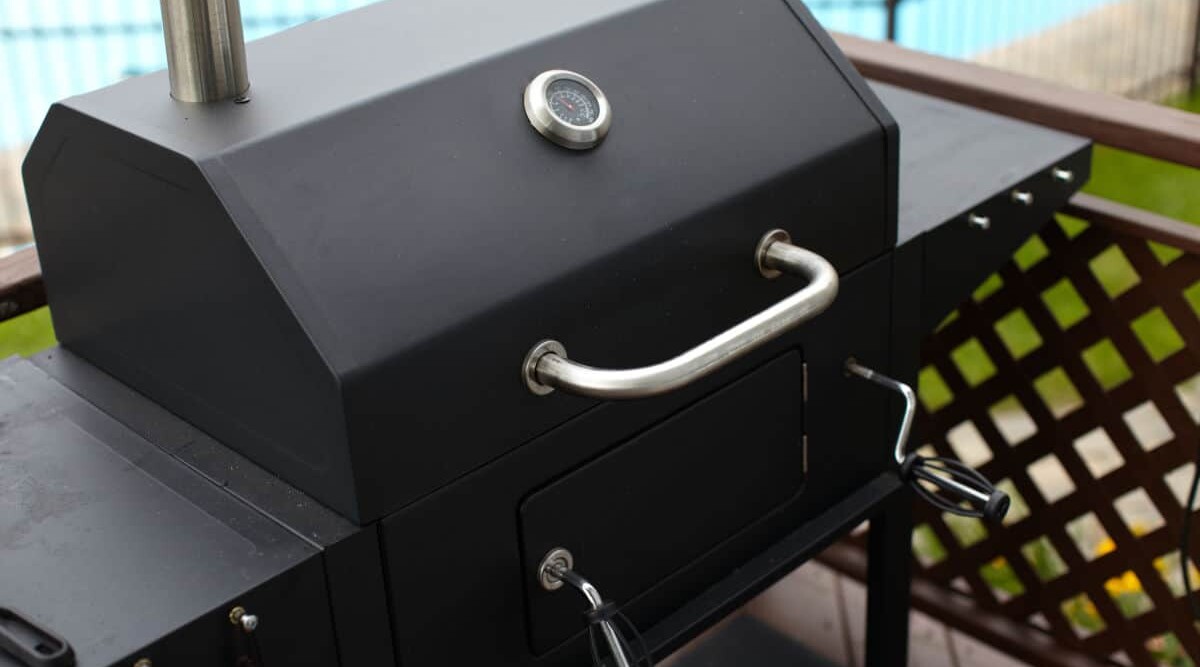
How to Season a Smoker — Step-by-Step Method

Seasoning is one of the first things you’ll want to do with your newly purchased smoker. If your smoker has to be assembled, it occurs to me that part of the seasoning process can start there.
- Clean interior, racks, grates and pans with dish soap and water or a specialist grill cleaner before assembly of your smoker. Although Alaska Granny says to just use water, a mild soap can act as a degreaser in this first step of cleaning and removing manufacturing oils and grime. Use a soft cloth to avoid scratching the finish.
- Air dry. Although all the instructions say to do this, I’m not sure why or if it’s really necessary. Seems to be a theme with this process though.
- Spray or wipe down the interior with cooking oil. No need to put on so much that the oil has to be mopped up; a thin, even coat is what you want to achieve. Using a can of cooking spray (the flourless kind) is probably the quickest way to do this. Doing this step while the smoker is unassembled ensures all edges and corners are covered. And of course, it gives you more elbow (and head) room. At this point you’ll assemble the grill according to the manufacturer’s instructions. Be sure to handle pieces carefully to avoid removing the protective coating you’ve just put on. If some oil gets on the outside, that’s fine too. Rub it in and give your smoker’s exterior a bit of water-proofing while you’re at it. Giving the racks an oil coating at this point doesn’t hurt.
- Put water pan in place but leave empty. Not every source agrees on this step as you’ll see later in this article. But most electric smoker seasoning instructions say to do so.
- Open vent. See comment below.
- Set temperature to max (which means having the vents open.)
- Run for 3 hours or as specified in the manual for a full cooking cycle.
For charcoal or gas grills, the process is essentially the same but for steps 6 to 8
- Add heated charcoal.
- Let it burn to ash.
- Dump ash when cool.
Variations on The Basics Can be Really Fun!
So yes, those are the basic steps but, as with many things, there is room for fun innovation and expert tips. For instance:
Step 5 says to open the vent. Just as many others will say to keep the vent closed. When many voices give differing opinions, the best tie-breaker you can use is the user’s manual that came with your smoker.
But the most innovative part of the process is Step 3. Why use plain old vegetable oil when there’s bacon? Start as you mean to proceed by infusing your smoker with the aromas of wood and smoke and meat.
Some seasoned pitmasters like to use fats such as red palm sunflower oil, olive oil, raw beef fat (suet), and lard.
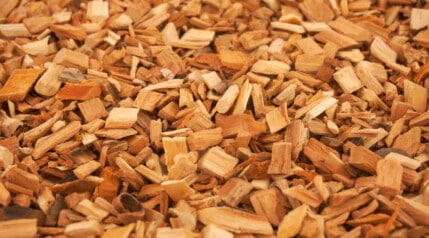
Woods are introduced towards the end of the seasoning process, gifting the smoker with a distinctly non-metallic smell. Fruit woods like apple, cherry, and peach are used with hickory and mesquite.
While Danny McTurnan gives the wise advice to slowly heat the smoker to avoid warping the metal, Derrick Blackwell, Sr. takes a low and slow approach all the way, firing along at a temp of 250° F for 4 hours followed by another 6 hours at 350° F with hickory and cherry woods.
And Donald Smith really thinks outside the box, using a water/apple juice/liquid smoke blend.
Can the Outside of The Smoker Benefit From an Oil Layer?
It sure can. And for the same reason — rust prevention.
Now, most smokers will be painted. Not sure if I’ve ever seen any electric smokers or pellet grills that aren’t painted on the outside, but some offset smokers come bare metal. So season the outside if it will benefit.
Reason to Re-season
Over time, you may get a build-up of charcoal or grease on the interior walls, or a spill may occur. When this happens, treat your smoker like new and go through the wash, dry, and oil process again.
Seasoned Smoker
So there you are — your new smoker is primed and ready for’ Adventures in Smoking.’
There may be reasons you’re already contemplating your next smoker purchase before this latest has had an outing, but I think it’s safe to guess you’re looking forward to a long and satisfying relationship with what you’ve just unpacked.
Taking the few hours needed to season it will make that long relationship possible by keeping rust at bay. And if you decide to take the creative path with the seasoning process, you can anticipate sussing out the subtle flavorings introduced into everything that comes out of the smoker.
Have a special technique for the seasoning process? We’d love to hear about it, so please do let us know in the comment section below.


I would suggest not spraying down the parts of the smoker while it is still apart on all smokers before putting it together, because not all smokers are created equal. Many of the mid to low-end smokers and offset smokers are not sealed well when assembled as per the instructions with the included parts. Most of these smokers will require separately purchased gaskets and food grade high temperature silicone to seal off leaks. If you try and seal a pre-oiled smoker it is just is not going to work, the gaskets will not stick nor will the silicone.
I agree that getting oil in every nook and cranny while it is apart will aid in rust prevention, the silicone applied properly will aid in rust prevention, then oiling both inside and out will give you the results you want and the sealed smoker you need.
Hi Kevin,
Thanks for taking the time to comment!
My first EVER smoker was this piece of junk, lol:
It was honestly terrible, sub $250 new, very thin, gaps everywhere, terrible at holding heat, leaked smoke out of the edge of every panel, all sides of the hood, between firebox and cooking chamber.
I did a lot of reading at the time about offset mods, and followed some advice: I got a pipe to lower the chimney to grate level, used felt gaskets around all sides of the hood, and high temp silicone wherever else it was leaking. Even after all that, it was still a nightmare to try to maintain temp, but was far better and is the kit that got me hooked into BBQ. I was happy to upgrade and not look back though!
Anyway, some solid points made, Kevin. I agree with you, thanks for adding it. I’ll tweak the article to reflect it when I get a spare half hour. 🙂
Thanks, this is my second Masterbuilt electric smoker, but my first new one.
Nice! Building a collection? Or did the first one break somehow?
I believe what you speak of like every word is essentially correct, and truly wise. For about a Zillion years, I seasoned every cooking vessel/pan that I ever used and had. I still today have 20-year-old vats to cook on, and it’s due to (I believe) the seasoning of the cooker. Amen.
I bought an Oklahoma Joe offset smoker. It’s my second offset but this on is 14 gauge. Very sturdy. To avoid rust on the bottom of the barrel I will again line the bottom with sand. No heat transfer from the coals (the muffler effect). For the rest I will brush Crisco (lard) inside and on the outside seams while it heats. That should limit rust by applying some regularly.
I didn’t wash anything first figuring anything would just burn off. I was afraid to get it wet before I protected it! Should I redo the entire process?
Nah, it’ll be fine!
Thank you dearly. This was very enlightening and simple. I just learned I did it all wrong lol. Was very helpful and taught a single mom how to teach my boys how to do it correctly. Thank you! Big hugs n cheers!🙏❤️🍻🤗
Thanks, Kim!
Thanks for this seasoning info, I will follow with my new bbq/smoker.