
There are all kinds of ways to get your knives sharp, from home gadgets to that guy who drives around neighborhoods in what you thought was an ice cream truck but was, in fact, just a sharpening store on wheels. (I hated that guy when I was a kid.)
The purpose of this article is not to tell you what kind of sharpener to buy (we’ve got another article about that), but to give you an overview of how to use knife sharpeners and the different major systems available for sharpening knives at home.
We’ve got a great video and step-by-step instructions for each. So grab a drink and a snack, and get ready for some educational programming.
No matter how good your knives are, or how careful you are with them, the time will come when they need to be sharpened.
Jump to:
- 1 How To Use an Electric Knife Sharpener
- 2 How To Use a Handheld / Pull-Through Knife Sharpener
- 3 How to use Sharpening Stones / Whetstones
- 4 How to use a Knife Sharpening System
- 5 The Reasons You Should Keep Sharp Knives
- 6 The 4 Main Types of Knife Sharpeners
- 7 Sharpening and Honing are Different
- 8 All the Way From Tip to Heel
How To Use an Electric Knife Sharpener
Electric knife sharpeners are very popular. They’re fast, incredibly easy-to-use, and many of them do an excellent job.
Let’s have a look at a three-stage sharpener in action. Don’t worry — they all work basically the same.
Step-by-step Breakdown and Guide to Use
- Turn on the power before inserting the knife.
- Take the knife by the handle in your dominant hand.
- Begin with the coarse section and insert the knife into the left-side slot, beginning closest to your hand (the heel).
- Pull the knife through slowly (about 5 seconds) and without pressure towards your body.
- As the knife tip comes into the grinder, slowly raise your hand and follow the contour of the blade to ensure all the edge comes in contact with the grinder.
- Repeat 3-5 in the right-side slot to sharpen both sides of the blade.
- After completing several paired passes, check the blade for a burr (raised metal) along the knife-edge with your fingers. If there is no burr, repeat paired passes until a burr is present. (Number of passes will depend on how dull the blade is.)
- Repeat the process in the next stage to remove the burr.
- If you are using a 3-stage unit, repeat process in the final stage.
- For a very clean edge, finish with a couple of quick (1 or 2 seconds) paired passes through the fine grit slots.
- Clean the blade with mild soap and water and wipe dry to remove any residual metal filings.
How To Use a Handheld / Pull-Through Knife Sharpener
Handhelds are very long on simplicity and convenience. Just pull through the slots, and don’t worry about where the closest power outlet is.
You can even take one camping or tailgating if you want. They’re a breeze to use, as you’ll see in the following video.
Step-by-step Breakdown and Guide to Use
- Place the sharpener on your counter or work surface.
- Hold the handle with your non-dominant hand (most models work for both right— and left-handed users), and hold on with a firm grip to keep the sharpener from moving during use.
- Grip the knife by the handle with all fingers behind the heel.
- For a multi-stage sharpener, begin with the coarse slot (assuming the knife needs more than just a touch-up or honing).
- Insert the knife into the slot closest to the heel.
- Pull the knife smoothly through the slot towards yourself, exerting slight pressure.
- Lift the handle as you approach the tip to follow the contour of the blade. Each pull should only be 1 or 2 seconds.
- Repeat steps 6 & 7 until a burr is raised along the edge of the blade.
- Move to the fine grit slot and repeat steps 6 & 7 until the blade is smooth.
- Clean the blade with mild soap and water and wipe dry to remove any residual metal filings.
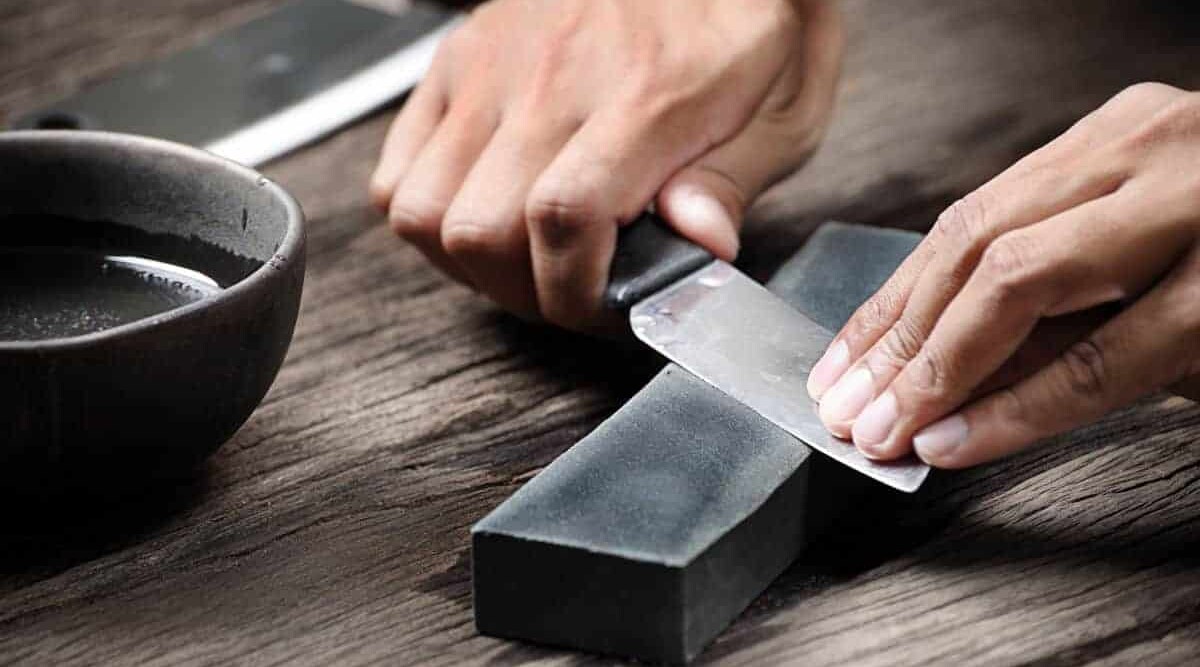
How to use Sharpening Stones / Whetstones
For some knife enthusiasts, there is no substitute for the total control of a whetstone.
There’s a high learning curve to using them expertly, but the results can be difficult to match with any other method.
If you’ve got the time to invest, it can be quite satisfying. Let’s have a look at someone who really knows what he’s doing.
Step-by-step Breakdown and Guide to Use
- Place the stone on the counter with the coarse side facing up, with either of the ends closest to you.
- Use the holder provided to keep the stone in place. If it did not come with one, wet a paper towel or dishcloth and set it on the counter. Place the stone on top of the towel or cloth.
- Depending on the stone, you may need to wet the stone Some stones require full immersion, while others can be surface-wet. Cooking-grade mineral oil may also be employed. Consult your manufacturer’s instructions before proceeding with this step.
- Determine the factory-set angle of your knife. You want to sharpen your knife at the correct angle so as not to damage the blade or reset the angle.
- If an angle set is included with the stone (a clip-on device that props the knife up at the correct angle), attach that now.
- Grip the knife in your dominant hand. Put your pinky, ring, and middle finger around the handle, and your thumb and index finger on either side of the blade.
- Rest the four fingers of your opposite hand on the top of the knife blade. This is for pressure and stabilization.
- Run the blade lengthwise across the stone from tip to heel, applying slight pressure. Make 3 or 4 passes.
- Flip over the blade and pull it along the stone towards you, running from tip to heel. Make 3 or 4 passes on this side.
- Repeat steps 8 & 9 until you can feel a raised burr along the entire length of the blade.
- Flip the stone over to the fine grit side.
- Repeat steps 8 & 9 until the burr is gone and the edge feels clean and sharp.
- Clean the blade with mild soap and water and wipe dry to remove any residual metal filings.
How to use a Knife Sharpening System
A sharpening system is the most complicated way to sharpen a knife, but it offers a ton of control and accuracy.
They are very popular among knife enthusiasts, and there are many different kinds. Most, however, can be used in essentially the following manner (skip to 3m18s!)
Step-by-step Breakdown and Guide to Use
- Secure the knife firmly in the clamp by the side of the blade opposite the cutting edge.
- Affix the clamp mechanism to the stand, if you are using one. For some models, the clamp is permanently attached to the system.
- From the selection of stones, choose a coarse grit stone and insert the rod in the angle guide appropriate for the knife.
- Depending on personal preference, you can pass the stone over the blade in long strokes, moving from heel to tip (or vice versa), or move along the edge in a series of short, circular motions.
- Continue using the stone on the edge until you can feel a raised burr along the entire length of the knife-edge with your fingers.
- Flip the blade over and repeat steps 4 & 5 on the other side. (Some models allow you to work both sides of the blade at once.)
- Once the burr is raised, switch to a medium grit stone and repeat steps 4-6. Move in the opposite direction you sharpened with the coarse stone.
- Continue with the medium grit until a smaller burr can be felt on both sides.
- Switch to a fine grit stone and repeat steps 4-6.
- Continue with the fine grit until an even smaller burr can be felt on both sides.
- Still using the fine grit stone, begin making light passes in a single direction along the edge to remove the remaining burr. Make a few passes, and the flip and repeat on the other side.
- Repeat step 11 until the burr is all but gone.
- If your system includes a leather strop, give the blade a few light passes to remove microscopic traces of the burr and leave the edge as smooth as possible.
- Clean the blade with mild soap and water and wipe dry to remove any residual metal filings.
The Reasons You Should Keep Sharp Knives

There are three reasons to keep your knives sharp that spring immediately to mind:
- You’ll get more life out of them
- They’re easier to use
- They’re safer
Let’s have a look at each of those in a little more detail.
A Dull Knife Isn’t a Dead Knife
After using a knife for a long time, its ability to cut cleanly will be diminished. Once a blade gets to the point you can no longer use it effectively, what good is it?
If something doesn’t do what it’s supposed to do any longer, you throw it out to free up space.
Sharpening your dull knives will give them a new lease on life. Rather than throwing them away and buying new ones, it makes more sense to restore them and carry on using them.
Soon, you’ll recoup your investment in a sharpener through the money you’ve saved by not replacing your knives.
A Dull Knife is Frustrating to Work With
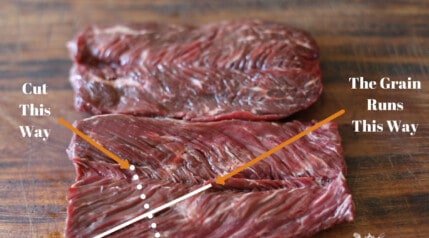
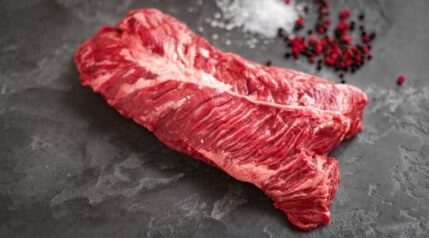
Ever torn apart a good piece of meat with a ragged knife, or squashed a ripe tomato with a blunted blade?
It’s hard to do your best work around the grill if your tools aren’t up to snuff. Keeping your blades sharp will allow you to trim and carve meat with ease, and prep your sides and garnishes, as well.
A genuinely sharp blade is a joy to cut with.
A Dull Knife Can Still Hurt You
It may seem counter-intuitive to say that a dull blade is more dangerous than a sharp one, but that is often the case.
Yes, a razor-sharp blade can easily cut you if you’re not being careful. The thing is, though, a sharp knife does its job so easily, there’s less chance of messing up.
Cutting with a dull blade requires extra effort to do the work. That additional force reduces your level of control over the knife.
If you slip while trying to force a knife through, say, a roast, you have far more momentum than you usually would. Your follow-through could take the blade way off course and into your other hand.
The 4 Main Types of Knife Sharpeners
There are four main types of knife sharpeners, and they are as follows:
Electric Knife Sharpeners

An electric sharpener has rotating sharpening surfaces inside the housing. Simply pull your knife through the slot and let the grinders do the work.
Better sharpeners have multiple stages with coarse and fine grits for a complete sharpening.
Handheld / Pull Through Sharpeners

Similar to electric sharpeners, but no motorized whirling grinders, it’s all manual.
On most pull-throughs, you pull the blade through a slot and across a stationary grinding surface.
Again, some models have multiple grits. Some handhelds require you to pull the sharpener along the knife blade, instead of the knife through the sharpener.

The oldest way to sharpen knives, sharpening stones, or whetstones, require you to carefully pull the blade across a rectangular block of a gritty material.
Many are two-sided, with a different level of grit on each side. And some come with multiple stones in sets, sometimes with a stand to hold the stone while you work.
Knife sharpening systems / Guided systems

Sharpening systems come in many different forms, but they all share some common traits.
Generally, you fix the knife in a clamp, and the grinding surface (a small whetstone, usually) is attached to a stand by a swinging arm.
The angle of the arm can be set to ensure you’re always sharpening your blade at the appropriate angle, 15 degrees for Japanese knives, 20 degrees for western style knives.

If you’ve been researching sharpeners, you’ve probably come across sharpening steels?
Despite the name, they are not for sharpening. Sharpening steels are made for honing, and are sometimes referred to as honing steels or honing rods.
The typical honer is a long, thin rod with a handle for gripping at one end. The rod is made of steel, ceramic, or a diamond-coated material.
Repeated use of a knife causes tiny folds and bends to happen along the knife-edge. Honers restore bent blades and make them straight again.
This is great routine maintenance for knives, and doing so frequently will reduce the amount of sharpening you’ll have to do. But, a truly dull knife will not be made sharp again by honing.
Honing does not sharpen. During sharpening, knife metal is removed to grind a new knife edge. During honing, no knife-edge material is removed, it is merely set straight again, to return to former sharpness.
All the Way From Tip to Heel
So that’s the ABC’s of knife sharpening all in one convenient location. With these simple steps to follow, you should be well on your way to using sharper knives in no time, no matter what system you’ve purchased.
If you haven’t bought a sharpener yet, and you were just here to get a feel for the different methods out there, check out some of our other articles that we’ve linked to throughout the guide above. We’ve got buyer’s guides and reviews, as well as the pros and cons of the different systems.
If anything you’ve seen or read here seems like something a friend or family member needs to check out, please invite them to come by. Get the word out and help your loved ones become better grillers, too!
Should you have any questions, comments, or epic tales to tell, please do share in the comments below. We dig feedback of all kinds. Don’t be shy!
Thanks for reading, and we hope we’ve made our point.
Happy grilling!

Thank you for your detailed write-up. It is greatly appreciated!