
There are two kinds of brining: wet and dry. As the title suggests, this piece is about wet brining.
There must be a million ways to flavor your meat. Fortunately, this article will cover just one.
Using salt to enhance flavor and preserve meat is a technique nearly as old as civilization itself. Places have been named for it, roads have been built to transport it, and wars have been fought to secure it.
So the next time you sprinkle on the white stuff, take a moment to reflect on the thousands of years of history held in that little shaker. Or, you know, just enjoy the taste.
Ok, enough with the history talk — let’s move on to the good stuff!
This guide explores the science behind brining, and shows you just how it’s done. By the time you’re done reading, you’ll have everything you need to indulge in some fine brining! (Except the meat and salt.)
Jump to:
What Is Wet Brining?

Before we get to the actual process, let’s take a moment to understand what brining is and how it works.
At its most basic level, wet brining is the process of immersing meat in salt water. You can add stuff other than salt for more flavor, but we’ll come back to that later. All you need is H2O and NaCl.
Why Do We Brine Meat?
Brining meat probably goes back to the very, very early days of salt use. Before the advent of refrigeration, people used salt and smoke to preserve meat and make it last.
Do you finish an entire turkey or ham in a single meal? Rarely, if ever. So, you seal it in a container and stick it in the fridge.
Imagine how frustrating it must have been to throw out most of a bear, or antelope, or whatever because it would turn rotten practically overnight if you couldn’t keep it cold.
Salt to the rescue! Added bonus: brined meat tastes fantastic!
What Happens When I Brine Meat?
Cast your mind way back to science class and see what you can recall about osmosis. If you’re anything like me, that will be next to nothing.
As a quick refresher, osmosis is, according to Merriam-Webster,
“movement of a solvent (such as water) through a semipermeable membrane (as of a living cell) into a solution of higher solute concentration that tends to equalize the concentrations of solute on the two sides of the membrane.”
In a nutshell, the salty water will penetrate the meat until there is an approximately equal proportion of salt water inside and out.
Great. So the meat is soggy?
Not to worry — meat loses a fair amount of moisture when it cooks. Starting with extra moisture means that even if you lose a lot of it, there’s still enough left behind to keep your cooked meat nice and juicy.
But wait, there’s more!
Unwind and Relax!
The salt in your brine has a relaxing effect on the proteins in the meat, breaking them down and tenderizing the meat. This results in meat that’s less chewy.
Combined with the added moisture from the water, you should end up with moist, tender meat that feels good in your mouth.
Enhanced Flavor
As a society, we Westerners are kind of obsessed with salt. I won’t get into the health issues here, but the bottom line is, salt makes things taste better.
Salt has the ability to release aroma molecules, and anything that smells good tends to taste good, too. (Smell and taste are closely connected; why do you think you hold your nose when you drink something nasty, like cough medicine?)
Furthermore, salt can mask unpleasant flavors, especially bitterness, and balance out excessive sourness or sweetness.
What Kind of Meat Can You Wet Brine?

Sounds great, doesn’t it? Makes you want to start throwing everything into a pot of salt water! But hang on; will all meat benefit equally from a good brining?
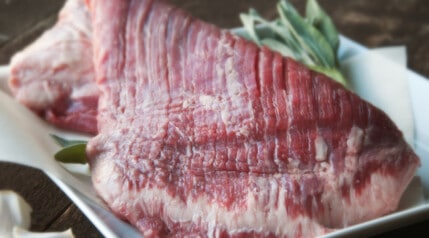
While brining is traditionally for lean meats, including poultry — especially Turkey — fish, and pork, you can wet brine just about anything. However, you’ll see the best results with these kinds of meat.
If you like to smoke low ‘n’ slow, try brining those ribs or that brisket first to keep them juicy even after hours in the smoker.
Don’t Brine Pre-salted Meat
Pre-salted or pre-seasoned meat already has plenty of salt and flavor. Adding more will not make things even better — quite the opposite, in fact.
Also, don’t brine kosher meat, as it has already been salted as part of the standard process.
How to Wet Brine Meat
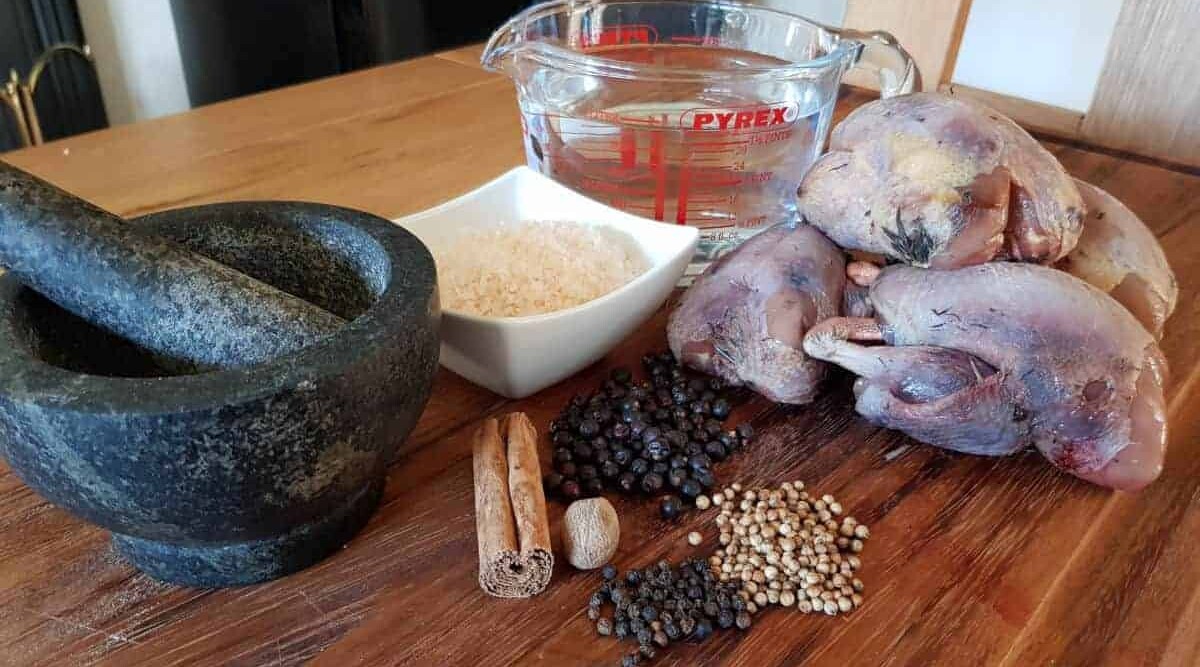
Ok, all ready to brine? Let’s go over a few things you’ll need to get started:
Container: What you use will depend on what you’re brining.
A couple of pork chops could be done in resealable plastic bag or container. Something large, like a chicken, will need a big stainless steel pot.
Do NOT use your sink, because you won’t be able to keep it cold. (Plus it’s where you wash stuff, so that’s kind of gross.)
Refrigerator Space: Make sure you’ve got space in the fridge for your brine container. Not to give anything away, but you’re going to need it.
Salt: Sorry to state the obvious, but make sure you have enough salt on hand. A large piece of meat will need a lot of salt, so check that box before you begin. There are many different types of salt, we recommend using a cheaper variety as the finer differences of more expensive salts will be wasted with a brine.
Other Ingredients: You can absolutely throw other things into the brine for added flavor, like spices and fruit. We’ll get into that soon — just make sure to have them prepped in advance.
What Kind of Salt Should I Use For Wet Brining?
There are many kinds of salt available for use, and most of them will work just fine. You should, if possible, avoid the use of salt with iodine as it can mess with the flavor of your meat.
Many people opt for kosher salt, but plain table salt works just as well.
Keep in mind that because of the difference in grain size, a cup of table salt is not the same as a cup of kosher salt. The best thing to do is go by weight, rather than volume. We’ll cover that further down.
What Else Goes In Brine?
As mentioned near the beginning, all you need is salt and water. You can, however, enhance your flavor experience with a few additives of your choice. Examples include:
- Citrus fruit slices
- Sage
- Oregano
- Rosemary
- Cloves
- Bay leaves
- All-spice
- Peppercorns
- Sugar
Honestly, if you think it will taste good and add value to your meal, try it!
How Long Should I Brine My Meat?
There are no hard and fast rules on this, but there are some general parameters.
If you don’t brine long enough, the salt water won’t have time to penetrate the surface and do its thing on the protein. This is especially true of skin-on poultry. The fatty skin acts as a barrier, and it takes a long time for the brine to get through.
Brine too long, however, and you’ll break down the proteins too far and end up with nasty mush. No amount of delicious flavor is going to salvage a mouthful of pulpy meat.
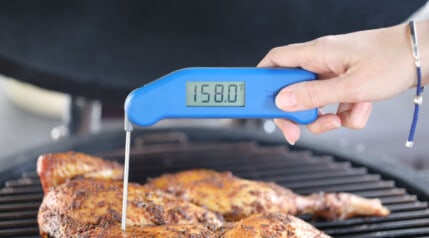
The consensus is brining one hour per-pound of meat is about optimal.
Step-by-Step Instructions For Wet Brining

Ok folks, here’s how it’s done, broken down into moist and tender bite-size pieces:
Step 1: Prepare your container
Choose a clean, non-reactive, container large enough for the meat you are brining.
Place the still packaged meat into the container and fill with water until the meat is completely submerged.
Pro Tip: You may need to hold the meat down with something heavy to keep it underwater. Exposed meat invites bacteria.
Step 2: Measure the water
Remove the meat from the water and measure the volume. If you are brining a whole chicken or turkey, add 1–3 cups of water, depending on the size of the bird, to compensate for the cavity.
Step 3: Get your salt ready
Break out the calculator — it’s math time! If you’re using table salt, this won’t be too bad. Just use one cup per gallon of water. Not working with that much water? No problem! One tablespoon of salt per cup of water gives you the same ratio.
Now, if you’re using kosher salt, it gets a bit trickier. Kosher salt has larger grains, so less of them fit in a cup. Therefore, 1 cup of kosher salt is not as much as 1 cup of table salt. Using the traditional ratio with kosher salt will leave you with disappointing results.
Use a kitchen scale to weigh your kosher salt. The ratio you’re after is 10 ounces (mass, not volume!) of salt to 1 gallon of water.
Once you have the correct amount of salt measured out, just set it aside. By the way, this ratio works no matter what kind of meat you’re brining.
Step 4: Prepare other ingredients
Now is the time to prepare any additional flavorings and ingredients to add to your brine. Sugar is perhaps the most common additive, as it facilitates the Maillard reaction, which is what causes browning during cooking.
Sugar is certainly a “flavor to taste” ingredient, so add it as you see fit. Some chefs go as high as 1 cup per gallon. Don’t worry about weighing to compensate for different kinds of sugar, though.
Step 5: Heat the water
To be effective, the salt needs to dissolve. That means hot water. Bring the water close to a boil. If you let it boil, you’ll lose water to evaporation, and that will leave you with too little for the brine.
If you are using sugar, add a small amount of water to the sugar to dissolve it. Stir it a bit, and it should readily dissolve in short order.
Add the salt to the remaining hot water. Stir the salt until you no longer feel or hear the salt granules scraping the bottom. Once dissolved, mix all the water together in your brining container and add any additional ingredients you’ve got ready.
Step 6: Cool the water

Next, let the water cool down. This isn’t sous vide, so you don’t want to immerse your meat in hot water. Chill it down fast with ice packs, ice straight into the brine mix, or put it in the freezer for a short while.
If you intend to put ice straight into the brine mix, it will ‘water it down’ when melted. So you need to plan ahead, and add extra brine ingredients, or less water at the start, to cover the extra water produced by the meting ice.
Step 7: Add the meat
You’re now ready to dunk your meat in the brine. Make sure to push it right down in and ensure it stays under. You can use something to weight down the meat, such as a weight, a heavy pan, or in my case a stone pestle.

If you’re doing a turkey or chicken, make sure to fill the entire cavity by rolling the bird around a few times.
Step 8: Cover and chill
Seal the bag, or put the lid on the container and put it in the fridge to keep it cool and safe. Now it’s just a matter of waiting!
Pro Tip: If the bird or cut is too big for the fridge, you can brine it in a plastic picnic cooler. Just be sure to add ice to keep things cool. Fill resealable bags with ice, or use frozen water bottles. Do not use loose ice cubes, or else you’ll throw off the water/salt ratio of your brine. Check periodically to make sure it’s staying cool.
Step 9: Remove the meat from the brine
After enough time has passed, remove the meat from the brining solution. You’ll want to discard the brine; it’s no good for anything at this point.
Thoroughly rinse the meat under cold water to remove surface salt and seasonings. Failure to do so will result in an incredibly salty meal! Be sure to rinse the interior of any whole poultry, too.
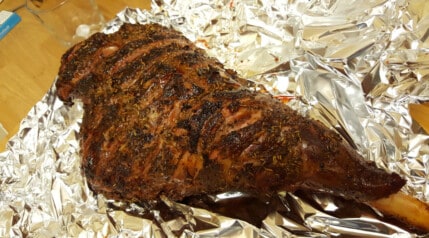
Pat the meat dry with a clean cloth or paper towel, and you’re ready to cook!
Wet Brining Vs. Dry Brining
Now that you know about wet brining, you may be interested in learning about its close cousin, dry brining. Guess what? We’ve got a whole article on that, too.
Just click here when you’re ready: Our detailed guide to dry brining.
The End of the Brine
Are you excited for your turf to hit the surf? Brining is a simple and effective way to add moisture and flavor to your meat that everyone should try.
If you weren’t sure what the technique was all about before reading this article, we hope you’re feeling better informed and ready to bathe your bird, or send your steak for a swim.
If you’ve got anything you want to tell or share with us, we encourage you to do so in the comments below. The river of communication flows in both directions, friends!
Until next time, stay salty!
Happy grilling!

Sir,
Great article but when you pen down next time let the readers know what gallon are you talking here U.S gallon or U.K gallon, What is a cup or water. 236ml or 284ml . With advent of internet your writeup is read worldwide not just Europe or U.S.
Hi, Palash. That’s a fair comment. I’ll make sure to specify in future, and current articles will begin to be updated in a couple of weeks time. For now, the above is U.S. measurements.
I was always curious about brining. I’ve got to
Try it. I’m always looking for a reason to cook a steak