
We spend a lot of time talking about the best ways to maintain our barbecues, grills, and smokers. And why wouldn’t we? A dirty or poorly maintained cooker performs badly and doesn’t last as long. So, we invest some time to protect our cash investments.
Why don’t we give our grilling gear the same consideration?
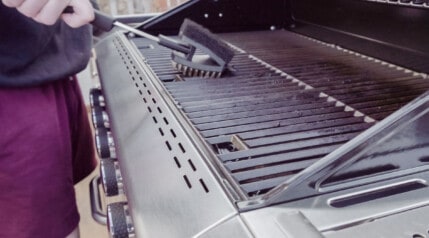
An essential item in your arsenal of utensils should be a good grill brush. It only makes sense — it’s part of what’s keeping your grill clean, safe, and ready to use. All that use, though, can leave your brush caked with crud and worn out.
To help you max out on this smaller investment, today we’ll show you the best ways to maintain and clean your grill brush, including easy-to-follow, step-by-step instructions. Plus we’ve got tips for buying a new one when the time comes.
First, let’s look at whether your brush needs cleaning or if it’s time to chuck it out.
Jump to:
Clean or Replace My Grill Brush?
Nothing lasts forever, especially something we use frequently. Your brush sees action either before or after every cook session (and if it doesn’t, it should!), meaning it’s highly prone to wear.
Take a good look at your brush. If the head or the handle are cracked, it’s time for a new one. The cost is so low for a new one, it’s not worth the risk of injury from a broken, jagged edge or bits of plastic getting into the cook box.
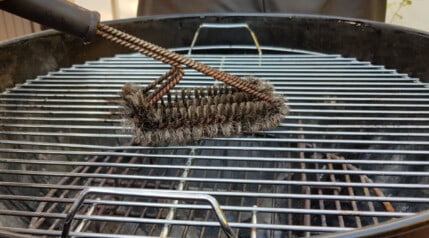
Mangled and bent bristles or wire coils on bristle-free brushes are also clear signs that your grill brush has had its day. Damage like this will keep it from cleaning effectively and could be detrimental to your grates.
Most importantly, if you use a grill brush with metal bristles, look for loose bristles before every use. You can use a pair of pliers to tug a few bristles gently as a test. If a bristle detaches and sticks to the grate, it can end up in your food and then in someone’s digestive system. This is extremely dangerous. At the first sign of a loose bristle, trash the whole brush immediately!
Keep an eye out for rust, by the way; it’s a good sign that the metal is losing its integrity and is liable to break.
If the brush is seriously caked with food debris but otherwise intact, a good cleaning may be all that’s required to restore it to prime condition. Conveniently, our step-by-step guide for cleaning your grill brush is next.
Grillers in climates where you don’t grill all year should wash, dry thoroughly, then store their grill brush at the end of each season. When the next begins, inspect it thoroughly and if sound, use it. You can often get multiple seasons out of a good grill brush.
If you live where grilling is a year-round activity, I recommend tossing your brush and starting fresh at least once a year as it will get a lot of abuse!
How to Clean Your Grill Brush
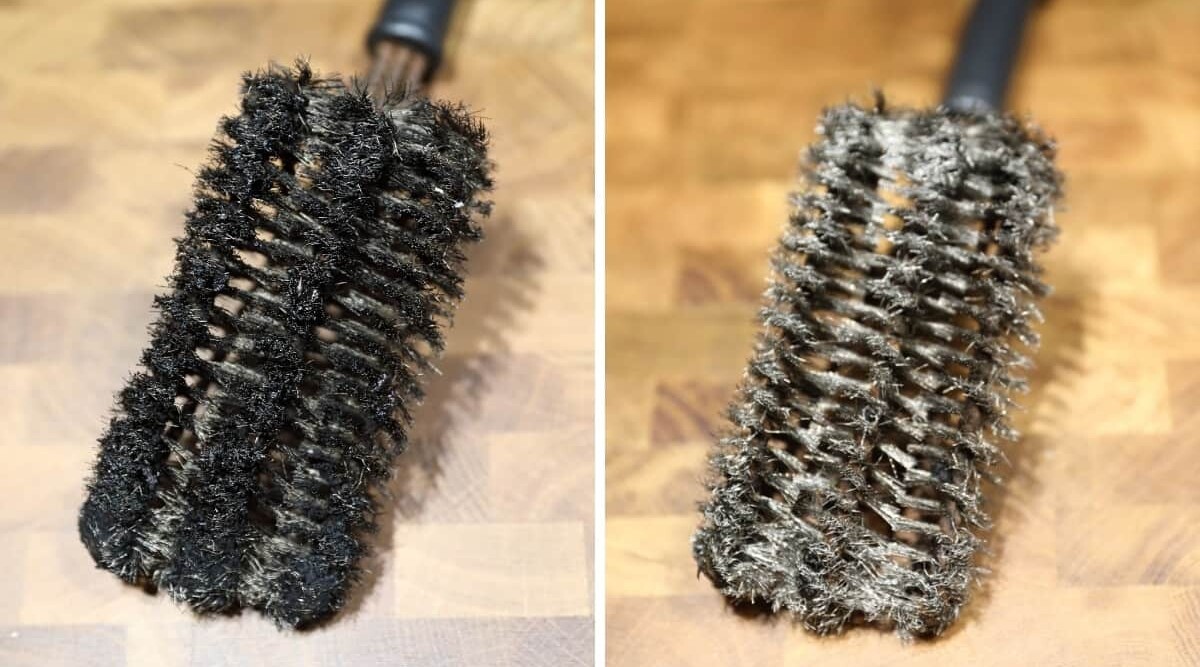
Clean your cleaner? Absolutely! A dirty brush won’t remove build-up from your grates, and a dirty grate is a nasty thing to cook on. Just follow these simple steps.
For Bristle Brushes
- Give your brush a few firm knocks against a solid surface to dislodge any large pieces of food.
- If you have two bristle brushes, rub them together to clean deep between the bristles. Don’t rub too hard, or you risk bending or loosening the bristles. I’d recommend using a nylon brush to clean your metal bristle brush.
- Fill a bucket with water deep enough to submerge your brush and add a dime-sized mild, grease-fighting dishwashing soap. Get it nice and sudsy and plop your brush in the water. Again, if you have two bristle brushes, scrub them together underwater to really get that soap into every nook and cranny.

- Allow the brush to soak for several minutes.
- Rinse away the soap and food debris under the tap or with the hose if you’re cleaning outdoors.
- Dry if it’s a metal brush, to help prevent rusting.
For Bristle-Free Brushes
- Bang the head of the brush against a solid surface to knock off any large chunks of food. Be careful not to hit the metal coils themselves, or you might squish them.
- Fill a bucket with enough water to cover the brush’s head and add just a few drops of mild, grease-fighting dishwashing soap. There should be enough room in the bucket to swish the brush around freely.
- Move the brush back and forth in the water rapidly to create suds and clean all the small spaces.
- Allow the brush to soak for several minutes.
- Thoroughly and vigorously rinse the brush under running water.
- Allow the brush to air dry. Hang it or place it brush-side down to allow moisture to drip off.
Grill Brush Maintenance Tips
Cleaning your brush will extend its life. But what else can you do? Here are a few thoughts.
- Store your brush indoors between uses to avoid exposure to extreme temperatures and moisture.
- Don’t press too hard when scrubbing off stubborn food debris. Try using a scraper instead. (Many brushes have a scraping edge built-in.)
- Use metal brushes on warm grates; the debris will be easier to remove, and you won’t have to press as hard.
- Only use nylon bristles on a cold grate to prevent melting.
- Inspect for damage before each use.
- Clean your brush frequently.
Buying a Replacement Grill Brush
Time for a new grill brush? Check out this list of features to look for before you buy.
- Choose a brush with a long handle to keep your hands and clothes away from hot and dirty surfaces.
- Look for bristles that are firmly and deeply inserted into the brush, so they stay put.
- Avoid brushes with bristle pads glued to the head; when exposed to heat, the glue may melt, causing the bristle pad to come loose.
- Although stainless steel won’t rust, softer brass bristles are a better choice for cast iron. Stick with stainless bristles if you have stainless steel grates.
Here’s one more thing to do before dropping your cash — give our article on the 10 Best Grill Brushes and Cleaning Tools a read. We’ve got a buyer’s guide and reviews of the top bristle brushes, bristle-free brushes, scrapers, and more to help you make the best choice.
Final Thoughts
Taking care of your grill is a subject you should never brush off. Now that you know how to care for your grill brush, put that knowledge to use — you might be surprised how much better cooking is on a properly cleaned grill. What’s the verdict at your place? Is it time for a cleaning or a new brush?
If you liked this article, we’ve gone tons more where it came from. Search or browse the site for recipes, reviews, and tips to make your grilling and smoking experience all that it can be. If you love delicious food, it’s well worth the time spent.
Thanks for stopping by and for making us your go-to for skills for the grill.

0 Comments