
Have you watched a Seinfeld rerun lately? The one where George Costanza behaved totally opposite of himself and things seemed to work out amazingly?
Well, surprisingly doing just the opposite of how you usually cook a steak or roast meat will give similarly amazing results.
In this article, we’re going to discuss the reverse sear method of cooking thick steaks or large joints of meat.
Trust me when I say, the results from doing it backward are wonderful, and it’s a technique you should try and perhaps add to your repertoire.
Jump to:
- 1 Cook Your Meat “Backwards”
- 2 A Brief History of The Reverse Sear Method
- 3 Reverse Sear Steaks for Edge to Edge Perfection
- 4 4 Reasons Why You Should Try Reverse Searing
- 5 Using the Reverse Searing Technique For Steak on Your Grill
- 6 A Word About Birds
- 7 Is This Approach Suitable for Every Type of Cooking?
- 8 A Word About Carry-Over Cooking
- 9 Achieve Perfection Through Reverse Searing
Cook Your Meat “Backwards”
What’s the first thing we do when we want to roast a thick piece of meat like a top round or pork loin? We usually sear the meat first to brown the outside.
Then we transfer it to the smoker or grill until it reaches a specified temperature on the inside. Sounds familiar, right?
The problem is that the outside can dry out and get too well done leaving 25% or more of the meat overcooked, chewy or even burnt. That’s no way to treat good meat.
What if we reverse the process by cooking the meat inside first, then browning on the outside? Impossible? Not so.
The reverse searing method uses low heat roasting to bring the internal temperature up to about 122 °F or 50 °C without burning the outside. Then the meat gets finished with high heat to get that seared, browned, sizzling crust and irresistible meaty taste and aroma from the Maillard reaction.
A Brief History of The Reverse Sear Method
Reverse searing evolved from a cooking method called “Sous Vide.” Chef George Pralus developed Sous Vide in 1974 to increase the shelf life of his Foie gras, at his restaurant Troisgros in Roanne, France.
Sous Vide is a method of sealing meat (or other food) in a food grade plastic bag and letting it cook in a temperature controlled water bath, sometimes for hours.
Around 2001 Christopher Finney, a member of the competition cooking team Iron Pig BBQ, began using this concept and is sometimes known as ‘The Finney method’ over the internet.
When the internal temperature of the meat was right, he would sear it on a grill to give it the golden crust all steak lovers love.
The difference with the reverse seared meat is that the color is consistent from the center to almost the edge. More of the steak stays medium rare instead of a thick ring of well-done meat on the outside and a cold, rare bulls-eye in the middle.
Many professional chefs use this method when preparing large cuts, whole birds, or steaks for a crowd because it’s more consistent. They understand the advantages of using this technique.
Reverse Sear Steaks for Edge to Edge Perfection
It turns out this technique is almost foolproof for cooking thick-cut steaks to rare / medium-rare perfection. Most of the big-name steakhouses use this method (they just don’t advertise it). Why?
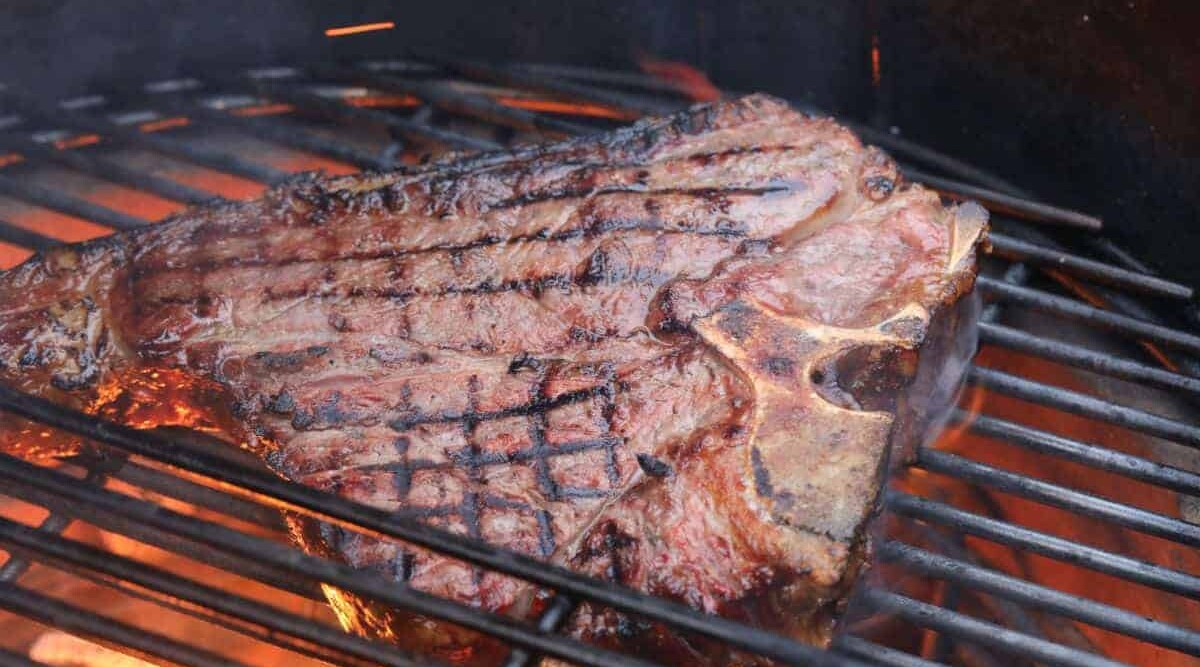
They’ve found the reverse sear method gives that picture perfect even redness from edge to edge. The steaks still get grilled on high heat to get that smoky aroma and dark layer on the outside with amazing flavors caused by the Maillard reaction and caramelization.
In fact, If you follow a proper temperature guide for steak doneness, you’ll end up with juicier and more tender meat than if you try to cook entirely over direct heat.
For people who must have medium-well to well-done, this method keeps the meat moist and juicy without cremating the outside. To see how you can use it, here’s a video on how to reverse sear a steak.
4 Reasons Why You Should Try Reverse Searing
Let’s talk about the four advantages of reverse searing.
#1 — The Meat Cooks Evenly
For this discussion, we’ll use the example of a thick steak, but this technique works on any large piece of meat such as a prime rib or whole bird.
As we mentioned earlier, the important thing about reverse searing is it eliminates that “bulls-eye” effect you get with high heat searing and grilling. You know, where the meat is very well-done on the outside and bloodred in the center.
Ruth’s Chris Steakhouse may “cook in a 1,800° broiler” or serve “on a 500° plate,” but they sure don’t cook those steaks all the way using high heat. To get pictures of steaks like they show takes low heat to cook the center without overcooking the outside.
With reverse searing, you start with low heat. The heat energy transfers evenly, bringing up the internal temperature to the right level without overcooking the outside. Your meat cooks all the way consistently without hot or cold spots.
#2 — Meat Browns Without Burning
Everyone loves a sizzling steak, browned on the outside and those beautiful grill marks adding to the flavor. But have you ever tried to cook a thick steak well-done?
I know, blasphemy, but some people just gotta have it that way.
What usually happens is that by the time the center is well-done at 170 °F or 77 °C, the outside is charred, hard and bitter. Well done shouldn’t mean burnt.
Using the reverse searing method ensures that the internal temperature is where you want it and leaves enough room for a good browning sear on the outside. You get a perfectly browned piece of meat, no matter what doneness you’re shooting for.
When we talk about proper browning, we’re talking about the Maillard effect, the scientific term for when the proteins and sugars in the meat reach 300 °F (150 °C) or higher and caramelize. It’s what gives meat that brown, slightly crusty outside with rich taste and aroma.
Another reason the reverse searing method browns so well is it helps to dry the meat before searing or grilling.
Why?
It takes five times the energy (heat) to evaporate water as it does to take it from freezing to boiling. If the pan or grill is using energy to evaporate wet meat, it’s not browning correctly.
The reverse searing method dries the surface of the meat as part of the natural cooking process, giving your meat the best conditions for the Maillard effect to occur.
#3 — Juicier, More Tender Meat
If you try to grill a thick steak all the way using high heat, you’ll just end up burning the outside before the center is even cooked from raw to rare. Using high heat from start to finish causes the meat to dehydrate quickly.
Conversely, cooking at lower temperatures slows evaporation, leaving the meat juicier and more tender.
For a “scientific” explanation as to why the reverse searing method keeps meat juicier and more tender, we must look at enzymes.
All meat contains an enzyme called cathepsins, which begin to break down tissues as it ages. It’s why dry-aged meat has a distinct flavor and tenderness you don’t get in fresh meat. The enzymes work very slowly at refrigerator temperatures. However, they pick up the pace quickly as the temperature rises until around 122 °F (50 °C) where the heat destroys them.
With this technique, the meat’s internal temperature slowly moves from cold to cooked, giving the enzymes time to work their magic, tenderizing the meat. Traditional grilling doesn’t provide the enzymes with enough time before heat destroys them.
#4 — Easier for New Cooks
It can be intimidating for new cooks to grill a steak or roast a big cut of meat. If the timing is not right, the meat will be undercooked, overcooked or even burned. We’ll tell you how in a moment.
The reverse searing method helps newbies look like a pro by removing the guesswork. All that’s left is to finish the steaks on the grill and then enjoy the rave reviews from your guests.
You simply start your meat by roasting in your closed grill and take it out when the internal temperature is just below rare, about 120 °F (49 °C). Then finish on the high side of the grill to give that perfect browning and grill marks.
You’ll find a basic cooking temperature chart further below.
Using the Reverse Searing Technique For Steak on Your Grill
Make sure you use an instant read thermometer to measure internal temperatures. And remember: The fewer times you stick the meat, the less juice it loses so once or twice should be enough.
Think of the meat like your arm and thermometer as the needle. The fewer jabs you get, the better.
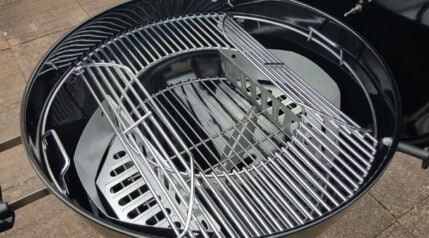
- Set up a two-zone fire. In other words, only make a fire on one side of the grill. If you are using a gas grill with multiple burners, just light one burner. Adjust the temperature inside the grill to 225 °F (107 °C).
- Put the meat in a pan on the cold side of the grill. Make sure the meat is not directly over the With the lid closed, you create an oven.
- Monitor both the inside grill temperatures and the internal meat temperature because you want low and slow. Once the meat reaches 115 – 120 °F or 46 °C to 49 °C, fire up the grill and finish the meat over high heat to get those beautiful grill marks.
- Grill for three minutes on each side for a rare or 5 minutes for medium-well.
For different levels of ‘steak doneness’ for steak, you can refer to the table below:
| Steak Doneness | Steak Doneness Remove from Grill at this Temperature | Final Cooked Temperature |
|---|---|---|
| Rare | 115–125 °F | 120–130 °F |
| Medium-rare | 125–130 °F | 130–135 °F |
| Medium | 130–140 °F | 135–145 °F |
| Medium-Well | 140–150 °F | 145–155 °F |
| Well-done | 150 °F+ | 155 °F+ |
A Word About Birds
To cook whole chicken or turkey, you will use a 2-zone fire for the entire cooking process, and you will leave the lid closed to create an oven effect.
The final internal temperature must reach 165°or 74 °C. Check the thigh for temperature, not the breast.
Once the bird reaches 115 – 120 °F or 46 °C to 49 °C, crank up the heat to 375 °F or 190 °C to crisp and brown the skin, but leave the lid closed until it’s fully cooked.
Baste the skin occasionally to aid in browning.
Is This Approach Suitable for Every Type of Cooking?
Reverse searing is mainly a low and slow cooking method, so you want cuts of meat that are 1 ½ inches (4 cm.) thick or more. This is the perfect cooking method for pork chops, big steaks, steakhouse burgers, even baked potatoes and poultry.
Duck, turkey and chicken need long slow cooking times to penetrate the meat and bones, but a hot temperature finish. Reverse searing keeps the meat moist but gives the skin a golden brown, crisp texture at the end.
However, reverse searing is not good for tough or thin cuts, like brisket, chuck, skirt steak, flank steak or boneless chicken breast. This method would make these cuts dry and tough.
If you’re in a hurry to grill a steak, this is not for you. It takes time because part of the cooking process is slow roasting at a low temperature. It takes a bit of patience and planning.
If you prefer to use a skillet from start to finish, to have a nice fond in the bottom of the pan, you will be disappointed. The reverse searing method keeps all that flavor and juices inside the meat where it belongs.
A Word About Carry-Over Cooking
Carry-over cooking is the term used to describe how meat continues to cook after you take it off the heat.
The meat absorbs the heat, and it keeps working its way towards the center for up to 20 minutes after roasting or grilling stops.
Check out the following article, and particularly the ‘reverse sear carry over’ chart at GenuineIdeas.com
As you can see from the chart, with the reverse searing method, the 2” thick Porterhouse continues to increase in temperature by 15 °F or 8 °C for about 18 minutes after grilling. It goes from rare to medium rare on the way to the table. Be sure to take your meat off the grill early to allow for carry-over cooking.
Achieve Perfection Through Reverse Searing
With reverse searing, you’re cooking the outside and the inside using two different methods. Low and slow roasting heats up the center, while high direct heat browns the outside.
It’s the way to go with thicker and more expensive cuts of meat. The more of the interior cooks evenly, just the way you want it, with less of the overcooking and burning on the outside.
Be sure to monitor the grill and the meat temperatures. It’s a simple technique, for cooks at any level, that yields juicy meat. The next time you’re preparing your thick cut meat or bone-in poultry, try it. This method works very well for lean meats like venison or other game meat too.
You’ll find it possibly the best way to cook your meat to perfection, and it may just become your favorite technique. Imagine serving a perfect medium rare steak every time?
Happy grilling!

0 Comments