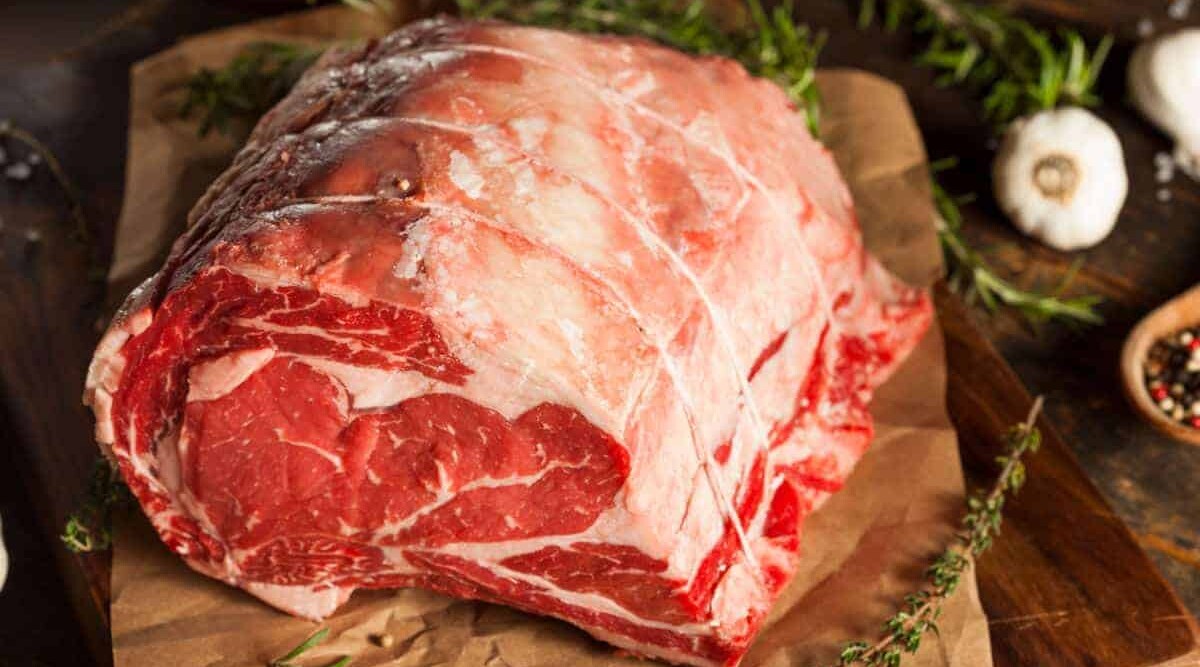
Tip for the day: when someone says they’re serving up prime rib, drop whatever you’re doing and beat a path over there…fast!
This is the jewel in the crown of the meat world, the cream of the crop, the champion of Chowhounds everywhere.
OK, you get it, Prime rib is good stuff. But exactly what is prime rib? Where does prime rib come from? And what’s the best way to select when buying, and then to prepare for cooking this royal cut?
In this post, we’ll give you a complete overview of prime rib, it’s origins, it’s name, the best way to prepare and cook it, and yes, in case you’re wondering, it’s to-die-for on your grill or smoker.
Read on!
Jump to:
What is Prime Rib?
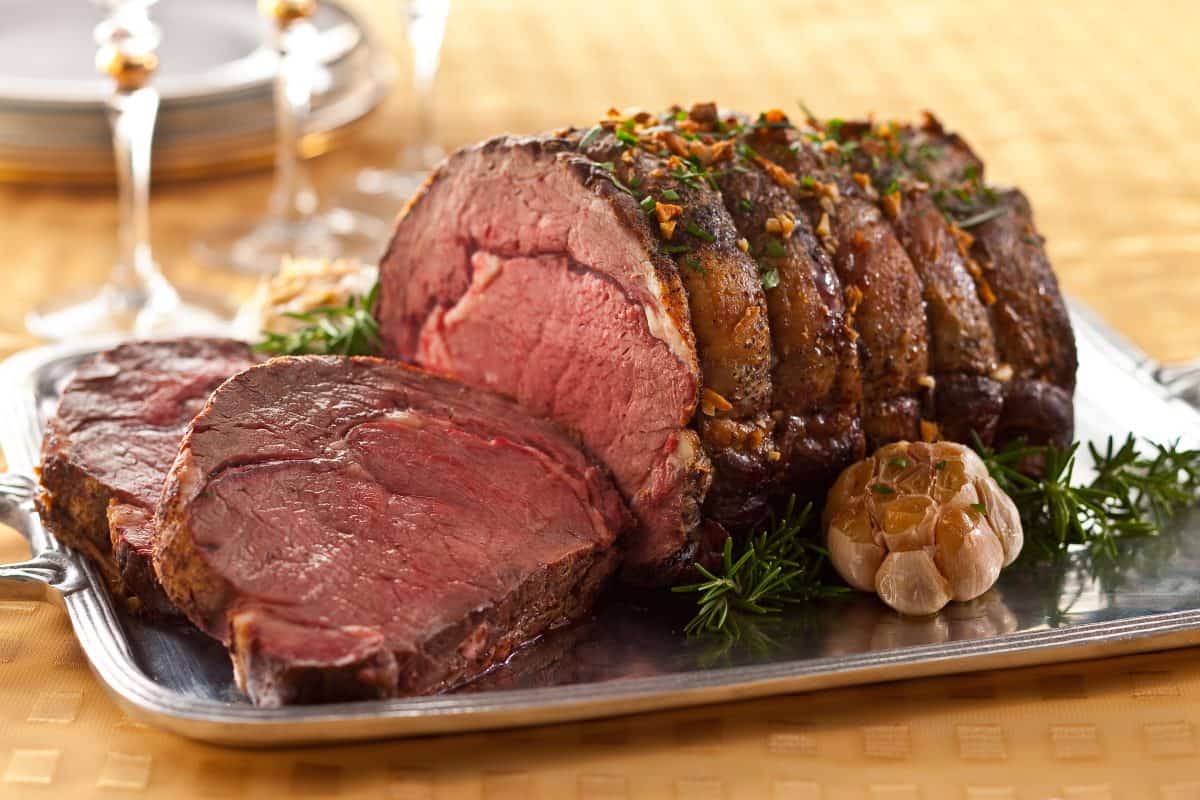
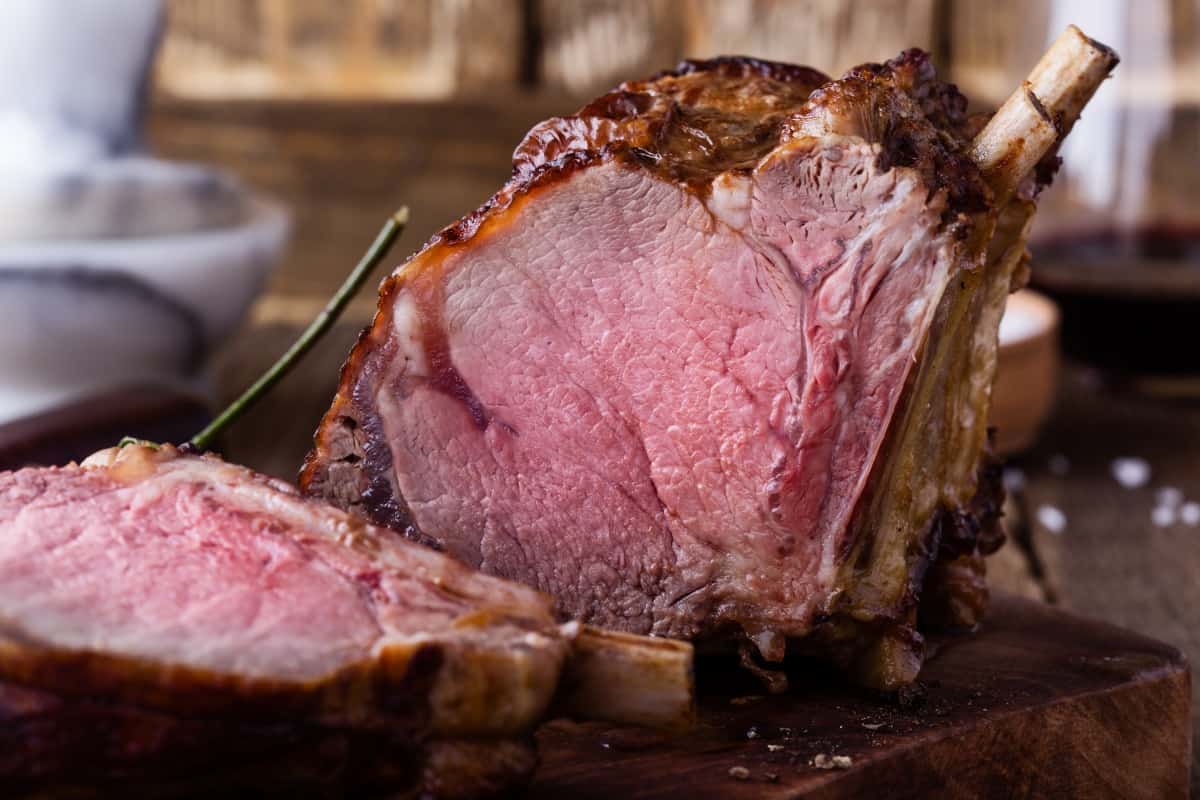
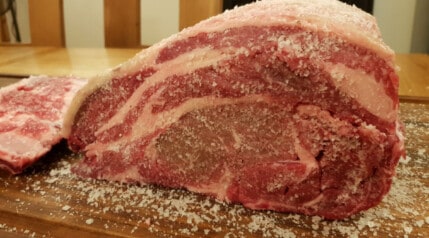
Also called beef rib roast, ribeye roast or standing rib roast, this is one of the most tender, juicy and flavorful cuts of beef. (Note: This is not to be confused with a ribeye steak. We discuss the difference here: Ribeye vs prime rib.)
Think about it, a cow spends its life on four legs, so unlike us humans who have muscular backs and core — think about your 6-pack — the cow does not use it’s back and rib muscles much, so this meat is very tender.
On top of that, the rib has a big juicy “eye” of marbled meat in the center surrounded by a thick fat cap to protect it from heat when cooking and that keeps it moist and flavorful.
Now a full primal rib is seven ribs in total. That’s a lot of beef, even for a meathead like me. Like 20 or 30 pounds. Great if you’re feeding the US army, but probably too much for the average family dinner. So my advice is to buy prime rib in a 3 or 4 rib section.
Here are your choices:
- loin end– also called small end or first cut, which consists of ribs 10-12 and has less fat and more meat, a slightly leaner and very tender option.
- Chuck end — Made up of ribs 6-9, also known as the blade end, or second cut. This section more fat than the loin end and is your “to-heck-with-the-diet” option.
The different names for these cuts vary depending on what part of the country you’re in but tell your butcher ribs 6-9 or 10-12, and you won’t have any problem.
Take a look at this handy diagram of different beef cuts and where they come from for more details.
Where Does Prime Rib Come From on the Cow?
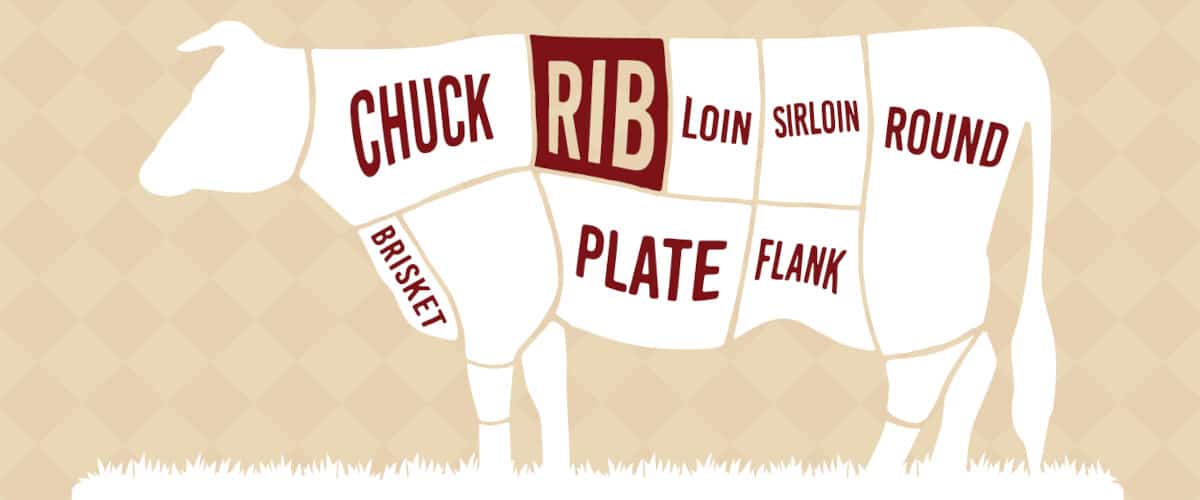
When the humble cow meets its Maker, it’s then carved up into eight “primal” sections — meaning first cut here — with each section going off for further butchering to become the cuts we know.
So where does prime rib come from? It is cut from the center of the primal rib, the largest, best part of the rib section.
Is Prime Rib the Same as Prime Grade?
The USDA has confused a lot of folks here, but here’s the simple answer: no. Prime rib originally meant the meat was cut from the primal rib.
THE USDA, however, uses the same term “prime” to indicate the very best quality meat.
The main characteristics they’re looking for is marbling (intramuscular fat) since this will indicate how moist and flavorful the meat is. Also, the age of the animal. Young (typically under 24 months) will provide a more tender meat. Nearly all USDA prime-grade meat goes to high-end restaurants and butchers.
Prime Confusion When Buying?
So here’s the thing: if you order prime rib at a restaurant, the restaurant is obligated to serve prime rib that is also USDA prime quality. The best of the best. If the rib is not USDA prime quality, the restaurant isn’t allowed to call it prime. They will instead call it standing rib roast or ribeye roast which is the same cut but not absolute top quality.
But these rules about what you can and cannot call prime rib only apply to restaurants and butchers. So at your average supermarket, you can buy prime rib that is the prime rib cut, but is very likely not USDA prime quality.
In fact, you probably won’t see “prime rib” at your supermarket, but rest assured that standing rib roast, ribeye roast or eye of the rib roast are all from the “primal rib.” Same cut, just not USDA prime quality.
Of course, many supermarkets still get meat of excellent quality, such as “Choice” or “Select”. Just look for good marbling. If you see nice white fat running in thin streaks all through the meat, it’s going to be a winner.
The bottom line is, for the guy on the street, “prime rib” these days is more of a catch-all term referring to rib roast, or standing rib eye, or eye of the rib roast. Remember they are all from that same primal rib. The official use of the word “prime” now refers more to the grade of the meat.
How to Choose Prime Rib and How Much Per Person?
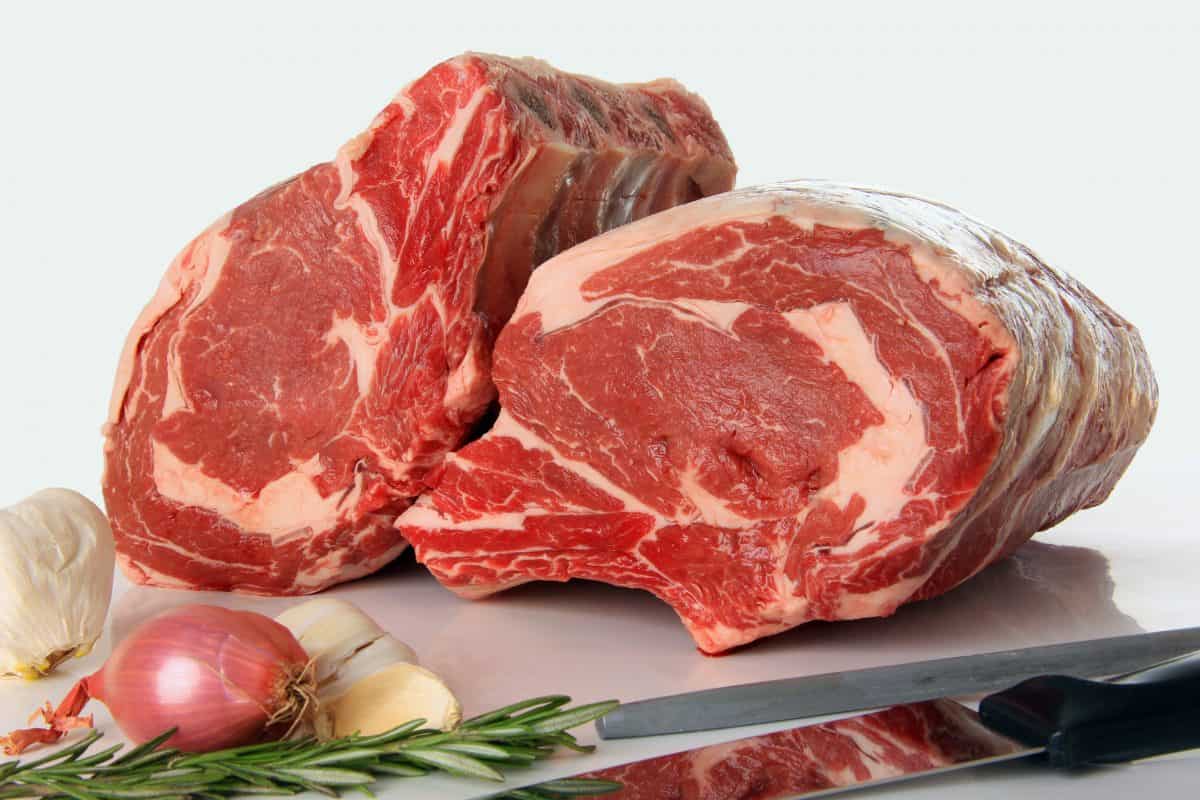
Prime rib can be cooked bone-in or boneless. I prefer bone-in every time because the bone provides lots of flavor and moisture. Of course though, boneless is easier to carve!
Prime rib can also be divided into individual ribeye steaks.
Prime rib in any shape or form does best in dry heat — roasted, grilled, seared or smoked — to retain its flavor and juicy tenderness.
If you’re buying bone-in prime rib, ask your butcher to remove the backbone, so that carving is easier. You can also ask them to cut off the bones and tie them back on which also makes carving easier.
And always look for good bright color in the meat and streaky white marbling, which is small streaks of fat running through the meat. This is what creates flavor and tenderness.
When bones and fat are involved, it can be difficult to estimate how big a joint to get for your needs.
Here’s a simple rule:
- A boneless prime rib will give you about 2 servings per-pound
- A bone-in rib will provide you with roughly 1 to 1 1/2 servings per-pound, or you can think of it as one bone serving two people.
- A 3-bone rib roast (bone-in), for example, is typically 5-6 lbs and will feed 6-7 people.
For more on how to choose a prime rib, click here.
At Crowd Cow and Snake River Farms, you have a wide selection of prime ribs available, including pasture-raised, 100% grass-fed, pureblood wagyu, Wagyu cross, American Wagyu Black grade, American Wagyu Gold grade, and Japanese A5 Wagyu.
Between them, they provide something for everyone, from low-cost items to high-end ones at a premium price.
What’s the Best Way to Prepare and Cook Prime Rib?
Ah, now you’ve got a lot of answers and a lot of opinions on this one. But we’re here to make things simple for you.
Preparation
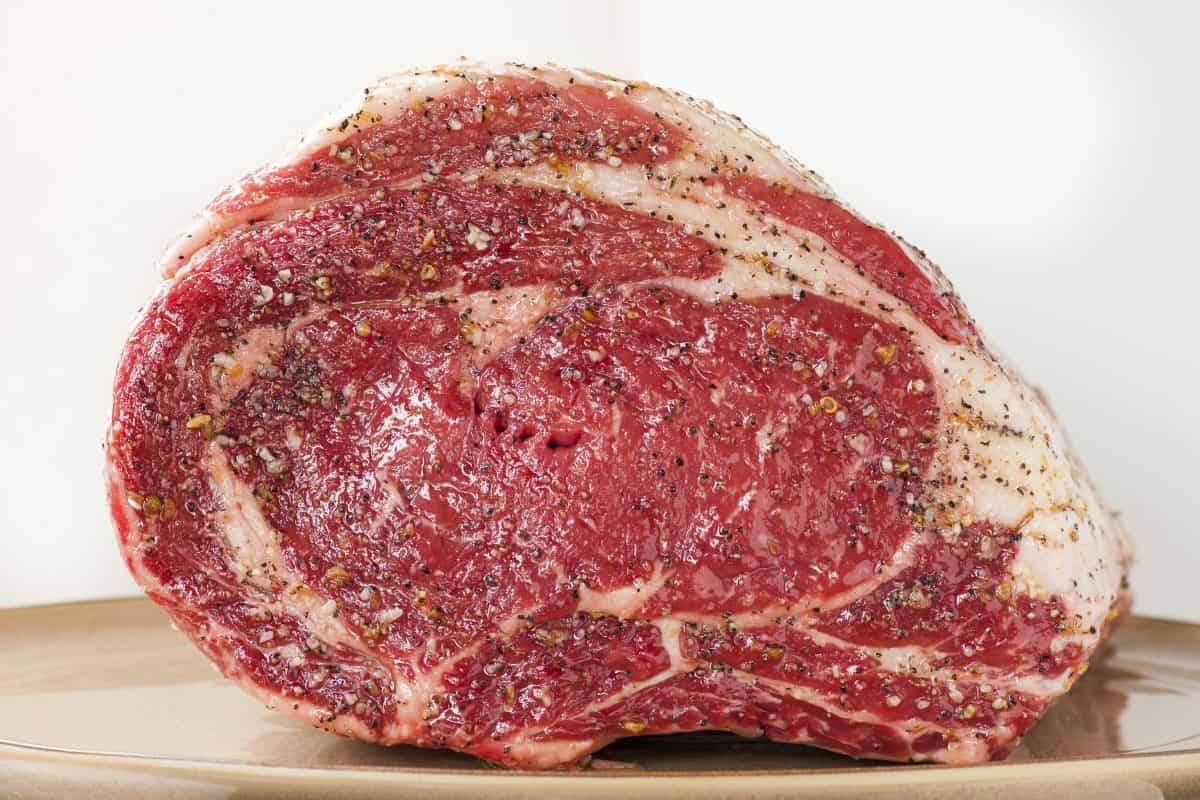
Here’s the scoop: don’t mess with it too much. Prime rib is such a fantastic, flavorful cut, you don’t want to busy it up with marinades and spicy rubs.
Add a few fresh herbs, garlic, lemon zest or mustard if you feel the urge. Otherwise, good ol’ salt and pepper works just fine. And be generous with the salt…this is a thick hunk of meat. It needs to season the whole roast, not just the surface.
If you really want the died-and-gone-to-heaven experience, cut up little slivers of garlic and poke them into slits you cut in the prime rib. Oh, baby!
Next, grab your butcher’s string and tie up the roast. This will help it cook evenly and prevent loss of juices. Here’s how it’s done.
Cooking
Prime rib, king of the feast though it is, is actually the simplest thing to cook. You just have to be mindful of temperatures both in your cooker and in the meat. Here are your choices:
- Low and slow, around 225° F will cook a 10 lb prime rib in approximately 3 hours (17-20 minutes per-pound). This method causes less shrinkage.
- Blast of high heat (500° F) for 30 minutes then low heat (225 °F) will have the roast ready in around 2 hours, with a beautiful dark seared crust.
Both methods work well, but experts generally agree that high heat to sear the crust combined with low heat is the best way to cook prime rib.
Either way, be sure to use a meat thermometer to make sure it’s properly and safely cooked. 135 – 140 °F for medium rare and 145-150 °F for medium. Don’t forget the temperature will rise at least another 5 °F after it’s come off the grill and is resting, that’s why we remove it at slightly under the desired final temp.
Check out this excellent video of how to choose, cook and carve the perfect prime rib.
Quick Tips for Cooking Prime Rib
- The day before you want to cook it, season the rib generously and leave on a rack uncovered in your refrigerator. This will allow the seasoning to penetrate the meat and also let the surface dry out some which will give you a crisper “bark”.
- Use a roasting pan that’s only slightly bigger than the meat. A too-big pan will make all those wonderful meat juices spread and evaporate.
- Don’t trim too much off the fat cap! This is not the time to think about your waistline. You want a good layer of fat around the ends and even fat distribution (marbling) through the joint.
- Always position the meat fatty side up, so it bastes itself during cooking.
- Rest a bone-in roast on its own bones to create a “rack”, but if you’re cooking a boneless roast, use a small roasting rack in the pan.
- Don’t cover the meat during cooking and don’t add water to the pan.
- Use a thermometer but make sure it doesn’t touch the bone when taking internal temp.
- Lightly tent the meat with foil and let rest 30 minutes to an hour after cooking to allow juices to redistribute and the temp to settle evenly throughout.
Prime Rib on the Grill? What about the Smoker?
A couple of years ago, I was daydreaming about prime rib, as I do. And I was thinking it’s sad that the holidays were a ways off, meaning no prime rib for a long time. And it struck me, why not prime rib on the grill? Or even in the smoker?
Fired up — me and my grill — I got to experimenting with this and here’s the skinny: it’s awesome!
Before we even get going here, just give a quick thought to the size of your grill. A prime rib is a pretty big joint, and you’ll need twice the grill surface area because the meat will sit over indirect heat. A large prime rib can be 16″ long, and you’ll need space around it for heat to flow.
All good? Great, so set up your gas grill for indirect heat with outside burners on and middle burners off, or on one side turn the burners on, and the other side leave them off.
Or on a charcoal grill, same thing, just stack your hot coals on one side so that you have a side with no direct heat below. You’re aiming for 250-300 °F inside the grill.
As with oven cooking, set your prime rib in a pan. You don’t want to lose any of those flavorful juices! Use a rack inside the pan if the rib is boneless.
You can also grill the roast right on the grill rack above indirect heat. Just be sure to put a pan for drippings under the meat so that you have your “jus” for serving with later. A little water added to this pan when you start will prevent the drippings from burning.
Close the lid and cook until the meat is about 10° less than done. So for medium-rare, this would be about 125 °F, and 135 °F for medium. Just know this will take a while, anywhere from 3 to 6 hours. Be patient. Good things come to those who wait!
The Reverse Sear Technique
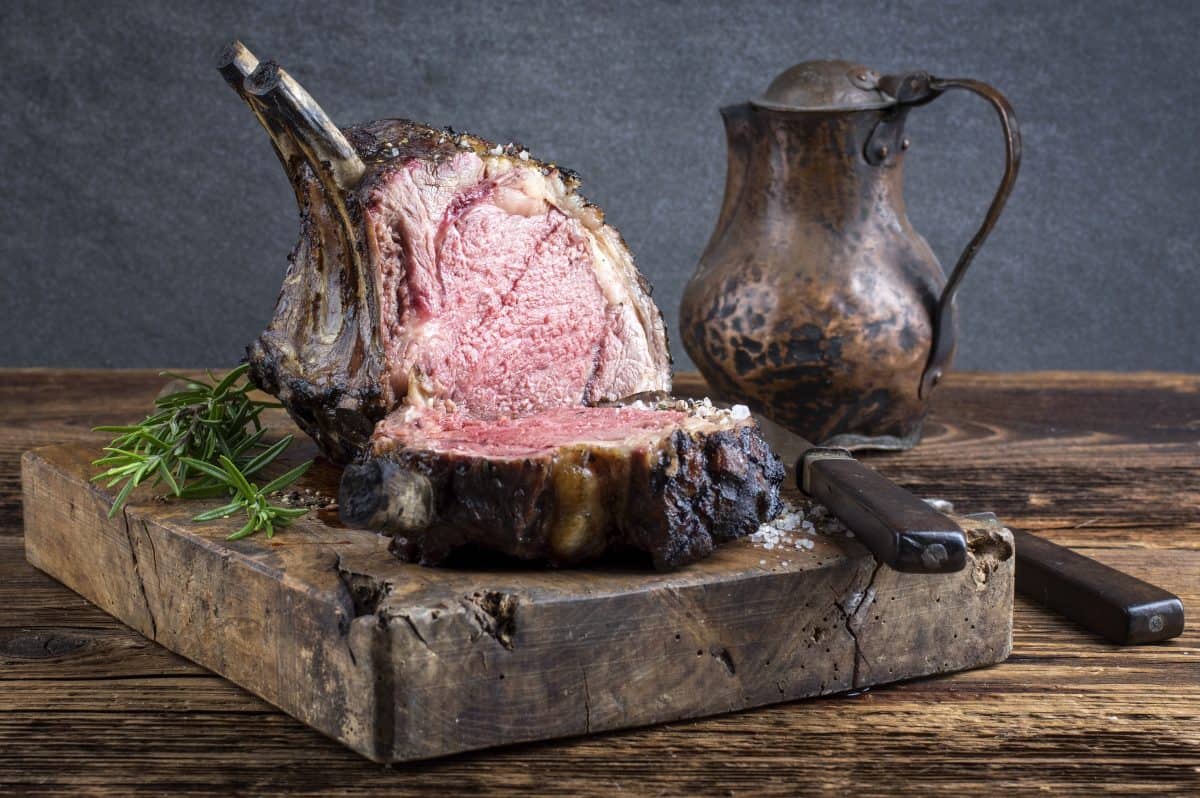
So you’ve got your prime rib cooking happily low and slow, and that’s going to give you a beautiful pink melt-in-the-mouth interior, but no crunchy dark exterior. Keep reading, it gets good!
Remove the rib, tent loosely with foil and let rest 30 minutes to an hour. Meanwhile, crank the grill to high heat, 500 °F+.
Before serving, put the meat back on the very hot grill to sear the crust, just 5 or 6 minutes, turning the meat to hit all sides. This method is called “reverse sear” and is the widely-accepted best way to cook a prime rib on the grill.
Think caramelized, dark, crunchy outside, and perfectly pink and tender inside throughout, from edge to edge. Mm…hmmm.
Perhaps a Lick of Smoke?
Now that I’ve tried prime rib on the grill, I won’t be taking it back to the oven. It’s that good. But! On the smoker, it’s even better, if you can imagine that!
Take a long slow cook with the king of roasts and add flavorful wood-smoke, and you’ve got a seriously awesome piece of meat: Tender, delicious, smokey and juicy.
Smoking takes a little longer than grilling. Count on 20-30 minutes per-pound. You’re aiming for the smoker to be around 250 °F, and the meat temperature itself between 130-150 °F. Knowing your own smoker here, how it cooks and handles heat, is very important.
Trim More Fat if Smoking
A critical difference between smoking and grilling (or oven-cooking) prime rib is how you should trim the fat.
With grilling/oven-cooking, you want to leave a good 3/4″ of the fat cap on the rib. With smoking, the thick fat cap acts as a barrier, preventing the smoke from reaching and flavoring the meat itself.
So, when smoking prime rib, grab your big knife and cut off a hefty chunk of this outer layer of fat. You can ask the butcher to do this for you, but I prefer to control how much fat I remove and how much I leave on.
Which Wood?
For wood, I like a mild smoke, fruit woods work great. Stronger woods like oak and hickory will overpower the flavor of the roast.
Smoking will result in a truly fantastic flavorful prime rib, rich, juicy and smoky. But it won’t give you a crisp seared crust. What’s more, many smokers don’t take kindly to being forced to high heat in a matter of minutes for the final sear. What to do?
Your options are to transfer it — after resting — to a very hot grill or oven for 10 minutes to work up that Maillard crust. Or go with the softer but melt-in-the-mouth prime rib right off the smoker. There are no bad choices here.
I would ALWAYS transfer to a hot grill and sear it though, you’re missing out if you don’t.
The Last Bite
For me, there are few things in this world as good as a perfectly cooked prime rib. And let’s face it, it’s not a cut that’s easy on the wallet, so you do want to get it just right.
I hope the tips in this post on choosing, preparing and cooking prime rib…whether on the grill, the smoker or in the oven, will give you confidence and enthusiasm for taking on this king of roasts. But take my advice, don’t wait for the holidays!
How do you like to cook prime rib? We’d love to hear from you in the comments below! Please share your experiences and any tips you have with us in the comments below.
Happy grilling!



As a certified chef and certified culinary educator, I don’t understand why I constantly see articles that suggests trussing a roast such as the rib. How is that possibly going to prevent juices from being lost and also assure even cooking? Makes no sense whatsoever.
Hi Mark,
Here’s my take on it — and please feel free to correct it if wrong, while letting us know WHY it’s wrong, and why you say what you say, as we’re all up for discussion and learning 🙂
So, theory goes that if you truss it with the goal in mind that it’s to create a more even and consistent shape across as much of the meat as possible, it has a more consistent shape and cooks more evenly.
As a made-up example, looking at extremes:
Extreme 1 — A piece of meat 1 inch thick one end, and 8 inches thick at the other with a perfect taper between ends: It will not cook evenly. Either the thin end is perfect and the thick end raw and inedible, or the thick end perfect and the thin end cremated, ‘DRY’ and inedible. And in between ends, all different levels of doneness between the two.
Extreme 2 — A joint that is perfectly cylindrical and the exact same thickness throughout. Both ends and every piece between will cook exactly the same, and every slice will be identical and perfect. It is cooked to the same ‘doneness’ throughout for the whole length and entirety of the joint.
This is what people mean when they say ‘ensures even cooking.’ When you truss a joint, you are trying to manipulate the shape of it with this goal in mind, to make it a more even thickness throughout, to ensure more even cooking.
Regarding ‘prevent juices being lost’ — yes, I can see your issues with this and somewhat agree. It possibly doesn’t really ‘prevent juices escaping’ (I honestly don’t know), but again, it comes down to the argument I’ve made above about varying thicknesses and even cooking, of meat drying out, and is then a matter of semantics.
Would you agree that after a certain point, the longer you cook something / the higher internal temp you take it, the drier it becomes? If a piece of meat is thinner in some spots than others, those thinner pieces will dry out. During cooking, effectively what happens is the surface of the meat dries out, and this dryness slowly works its way inward the more you overcook it (though obviously, it’s more complicated than that.)
If a joint is left thin one end, thick the other, more of those thin and middle parts of the meat will be well done, or overcooked, and dry and nasty before the thick end is perfectly done. MAYBE juices are not lost, or in the case of trussing not kept inside ‘per se,’ but the overall end result sure feels that way.
Make sense?
That’s how I and many others see it anyway.
I notice you said ‘a roast such as the rib’. Yes, the above would apply more to other less evenly shaped cuts, and those not attached to ribs, sure. But to some extent it applies to a rib roast too. Less important, sure, but it would still have an effect. Personally, I always remove the ribs and re-attach before cooking a rib roast, and trussing is obviously required then anyway. But while doing so, a far more even and round shape is obtained as a result, and that will mean more even cooking.
An interesting experiment might be to somehow have 2 identical pieces of meat; same cut, weight, intramuscular fat, moisture levels, etc. Etc. Identical in every way they possibly can be, EXCEPT one is wedge-shaped, and one trussed up to be cylindrical. Then to cook them, so the center in the thickest part are perfectly cooked to the same target internal temp.
Will the one NOT trussed up and more cylindrical lose more moisture over the cook? Will it be drier? Would it be detectable by weighing the two pieces post-cooking to see which lost most moisture?
I’ve no idea, but I feel the cylindrical one will retain more moisture overall, with a lot of the wedge-shaped piece that is thin one end, thick the other, drying out more with the overcooked thin to middle end losing tons of moisture. I feel it would likely weigh less due to moisture loss. And hence the trussed one ‘kept more juices.’
However, yes, there is some assumption and ‘feel from experience’ at play here, rather than concrete fact. It would be an interesting experiment, but hard to pull off accurately.
What I would be confident in saying though, is that the wedge-shaped meat would certainly not be cooked as evenly, would certainly feel drier at the thinner end, and overall would simply not be ‘cooked as well.’
It will have a burnt end / undercooked end, and a perfect middle at the fat end, or some variation thereof — and it will have far more of the meat overall feel to the casual eater as being ‘less juicy and dry.’
Thoughts?
Best explanation I have ever read of why trussing is important. Great stuff Mark!
Thanks, Timothy. It’s simply my thoughts on it, but seems logical 🙂
This was very helpful, Thank you.
Thanks, Brooke.
We are a Florida Grass fed / grass finished Ranch. I LOVE your website! I will help our customers know how to properly prepare all the cuts of meat we offer.
May we use your pictures and info on our site and also refer our customers to you for there education and equipment needs?
Hi Dawn. Thanks, for the compliments, always nice to hear people enjoy the site.
Unfortunately I cannot grant permission to use the images from my site, because the images are a mix of: My own photos (which I could grant use of), other authors photographs (I cannot grant use of), and stock images from Shutterstock, Depositphotos and the like that I am licensed to use, (I cannot grant use of). If you were to use any of their photos without paying them for your own license, you could get into legal issues. Sorry.