
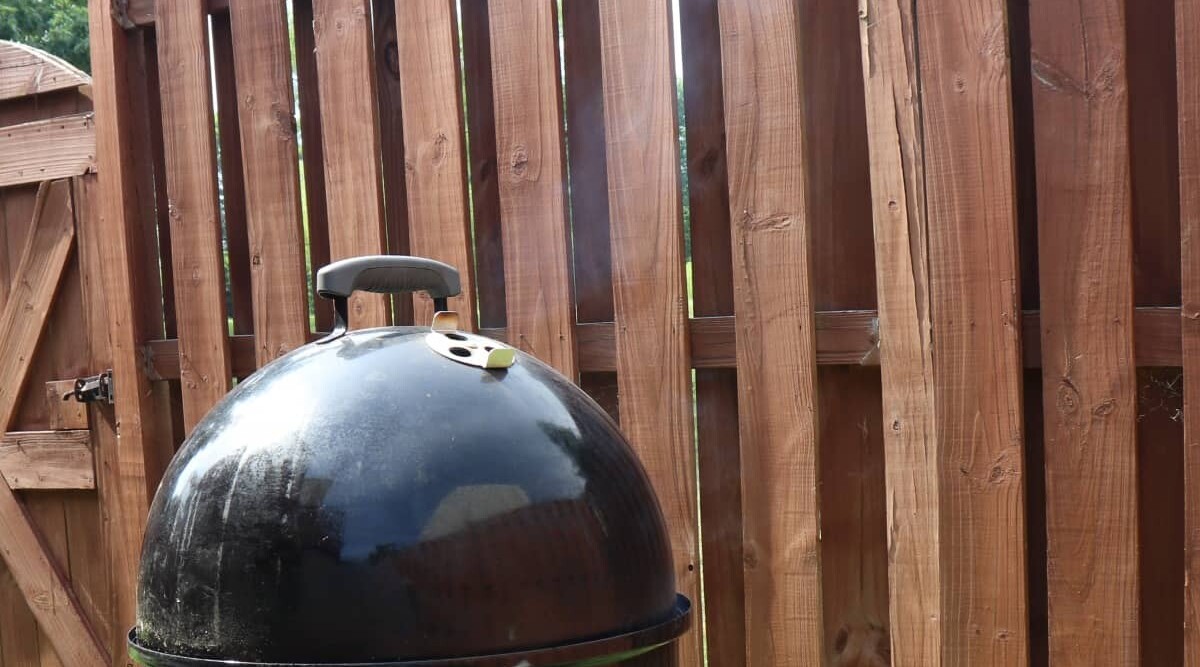
Thin blue smoke refers to the optimal, barely visible smoke that imparts a clean, smoky flavor to foods without the bitterness associated with thicker, white smoke.
If you’ve ever been disappointed by a batch of BBQ that tasted more like a campfire than a delicacy, it’s likely you weren’t creating the right kind of smoke. Thick, billowing white, gray, and black smoke are the enemies of good BBQ that leave an acrid taste. We want our smoke to be thin and barely visible.
This article will help you learn how to make thin blue smoke regardless of the type of smoker you use, and understand why it’s the best kind of smoke for smoking meat.
We’ll look at some of the science of combustion and smoke, explore the different types of smoke and what causes them, clearly define why we want thin blue smoke, and, ultimately, leave you with the knowledge you need to make your own.
Understanding how to get thin blue smoke is essential to unlocking the full potential of your barbecue. And it will be second nature to you after reading and following the advice in this guide.
Key Takeaways
- Thick, billowing white, gray, and black smoke are the enemies of good BBQ and leave an acrid taste.
- Thin blue smoke is the best kind of smoke for smoking meat.
- To achieve thin blue smoke, clean your grill or smoker’s fire pit to avoid dirty smoke.
- Maintain a small, hot fire to ensure complete combustion of your smoking wood, to create thin blue smoke, and to avoid thick white and gray smoke.
- Use hardwoods like oak, maple, hickory, apple, and pecan for the best smoke flavor.
- Always use dry wood, as wet wood creates white smoke and takes longer to burn cleanly.
- Use a small amount of wood to avoid overpowering the food with smoke flavor.
- Preheat your pit before adding the meat to ensure clean smoke is flowing.
- Practice and experience are key to achieving thin blue smoke consistently.
Jump to:
- 1 Key Takeaways
- 2 How to Get Thin Blue Smoke
- 3 How to Get Thin Blue Smoke from Different Smokers
- 4 Practice, Practice, Practice
- 5 What is Thin Blue Smoke?
- 6 Dirty Smoke — Why We Avoid White, Gray, and Black
- 7 What is Smoke? What are The Chemical Components?
- 8 Four Stages of Burning Wood — We Want to be at Stage 3 for Thin Blue Smoke
- 9 Conclusion
How to Get Thin Blue Smoke
This article used to start by defining different types of smoke before going into the science of the different stages of wood burning and how smoke is created, and then getting into how to make thin blue smoke.
But I received feedback from a handful of readers that they just don’t care about the science and simply want advice on getting thin blue smoke. So, I’ve jumbled things about a bit.
I’m the type of person who needs to know ‘why,’ as well as ‘how’. If you do too, the science and theory are now at the article’s end. For everyone else, we now get straight into practical and actionable advice.
Part of creating thin blue smoke comes down to knowledge and part of it to experience. Keep practicing, and soon, you’ll know your smoker so well it’ll become second nature. To get started, though, here are 8 tips to follow for making thin blue smoke.
Clean Your Pits!
No, not your armpits—though maintaining personal hygiene is important when preparing food!
I’m referring to your grill or smoker’s fire pit. Burning wood, charcoal, or gas produces soot and creosote from the fuel’s chemical compounds and from food bits and grease falling through the grate. This accumulation results in DIRTY smoke with an unpleasant taste and smell.
Aim for clean, pure wood smoke only, avoiding smoke from burning residue left over from past cooks. Ensure your cooker is clean between uses to create the best smoking environment possible.
Wood Smoke Only
For as much as charcoal users love to tell anyone who’ll listen (and anyone who won’t) that charcoal is the “real” way to barbecue, it’s not the critical ingredient for smoking. Wood is for smoke. Charcoal is for heat.
If there’s smoke from your charcoal, it’s either just been lit, or it’s starved of oxygen and creating ‘dirty’ smoke.
Don’t put your meat on the grate until the charcoal is ashed over and no longer spewing smoke, and you’ve added your wood chips or chunks.
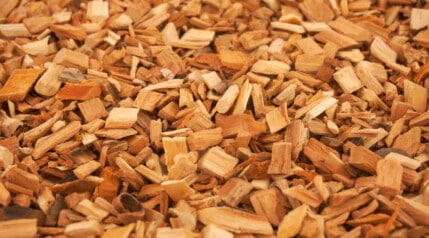
Use the Right Wood — Type and Size
Any wood can produce smoke, but only specific types and sizes yield the desired thin blue smoke.
Use only hardwood, such as oak, maple, hickory, apple, and pecan. Avoid softwoods like cedar and spruce, which contain sap and moisture, leading to harsh smoke that can spoil food flavor and potentially harm health.
Also, never use treated wood, including pallets, treated lumber, or any wood with chemical treatments or paint, as these can contaminate your food and pose health risks.
Check out our guide to the best woods for smoking meat and seafood for the right wood types to use.
For charcoal smokers, opt for wood chunks ranging from golf ball to baseball size (or beer pong ball to fist-sized for those unfamiliar with sports) for lasting smoke. Electric or gas smokers work well with chips and dust, while offset smokers are best suited for large logs and splits.
Dry Wood — Do Not Soak It!
There’s an endless, ongoing debate about wet vs. dry wood for smoking, and I totally don’t get it.
Wet wood smolders, has to be dried out before it can ignite, takes longer to get to the stage of burning cleanly that we want, and puts out white smoke for a lot longer than dry wood.
So stop the insanity — use dry wood every time for the best results.
Not Too Much Wood!
You only need a small amount of smoke to impart a great smoky taste to your food, without overpowering it and making your food taste like an ashtray. This means, you don’t need much wood!
A single, fist sized chunk of wood combusting at any one time is enough to provide good smoke for anything between 45 and 60 minutes.
So if using a charcoal smoker — such as a kamado or a Weber Smokey Mountain — spacing out just 3 or 4 decent sized chunks, so they burn at different times, is plenty.
You Want a Small, Hot Fire
You want a small hot fire to create thin blue smoke, not a large, spread-out, smoldering cooler fire. A concentrated, hot fire (650 °F to 750 °F) gives you the cleanest smoke, so let’s see some flame in that firebox.
Oxygen-starved fires produce undesirable thick white and gray smoke, so we must avoid this. Of course, we also want to steer clear of a large, roaring fire to maintain low and slow cooking temperatures. So start your fire with just a few burning coals, and try to keep it small, with your smoking wood right in the flames.
A small, concentrated, hot, burning fire is what you are after. If spread out too wide (too many coals lit), you will need to choke down the vents to slow combustion to keep your pit temperature low. But this results in a fire not hot enough to burn the wood at a high enough temperature to get good, clean smoke.
The heat generated from a small, good burning fire can equal a large, spread-out, barely burning fire. You need the former. With most smokers, the way to achieve this is to light your fire in only one place. Keep the top vent open, and control the flames with the bottom vent. Be patient and allow time for the small fire to pre-warm your grill up to cooking temperature without letting the fire get large. Do not rush things.
This is where experience of your smoker comes in, getting a small concentrated fire going and maintaining it without causing too high temps. Only practice can make perfect here, I’m afraid.
Preheat Your Pit Before Cooking
Never add your meat before getting the internal temperature in the smoker or grill where you want it. The walls and grate should be warm, and the smoke should be flowing.
Master Fire Control
A lot is going on when you’re smoking meat. Especially at first, you’ll spend a lot of time tweaking your vents to control the flow of oxygen, eyeballing the smoke to be sure it’s clean, adding more wood as needed, and keeping tabs on your thermometer to ensure you’re holding your target temperature.
There’s no smoke without fire, the saying goes. Learn to not only build the right fire for the job, but also how to maintain it. This comes with experience, and changes with different types of smoker.
So let’s take a look at some general guidelines for how to create thin blue smoke with different types of smokers.
How to Get Thin Blue Smoke from Different Smokers
The advice above holds true for all smokers, but is somewhat generic. So here are some extra tips on specific types of smokers, that should help you achieve thin blue smoke no matter what equipment you’re using.
With a Kamado Smoker

Kamados are the type of smoker I use the most. I own three of them, and I’ve gotten good at creating the type of smoke we want. However, with a kamado, it won’t be ‘thin and blue’, it will be more of a thin, wispy white. But this is fine.
The problem with Kamado smokers is they are somewhat TOO efficient! They hold heat so well, are so airtight and airflow restricted that it’s hard to get a fire big and hot enough to combust your smoking wood at a high enough temperature to create clean, thin blue smoke. Therefore, thick white smoke is somewhat of an inherent issue with Kamado smokers! But thinner, cleaner smoke can be achieved, and here’s how:
Make sure your kamado is clean. Most of us (and I am guilty!) do not use a drip tray and allow drippings to fall onto and collect on our deflector plates. This grease sits there, ready to create thick white smoke the next time we fire up, sometimes for over an hour. So use a drip tray or clean those deflector plates.
Smoke at a slightly higher temperature of 250 to 275 °F. I know 225 °F is always recommended, but the higher temperature allows a slightly hotter, more flaming fire, which gives more possibility to create a cleaner, blue smoke. Of course, tenderizing in a smoker is a function of both time and temp, so if you want to slow down your cook, go higher at 275 °F for the first 3 to 5 hours, then drop the temp to 225 °F once you have finished the smoking stage.
For long, low and slow smoking, bury your smoking wood in the base of the firebox, surrounding it with charcoal. This puts the wood closer to the fire grate for unrestricted oxygen and passes generated smoke and gases from the burning wood up through the burning charcoal around and above the wood, where it’s more fully combusted.
Finally, for short smoking sessions, like reverse searing a steak, ensure a compact group of hot-burning coals is at cooking temperature before placing wood on top. Add food only once the initial white smoke subsides.
For vent control, close the lower vent to about a finger width and open your top vent daisy wheel. You want to create a good draw and airflow through the kamado, with exhaust fumes leaving quickly out the top. So leave the top open and tweak the lower vent to dial in your temps.
‘Smoking Dad’s video on achieving thin blue smoke in a Kamado offers valuable insights and is recommended viewing.
With a Weber Smokey Mountain

Similar to kamados, you aren’t going to get a true, thin blue smoke in a Weber Smokey Mountain, but you will get a very light and wispy white, which is close enough.
The best way to get the desired smoke in a Weber Smokey Mountain, is to use the minion method (linked below.)

There’s a reason so many competition teams use this method with water smokers such as the Smokey Mountain, and that’s because it just plain works!
What you need to do is:
- Set up the minion with a doughnut shape of coals around the outside of the firebox, with 3 or 4 wood chunks mixed in.
- Have your top vent completely open, and all three lower vents closed down to between 1/8th to 1/3rd open, depending on climate, type of charcoal used, etc. (You need to experiment to find your sweet spot.)
- Light about a half chimney full of coals, and when completely ashed over, pour them into the middle of the minion.
- Put on your lid, and wait for your smoker to come up to temp (225 °F being the goal.) Leave the top vent open, and tweak the lower vents to dial things in. As the smoker warms through, you will see thick white smoke from the wood, but it will die down after about half an hour.
- Once the white smoke has finished, and the smoker is up to temp, you’re ready to add your food.
It really is that easy! For more details on this process, please do check out our guide to the Minion method.
With an Offset Smoker

Ah, stick burners and offset smokers. These are the pits where you get true, thin blue smoke.
In an offset stick burner, you create a relatively large, flaming bed of wood burned down to coals, or use a bed of burning charcoal for heat, with fresh logs placed on top to produce smoke. The fire is so large, so hot, and there’s so much draw and airflow, that combustion of the wood is complete, and thin blue smoke is quite easy to achieve — at least compared to kamados and Weber Smokey mountains.
However, it’s confession time!
Although I now have almost two decades of experience with BBQ and smoking, I have rarely ever used a large offset smoker. Therefore, I freely admit that I’m no expert. With this in mind, I will refer you to two resources on the topic of creating thin blue smoke with an offset smoker.
First, check out this fantastic introduction from SmokedBBQSource.com on how to use an offset smoker.
Secondly, watch this video from ‘MadScientistBBQ’. It’s a long one, but it’s chock-full of great info on starting and maintaining fires for you offset smoker owners:
With a Pellet Smoker

Pellet smokers are the ultimate in set-and-forget smoking for the backyard pitmaster. They are push-button easy to use, and highly effective, including producing thin blue smoke!
I’ve not got a lot to write on producing thin blue smoke with a pellet smoker, because it really is so easy. But here goes:
- Turn on your smoker.
- Set it to your smoking temperature.
- Wait for it to come up to temperature. During this time, it will produce white smoke.
- Once up to cooking temp, and the white smoke dies down, you are done. Add your food and cook.
If you do get white or gray smoke while cooking, it’s likely because grease and drippings are burning. So keep your pit clean! However, if you are getting white smoke at 225 °F, simply dial your pit up to between 250 and 275 °F and cook at that temperature. The white smoke will die down as the wood combusts more fully.
And that’s it.
In fact, pellet grills combust their wood so effectively that many people — particularly those coming from charcoal smokers — complain that the smoke flavor from a pellet grill isn’t strong and pronounced enough. This has made manufacturers create ‘high smoke’ settings on their grills.
In this setting, generally speaking, what happens is more pellets are pushed into the fire pot, while the temperature is held lower, to allow more smoldering of the pellets instead of complete combustion. This creates some thicker white smoke, adding more flavor. It’s a period where the smoke is not thin and blue, but this is OK for 45 minutes or less, and in some cases, it is perhaps desirable to add some extra flavor.
With Electric and Gas Smokers

There’s not a lot you can do with electric and gas smokers — or even do wrong. Here is all you need to know:
- Follow the manufacturers’ instructions.
- DO NOT soak your wood chips.
- … That is all.
Electric and gas smokers have a little tray or smoker box, that holds wood chips over the heating element or burner, which causes the chips to smolder slowly.
The smoke will be white. It will not be thick, billowy white, it will be light and wispy white. However, it will not be thin and blue. There’s simply not enough combustion going on.
So with electric and gas smokers, follow the instructions of the manufacturer. Do not soak your wood chips. And accept ‘it is what it is.’
You can limit how white the smoke is by smoking at a slightly higher temperature, but that is all. But hey, don’t be discouraged! I have used many such smokers, and the food from them is delicious. So crack on!
Practice, Practice, Practice
Unless you’re very lucky, you probably won’t nail the thin blue smoke your first time. And, even if you do, you may not be able to replicate it next time!
Don’t give up; like all good things, it’s worth putting in the effort to get it right. As you get to know your smoker, you’ll find it becomes easier to make thin blue smoke.
You might want to try a few practice runs — get your smoker up and running, but don’t add any meat. Wood is a lot cheaper than, say, a 10-pound brisket. Would you rather burn through a few logs or spoil delicious meat?
OK, now onto some science and theory.
What is Thin Blue Smoke?

You probably already know smoke comes in a range of colors. The one we want for smoking food is faintly blue and virtually invisible.
What we call “color” is the reflection of a component of light bouncing off an object and reaching our eyes. The tiny particles that make up smoke are barely detectable. However, they’re just large enough to reflect the narrow wavelengths of blue light. You may have to look twice to see that your fire is producing thin blue smoke.
Why do we prefer thin blue smoke for long cooks? Because it contains just enough aromatic compounds to add smoky flavor to our food gradually, without overwhelming it.
We smoke meat for hours to tenderize it; if we let it cook in an intensely smoky environment that whole time, it would be inedible — no one likes that much smoke taste! (Not even me, and my wife tells me my Scotch and my meat sticks taste like an ashtray. How does she even know what an ashtray tastes like?)
Dirty Smoke — Why We Avoid White, Gray, and Black

Unfortunately, the colors we most commonly associate with smoke (and we won’t get into the whole “black and white aren’t colors” argument here) are the least desirable.
Remember what I just said about the microscopic particles of thin blue smoke being barely large enough to show up blue? You can probably guess, then, that white, gray, and black smoke contain much larger particles — white reflects all colors equally, black reflects none, and gray is somewhere in the middle.
White smoke is usually what we see first as the wood starts to combust. A lot of it is water vapor from the moisture in the wood evaporating. There’s a goodly amount of the aromatics we like in white smoke, so it’s just fine for a quick blast of smoke flavor in a short cooking session. But, it’s not what we want for an extended low and slow cook.
Incomplete combustion can also cause lots of white smoke. The most common cause of incomplete combustion is too much wood, coals that aren’t hot enough, a lack of airflow, or a fire that’s too hot.
Gray and black smoke mean either your wood is low quality and releasing a lot of particulates, or there’s not enough oxygen to fuel your fire. This smoke leaves a bitter, acrid taste on your meat. Unless you like the taste of soot, don’t let your meat sit in dark smoke.
What is Smoke? What are The Chemical Components?

That’s a great question! We all know it when we see it, but what the heck is smoke, anyway? The answer is: it’s a bunch of stuff! As wood burns, it releases chemical compounds trapped within, and new ones are created as the extreme heat changes the properties of what’s inside.
Breaking it down, smoke consists of anywhere from about 40 to 100 different components, including some trace metals like nickel, copper, and zinc. Mostly, though, it’s CO, CO2, NO, water vapor, and fine particles of ash, char, and creosote.
Oh, and an essential ingredient called syringol.
Syringol sounds like a character from Lord of the Rings, but it’s actually an aromatic oil. Meathead Goldwyn at Amazing Ribs hipped me to syringol, and it turns out it’s primarily responsible for the intoxicating smell of wood smoke. In fact, syringol is a key ingredient in synthetic smoke flavorings.
When smoking food, remember to use clean, dry wood that’s free of any artificial additives like glue, paint, and resin, as well as mold. You’ll end up with potentially dangerous toxins in your smoke and, consequently, in your food. Kiln-dried hardwoods are ideal, free of excess moisture, mold, bacteria, insects, etc.
Four Stages of Burning Wood — We Want to be at Stage 3 for Thin Blue Smoke

When you burn wood — whether for heat, cooking, or a good ol’ campfire for ambiance — it goes through four stages, progressing from a solid log, stick, or chunk to a pile of ash. For smoking food and barbecue, we want to be at stage 3.
These stages are as follows:
Stage 1 — Evaporation
This is the sometimes irritating part when you try to spark up your wood with a lighter or matches (or already lit charcoal). All that’s happening here is any moisture in the wood turns to steam and drifts away. No fire, not much heat — yet.
Stage 2 — Pyrolysis
Oooh, fancy word! You might recognize the first bit, “pyro,” from such words as pyrotechnics, and (for you Def Leppard fans) pyromania. As you might have guessed, it means “fire.”
Ironically, there’s still no visible flame, but the wood is technically burning and starts to break down chemically, releasing carbon monoxide (CO), carbon dioxide (CO2), methane, water vapor, and other gases.
When the wood is at this stage, it produces thick white clouds of smoke as water vapor, gases and compounds are released, but aren’t ignited and burned.
Commonly, when we see thick clouds of white smoke from our BBQ smoking wood, it’s because the fire isn’t hot enough, and the wood is stuck in this second stage of Pyrolysis.
Stage 3 — Ignition & Combustion
With all the gases present, once the temperature crosses the minimum required (about 540 °F, but it varies widely depending on the type of wood, how dry it is, and more), the vapors ignite, and we have made fire.
Nitric oxide joins our vapor mix, an essential compound for the smoke ring that so many of us strive for.
This is the stage for the lovely thin blue smoke that we want permeating our meat, infusing it with flavor. We want to keep our wood burning at this stage for the best smoke and flavor.
Stage 4 — Charcoal Formation & Burning, A.K.A. Char Burning
Eventually, every component of the wood burns away until the only thing remaining is carbon, also known as charcoal.
Charcoal burns, obviously, and does so at very high temperatures of 900 °F+. What it doesn’t do is produce much smoke. That’s why we add wood to charcoal fires when we smoke meat.
Conclusion
Truly mastering the art of smoking takes more than a weekend. The best smoked meat you’ve eaten was probably prepared by a professional pitmaster, or at least a serious enthusiast who’s put a lot of time and effort into learning the craft.
Don’t give up! This isn’t like grilling hamburgers, and it will take a lot of trial and error. I say none of this to scare you off. I just want you to understand the reality of smoking with wood. It’s a heck of a lot of fun, though, and the reward — delicious smoked meat and the praises of your guests — make it all worthwhile.
And I promise, once you get the hang of conjuring up thin blue smoke, you are well on your way to smoked meat glory.
As I always do, I thank you for reading, and I wish you nothing but the best with your backyard cooking journey. Hit us up through the contact form or social media with any questions or comments you have on how to create thin blue smoke. We’re always happy to help.

I’ve been smoking for years, but have never done a long “low and slow” pork roast or brisket, mostly I just do chicken and fish, and I’ve always smoked with white smoke for short periods of time and if it’s not done in the middle (chicken), then it goes on the gas grill to finish, or the oven if it’s mid-winter! I recently was told that thin blue smoke is the way to go, and having read your article, I think they’re right if I want to do any long smoking, but otherwise I’m fine to continue the way I’ve been going and that the thin blue smoke method may be too hot/not enough smoke (for me, perhaps not for your wife) for something like salmon, which is done in a flash at high heats and without the benefit of much smoke. If people didn’t like my smoked goods, I’d definitely rethink my process, but the salmon gets eaten every single time at every party I take it to, and recently at my daughter’s graduation I smoked three chickens this way, then finished them on the grill and when I shredded the meat, some of the stuff by the bone still need a little additional time in the oven, but I also bought ten pounds of smoked brisket from the local smoke champs ($284!), and everyone said the chicken was better than the brisket. It probably didn’t hurt that when I put the shredded chicken in the oven to finish it I seasoned it with garlic and salt and pepper and threw in some chicken broth so it wouldn’t dry out! It didn’t, it soaked up the broth and was moist and smokey and full of flavor.
But I wanted to thank you for your article, it’s very informative and if I ever want to try my hand at a pork butt (which I definitely do), I’ll definitely follow your instructions. Thank you.
Thanks, Matt. When doing short cooks, I find white smoke is almost necessary to get any kind of smoke flavor on the food. So I agree with what you’re doing!
I’d love to hear your thoughts on the snake method and to ask if you could give tips for us starters to smoke on something like a kettle or a master touch.
Thanks for the article!!
Hi Robin,
here’s two articles that will help you: The charcoal snake method, and how to use a charcoal grill. I hope that helps.
Great article! And I also love your wood smoke 101 that it goes deep on the science of combustion!
I recently stopped using my Masterbuilt Electric Smoker and began smoking meat on my propane grill. I’m finding this produces much better results! I put the meat on one side, and create a fire in a large soup can on the other side. I had been using a few lumps of charcoal with chunks of wood placed on top in an attempt to get thin blue smoke, but it still seemed white and dirty. I’m wondering if I just build a stick fire in the soup can and let it blaze away, not worrying about airflow or heat production (since it’s on the other side of the grill), would that give me a better chance at producing thin blue smoke?
When my wood chunks ignited and flamed a lot in my previous attempts, I didn’t notice any smoke being produced at all. I guess because the fire was too efficient… Is that a concern with a stick fire? It seems like it would be more similar to the stick burner offset smoker, in which you don’t really worry about it. Maybe there is smoke flavor imparted on the meat even if you don’t see thin blue smoke? I would love to hear your thoughts. Thank you!
Thanks, Doug. It’s always nice to hear the content is useful!
It sounds like you’re exploring some interesting techniques in your quest for the perfect thin blue smoke. I love it!
Though unconventional, I don’t see any reason why it wouldn’t work. I’d say the main issue would be finding a balanced airflow to ensure enough oxygen for clean burning, but not so much that it rages away and burns too quickly. This would be too much heat and flames hitting the inside of the grill lid, it would need constant refilling, or there just won’t be enough time for your food to take on a smoke flavor. Burn too slow, though, and you get the thick white smoke, of course.
If you use a correct hardwood that’s been seasoned well and can get the fire’s intensity right, though, I cannot see any reason why this wouldn’t work. But it may well take some trial and error to perfect the technique.