

Would you believe it if I told you that a charcoal chimney and a grill grate are all you need to achieve seared steak perfection?
It’s true! By lighting half a charcoal chimney and placing a grill grate on top you can create some of the best steaks of your life using the ‘Afterburner Grilling Method.’
Have you never heard of this method, let alone tried it? Afterburner steak is possibly one of the quickest ways to grill insanely good thin steaks, those cuts that come in under an inch thick.
In this article, I’ll teach you all about it, and how it’s done.
History of the Afterburner
Craig “Meathead” Goldwyn at AmazingRibs.com calls this the Afterburner Method. According to Meathead, he noticed one day how his lit charcoal chimney looked somewhat like the afterburner of a jet, with blue and red flames shooting out the top.
Curious, he placed a cast iron pan on top and whipped out an infrared thermometer to measure the temp. To his surprise, it was a whopping 800 °F!
Because the charcoal was bunched together in the chimney, and because the pan was so close to the heat, it was easily able to achieve this super-hot temp.
From here, he did what any warm-blooded, red meat-loving American would do: he placed a grill grate on top of the chimney and quickly seared up an amazing steak in less than 6 minutes!
You can see Meathead Goldwyn discussing the technique in this video where he afterburner grills a sous vide steak:
What Type of Steak to Use
In our beef cuts diagram, we describe many cuts as one of the best steaks for grilling, but not all are suitable for the afterburner method because the thicker ones will burn on the outside before the insides are cooked.
Meathead recommends using this method on thinner cuts like hanger steak, skirt, and flank. These are cuts that are usually between ½” to ¾” thick. The afterburner steak grilling method is ideal for these cuts because you’re able to achieve a perfect medium rare on the inside, with great, even browning on the outside with the method.
The method is also great if you like to eat blue rare steaks, because you can get the best sear possible while cooking the inside the least.
You could use this method on a thicker steak, but you must be forewarned: It’s easy to end up with a steak that’s well below medium-rare, or worse, you could end up with a medium rare steak with a burned and charred exterior!
If you’re unfamiliar, here are some detailed guides on some of the thinner, most suitable steaks available that really benefit from this cooking technique:
Afterburner Reverse Sear
The reverse sear is a popular way to cook a steak to perfect medium-rare that lends itself to the afterburner method.
Unlike the conventional method of cooking a steak by searing it over a hot flame the entire time you cook it, the reverse sear is when you slowly bring the temperature of the meat up and only finish with a sear.
The afterburner could come in handy with that last step to provide a deep, even, mahogany crust that many steak lovers want to achieve. Better yet, since the steak has already slowly come up to temp, you can use as thick a steak as you like.
How to Cook Using the Afterburner Method
It doesn’t take much to cook a steak using the afterburner method. So long as you have a charcoal chimney and a grill grate, you’re in business. However, I’d never forgive myself if I didn’t mention the super cool Chimney Griller, by Unknown BBQ Competition Team.
This awesome little tool replaces the need to use a grill grate and safely fits directly on top of the chimney. With the Chimney Griller, there is no worry of trying to handle the grill grate, or what to do if it falls off.
I have a similar but different one, from a company called ProQ:

Dry Brine
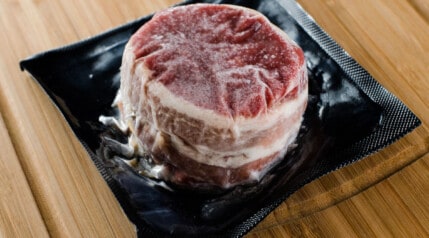
A few hours before you cook your steak, you’re going to want to dry brine by sprinkling a generous amount of kosher salt on your steak and let it rest in the refrigerator.
This process will draw moisture out of you steak, which will, in turn, dissolve the salt which will then be reabsorbed into your steak, bringing the salt in with it.
You’re going to want to avoid using rubs or applying pepper to the steak until after it is cooked. That’s because the ingredients found in a spice rub — and especially black pepper — will easily burn and turn bitter when they are placed so close to the fire.
How Much Charcoal?
Avoid the temptation to light a full load of charcoal in your chimney. This will result in way too hot a cooking surface that will surely burn your food.
Also, the charcoal will take longer to light.
Instead, only light about a half chimney load of charcoal. This will provide more than enough heat to reach screaming hot searing temps of up to 800°.
The Cook
Once your charcoal is lit and your grill grate is in place, it’s time to put your meat on.
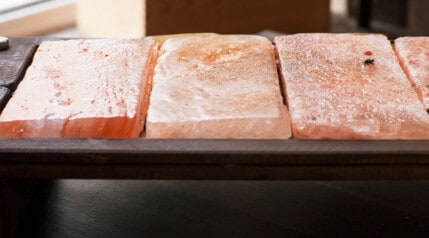
First, you should use a paper towel to dry up any moisture on the steak. This is done to avoid any surface moisture from evaporating and cooling the meat surface once laid on the grill grate.
Once your steak is on, don’t walk away and leave it unattended — this can burn pretty quickly.
Flip your steak every 30 – 60 seconds. Doing so will assist with creating that dark and tasty Maillard crust we’ve been talking about this whole time.
If you left your food on the grate for too long, your meat will surely burn, and we don’t want that.
After the first couple of flips, it’ll be time to check the temperature.
If you’re like me, you have at least two Thermapens. Take one and use it to read the internal temp of the steak. If it’s below 125°, keep cooking and flipping. Once your steak has reached a perfect medium rare internal temp of 125°, it’s time to rest your steak before digging in.
Overall cooking time will vary depending on the particular cut. We cover most times in our article on how long to grill steak.

Because the afterburner sear method is so hot, take your steak off a good 7 or 8 degrees F under your target temp, as it will rise a lot while resting due to carryover cooking. More so than the rise you’re used to after standard grilling.
— Mark Jenner
How to Cook Using Afterburner With Reverse Sear
As we already discussed, if your steak is thicker than ¾” you might want to implement the reverse sear.
Start by dry brining like you would any other steak and setting up a grill for two-zone indirect cooking at approx. 250 °F – 300 °F and place your meat on the “cool” side of the grill.
Once your steak is brought up in temperature to approximately 115° – 120 °F, remove from your grill and prepare your charcoal chimney for the afterburner.
Best part, your meat will rest while the charcoal chimney is coming up in temp, so you won’t have to rest it after you’re done with the searing.
Once you’ve lit your chimney, you can add your meat and complete your sear. Just like the thinner steaks, you’re going to want to flip every 60 seconds or so and check for temp after a couple of minutes to avoid burning your meat.
Conclusion
Well, there you have it, kids. If you haven’t tried the Afterburner Method this is a sure fire way to impress your party guests next time you have them over for steaks.
Have you tried the Afterburner Method? What did you think of our take on it? Is it accurate, or would you suggest changes? Leave us a comment down below with your thoughts.
Happy grilling!


I love the article, thank you! My grill has a searing burner and the Temptation is always putting on there first and then finish the cook, cooking it first and throwing it on their last sounds much better! I am an engineer and fabricator so tomorrow morning first thing I’m going to take a piece of 10 inch round stainless pipe and fabricate a special Grill just for the purpose you laid out. Can’t wait to try it, thanks for all the great info!
Thanks, Jeff. Best of luck!