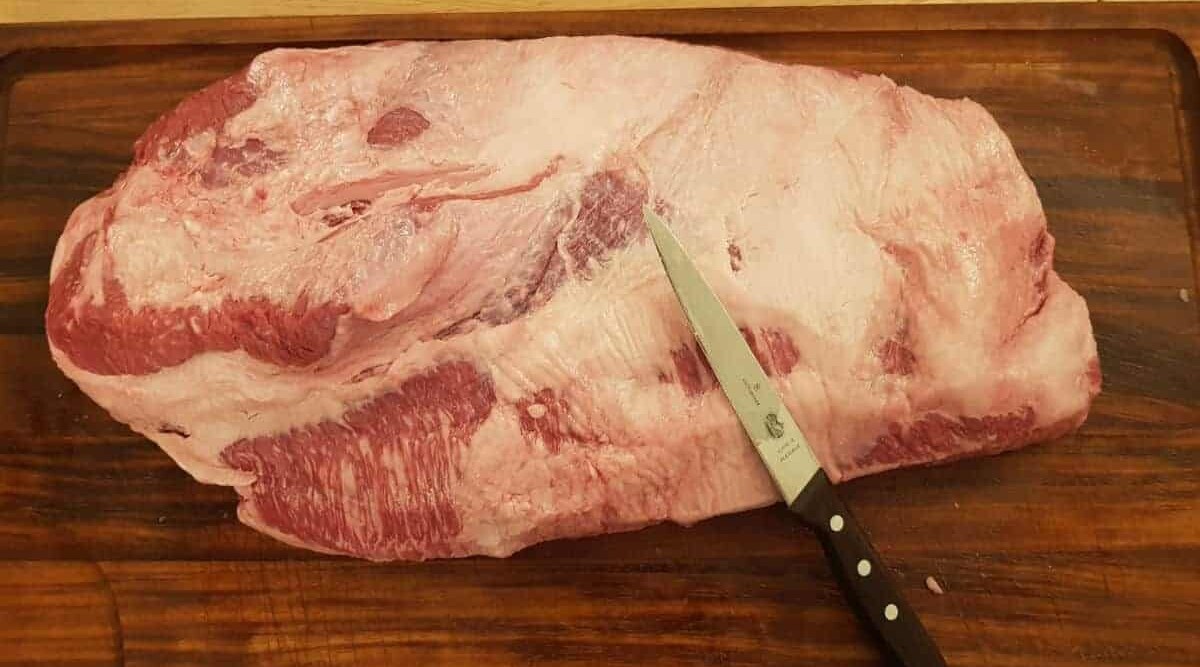
Prior planning prevents poor performance, or so says the old adage. I have to say, I agree with the sentiment.
Some people seem to fly through life by the seat of their pants, and I agree that it’s exciting to sometimes just “wing it.” But some experiences really are best when you prepare for them in advance. Brisket comes to mind as a great example.
A good brisket is not a cheap cut of meat, but it can also be really, very big. Between the cost and the amount of labor required to cook one to perfection, you don’t want to fail! And the very first step is knowing how to trim it.
The process involved in trimming, prepping and smoking a brisket is a long and detailed one, so rather than throw it at you all at once, we’re going to break it down into smaller pieces.
In this article, we will also cover some brisket basics, such as cuts and selection, but before we get to that, we’ll start with the meat of the article and focus on how to trim a brisket.
Jump to:
How to Trim a Brisket
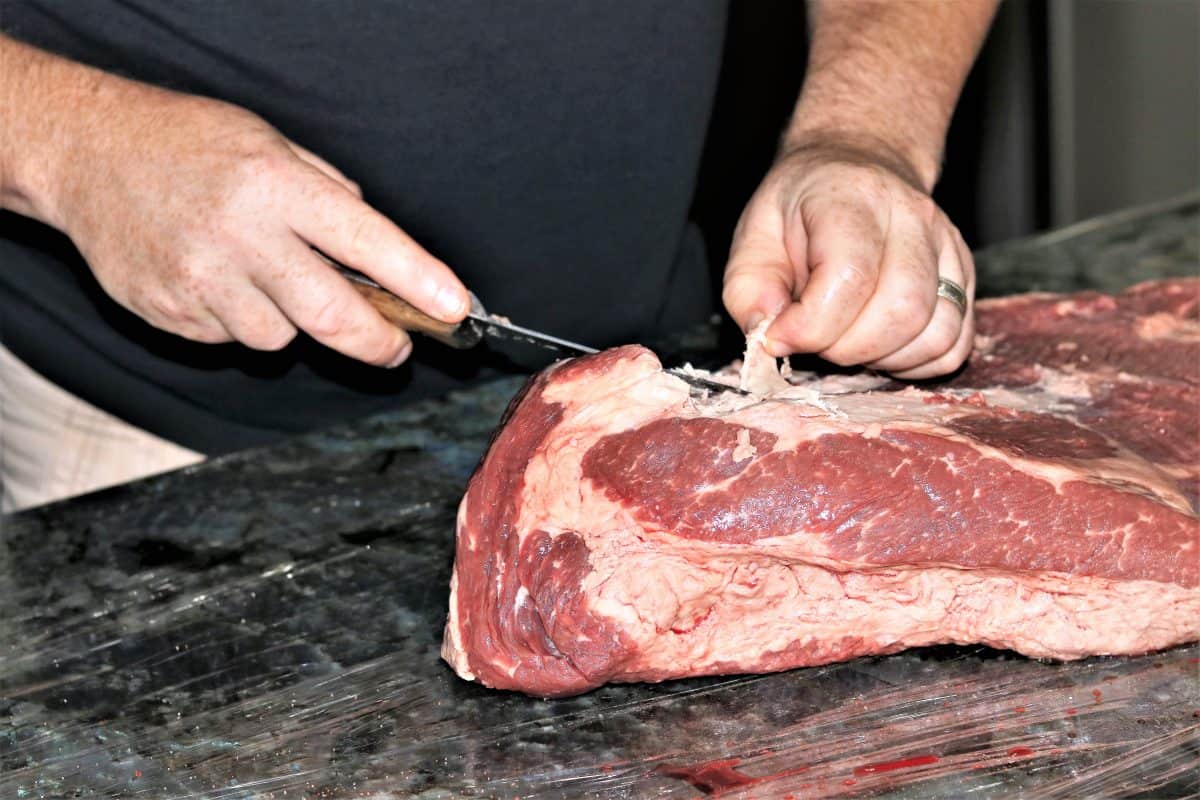
Ok, you’ve got your brisket home from the store or the butcher, and you’re ready to prep it for the smoker. Before you start in with a beef brisket rub, however, you’ll need to do a little trimming,
First, get yourself a really, really sharp knife. A dull edge is just going to tear at the fat and frustrate you as you try to trim with precision.
Forget about the paring knife, too — you’ll want a nice long blade to get this done efficiently.
Step-by-Step Instructions For Trimming a Brisket
This is a process that really should be watched — and not just read — to truly understand it.
Have a look at the following videos to see how it’s done, and then read further for the whole endeavor in detailed text. You can also use this section as a handy reference guide when you start trimming your own brisket.
I chose a video that’s broken up into two parts, and given how long it can take to trim a brisket, you’ll be glad I did. Eight to twenty minutes of non-stop carving isn’t going to win any Academy Awards, I promise you.
Video 1: Getting started
Video 2: Finishing it off
Now Here’s Your Step-by-Step Break Down
Step 1: Place your brisket on a large cutting board, fat cap side up. Get your sharp knife ready.
Step 2: Score across the fat cap at the point end and carve out the thick chunk of fat that’s on top of the point near where it joins the flat. You want to expose the meat of the point to allow your rub to penetrate.
Step 3: Continue carving fat off the point, so the meat is at the surface. This includes the end of the fat cap where it curls up and over the tip of the point. Try hard to avoid cutting deep into the meat — try to keep as close to the dividing line between the meat and the fat as possible so as not to waste the meat.
Step 4: Start in on the fat cap on the flat end of the brisket. You want to leave about a ¼ inch covering of fat across the entire flat. It’s possible your brisket may already be close to that thickness after the butcher is finished with it. Look for areas of the cap that obviously protrude, and shave them down carefully. A uniform covering of fat will cook more evenly.
Step 5: Trim off a thin piece of meat at the end opposite the point. Quite often this exposed edge may have turned color, and it might not cook well. Rather than risk it, slice it off and expose the untouched meat underneath.
Step 6: Turn the brisket around and find the long side that is almost entirely covered by the fat cap. Run the knife down the length and remove this very large and tough layer of fat. Try to keep the edges of the meat square, because bits that stick out tend to burn.
Step 7: Flip the brisket over so that the fat cap is now on the bottom. Find the thick wedge of fat near the point end and begin carving it off. It’s usually running pretty deep, and you’ll be left with a large valley demarcating the border between the point and the flat.
Step 8: Take one last look over the brisket to make sure it’s even, and no large intrusions of fat remain between the flat and the point. If you want to cook the point separately, you can easily remove it now by following the valley you made all the way through. Many chefs suggest leaving it on, however, and I tend to agree.
Bonus Pro Tip: Did you see how easily that knife sliced through the meat and fat? Well, it’ll go through your fingers and hands just as easily. Be very careful when cutting at weird angles, cut away from your body, and keep a first aid kit handy, just in case.
For a slightly different take on trimming, you might want to check out our look at franklin’s BBQ brisket recipe. It’s much the same, but seeing and hearing more than one opinion is always good.
That’s it! Congratulations on trimming your first brisket. Now all you have to do is season, smoke, carve and enjoy. And we have articles to help with this too, such as when to wrap brisket in butcher paper and a guide on slicing brisket correctly.
And hey, don’t go throwing all that expensive beef fat that you’ve carved off your brisket away! Check out our guide on how to make and use beef tallow, it’s a wonderful ingredient that makes good use of the by-product.
Back to the Beginning
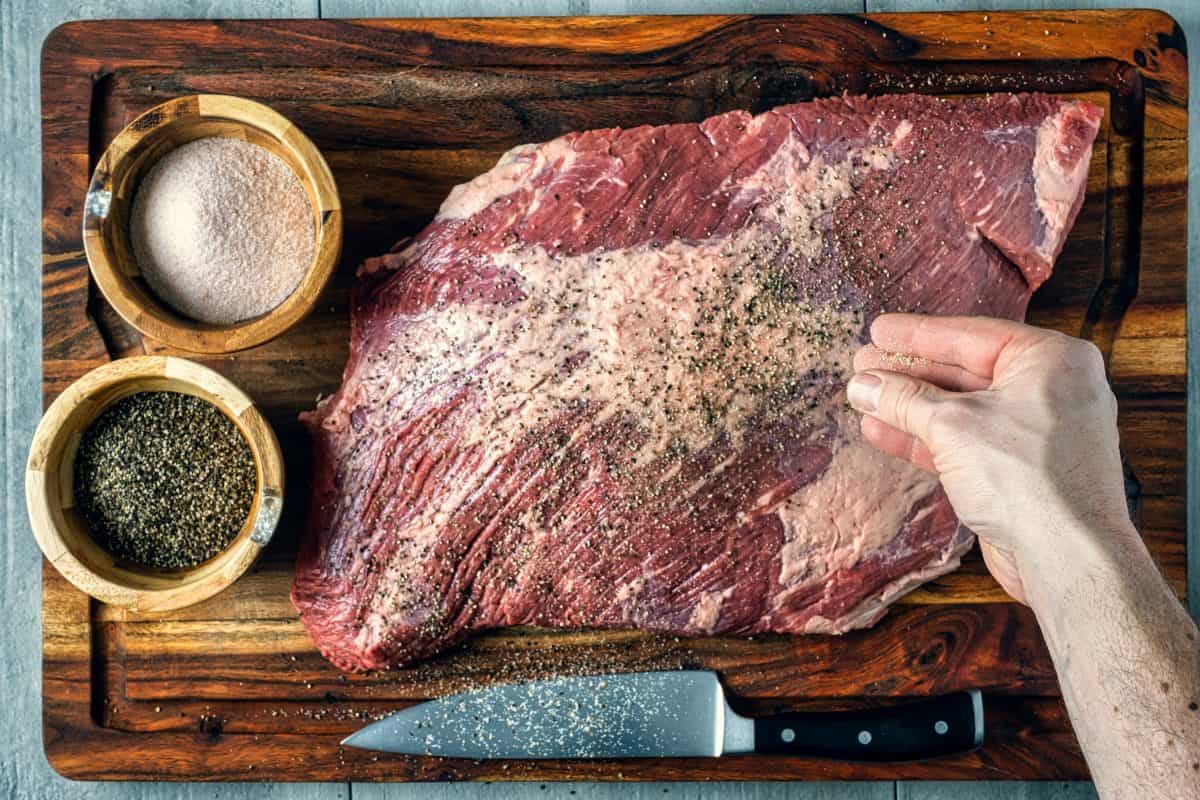
Before we can learn how to trim brisket, we must first get to know this wonderful, but oft-misunderstood cut of beef, otherwise you will not know the words and terminology used when describing what parts to trim.
So for those who’ve come here without this prior knowledge, we’ll now dive into what a brisket is, the different parts of a brisket, how to buy the best one for your needs and more.
What is a Brisket?
The brisket is a primal cut found at the front, or breast section, of a beef carcass. The USDA Institutional Meat Purchasing Standard (IMPS) defines the brisket as including:
“The anterior end of the sternum bones, M. pectoralis profundi, and the M. pectoralis superficialis.”
Furthermore:
“Evidence of the cartilaginous juncture of the 1st rib and the sternum and the cross-section of 4 rib bones shall be present.”
There is one brisket per side of beef, but typically a butcher subdivides the cut before it goes up for sale.
To get a whole brisket, you might need to put in a special request. This is commonly known as a “whole packer,” or “packer cut.” A whole brisket can weigh as much as 20 pounds, especially if you get one with the deckle (a layer of fat and muscle) intact. The average boneless deckle (or point) weighs around 10 to 12 pounds.
The two cuts made from the brisket primal are the ‘flat’, and the ‘point.’ And for an in depth comparison and discussion of the two cuts, check out our guide on the brisket flat vs point.
Brisket Flat
This is the largest part of the brisket, and it’s essentially rectangular. Although there may be decent marbling, it’s considered a lean cut.
Brisket Point
The point is far smaller than the flat, and it lurks more or less on top (or underneath, depending on how the cut is sitting) of the flat, but protrudes at one end. The point is somewhat fatty, not only on top but right throughout the cut.
It is a mass of fat and muscle that links the brisket flat to the rib cage. Sometimes this is also known as the “Second cut brisket.” It’s very fatty and turns many people off. Cooked correctly, however, it is succulent and delicious, especially when used for making burnt ends! Don’t be afraid to try it!
The Deckle
The Point is also sometimes known as ‘The Deckle.’ It is the same cut, just under a different name.
The Fat Cap
This is a thick layer of fat that covers one entire side of the meat.
It runs the entire length of the flat, and often wraps around one side, as well as sits between and separates a lot of the muscle in the two cuts, the flat and the point.
If you buy a separate flat rather than a packer brisket, you’ll usually get the fat cap included, though some butchers cut it off before it hits the counter. This is especially true at grocery stores.
Choosing the Best Brisket for Smoking
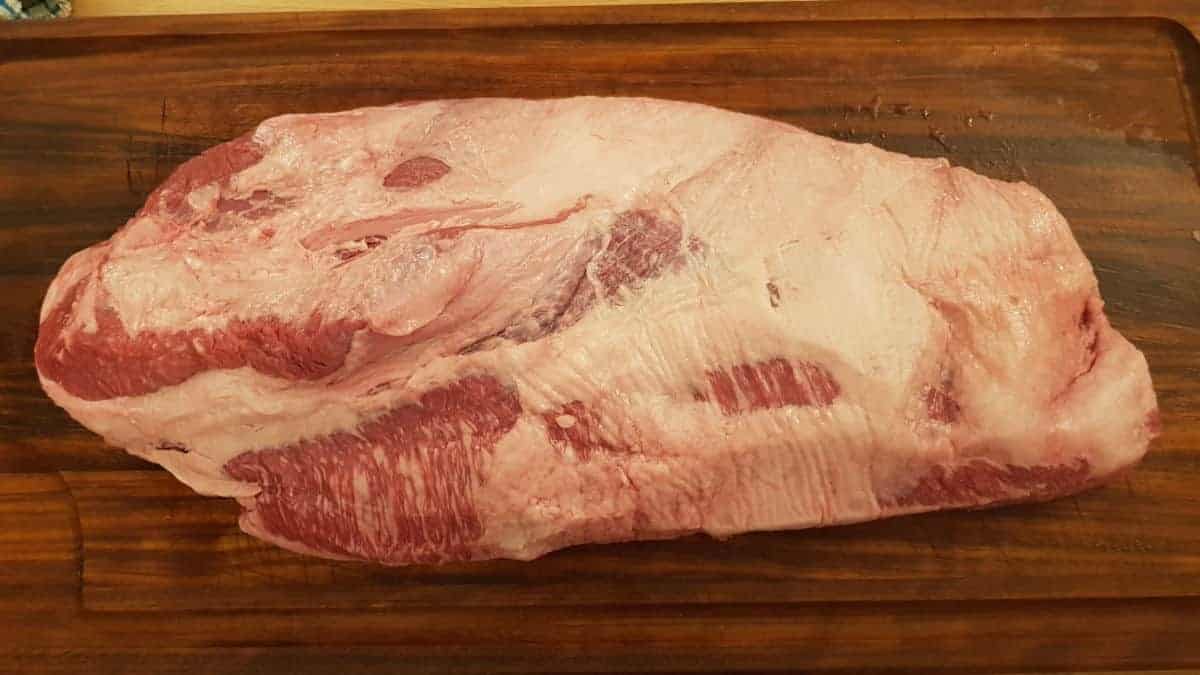
Now that we’ve gone over the parts, and how to trim a brisket, I’m sure you’re ready to run out to the grocery store or butcher shop to grab a full packer of your own?!
Not so fast! We haven’t discussed what to look for in a brisket yet.
Though it may be possible for a good chef to make a great meal out of a sub-par piece of meat, wouldn’t it be better to just start with a quality cut?
Here are some tips on sizing up a brisket.
Grades of Beef
Meat in the United States is graded by the United States Department of Agriculture (USDA). Other countries have their own government agencies performing a similar function.
There are eight grades the USDA might award to meat fit for human consumption, though it is usually only the top four you’ll find at a grocer, and really only the top three are worth considering. They are, in order of quality, Prime, Choice, and Select.
Prime cuts are the good stuff. This is what you find at high-end restaurants, and it’s what you want to buy if you want the best. Prime cuts of beef have good marbling and color throughout.
Choice cuts are almost as good as Prime, but have a bit less marbling and are therefore slightly more prone to drying out. Select cuts of beef have decent marbling, but may be noticeably less moist and flavorful.
Since brisket is smoked for such a long time, you want to choose a quality cut that’s going to hold up to all that heat.
Pass on the Select-grade cuts and buy at least Choice. If you really want a treat, nab yourself a Prime brisket, but be ready to pony up, because it won’t come cheap.
Remember, beef sells by the pound, and there are a LOT of pounds in a brisket!
Size Matters
As we’ve already covered, a brisket can be a giant beast.
While the challenge of prepping, smoking and serving a 15 pound slab of meat might speak to your inner caveman (or woman), make sure to pick a cut that makes sense for your needs.
Think about how many people you’re feeding, and also keep in mind the size of your grill.
Thickness Does, Too
A cut of meat that has a relatively uniform thickness will cook more evenly. If you’ve ever tried to cook a top sirloin, sometimes known as a “baseball steak,” you know what I’m talking about.
Look for a brisket that is as close to the same thickness all the way across as possible. Some are cut with a tapered edge, which may burn during a prolonged smoking session, and you’ll end up cutting that off, anyway.
Some Words on Wagyu
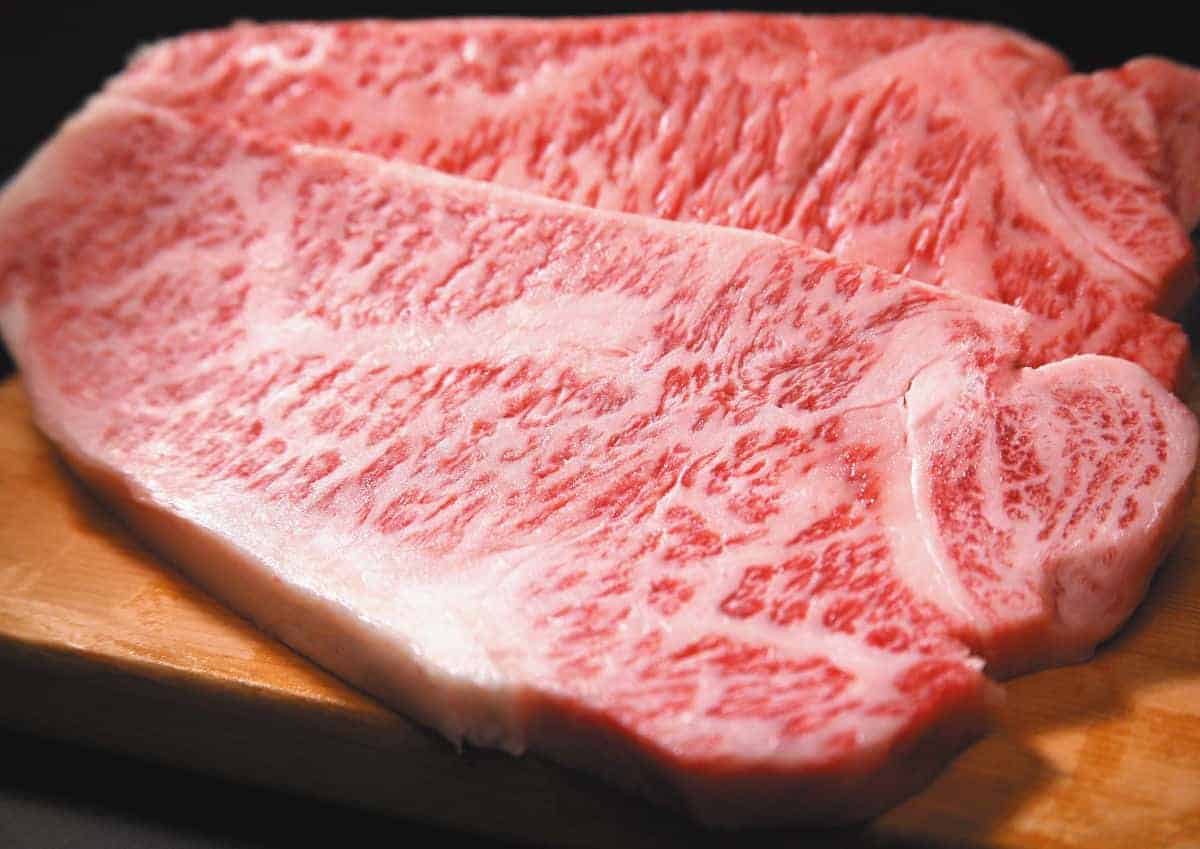
If you’ve done much research into beef, or if you shop for high-end meat products, you may already be familiar with wagyu beef. If not, allow me to enlighten you.
Wagyu cows are indigenous to Japan, though there are some U.S. Breeders. Without getting too deeply into the wagyu story, they are highly regulated and highly prized beef cattle with a flavor that’s second to none, thanks in large part to the exceptional marbling.
If you want to dig deeper for yourself, you can head over to the website for the American Wagyu Association and fill your brain with beef trivia.
It also has a price tag second to none! A top grade Wagyu brisket could set you back as much as $200, though there are some more moderately priced options. If you really, REALLY want to impress your guests, try and get your hands on one of these — it really is the gold standard for brisket.#
Click here to find out more in our in depth discussion on Wagyu beef.
Nice Looking Fat You’ve Got There!
To the untrained eye, all fat looks pretty much the same. A closer look reveals important clues about quality, however.
What you’re looking for is hard, white fat. This lets you know the cow got nicely fattened on grain during the weeks leading up to the slaughter.
Yellowish fat indicates a grass-fed cow.
I’m not here to argue beef farming philosophy, and nutrition isn’t my main concern right now, either, though both subjects are important. When it comes to flavor and moisture, however, grain-fed wins, at least when it comes to brisket, which relies heavily on its fat. Cows that eat grass have less fat, so if you want fattier beef, stick with grain.
The Skinny on Fat
There are two schools of thought when it comes to fat on a brisket: cut it off, or leave it on. Neither side is wrong, they’re just very different.
As we know from other cuts of beef, fat equals flavor and moisture. Logic might tell you that less fatty meat is better meat, but the truth is often exactly the opposite.
Fat marbled through the meat adds moisture and keeps the meat tender during cooking. Considering how long a brisket cooks for (think hours), it seems like a good idea to have all the moisture possible!
The thing is, the point is naturally marbled, but the flat is not. The flat is quite lean, and often comes served slathered in sauce to disguise the lack of flavor and moisture.
So how do you keep a brisket flat moist? Choose one with the fat cap intact rather than one from which the butcher has already removed the large, white layer.
Cooking it with the cap in place ensures both moisture and flavor as the cap melts. We get into more detail in another article about smoking a brisket fat side up or down.
In the end, the choice is entirely yours. If you want my recommendation, though, stick with the fat and learn to work with it.
Some grocery stores offer a “rolled brisket,” which is exactly what it sounds like: it is rolled into a cylinder and tied up. Don’t bother with this one for your smoker, because you’ll just have to unroll it anyway, and they probably trimmed off all the lovely fat. Save this one for a slow cooker, or another moist-cooking method.
A Quick Note on Price
Prices vary depending on the grade and the size.
All in all, a brisket usually sells at a fairly low price per-pound, but because they’re so big, they can be expensive.
So while they’re good value, they’re not normally an impulse purchase, if you know what I mean.
A Sharp Ending
A good brisket is the kind of meal a cook is proud to serve to his or her guests. Plenty of folks are comfortable with basic grilling, but when you serve them this beauty, the hot dog and burger crowd will be in awe of your barbecue prowess!
Armed with your new knowledge, there’s no reason why you can’t tackle this marvelous piece of meat. A brisket is a great cut for smoking and a treat for your family or guests. Leftovers are amazing for sandwiches and snacks, too!
Don’t feel bad if your first try at smoking one doesn’t come out competition-worthy. There’s a bit of a learning curve when it comes to choosing, and especially trimming, a brisket to perfection. Keep at it, though, and soon you’ll be able to add this wonderful cut to your arsenal of grill offerings.
If you think you know more about brisket than I do (and that’s entirely possible), please drop a line and fill me in on any details or tricks I may have missed, or that you think our readers might like to know. We love questions and comments!
If this was your first time visiting with us, thanks for dropping by, and we hope you’ll stick around for more!
Happy grilling!




Outstanding article and videos! Thanks, for putting them together. I am on my fourth (or fifth?) packer brisket and been a bit fanatical on research. Been devouring what I can to understand and refine my trimming technique — your article brought it all together in a systematic, and repeatable manner. Thanks! Very much appreciated!
Hi Michael,
Thank you, it’s always nice to hear the info we put together is useful and makes doing so worthwhile 🙂
Happy smoking!
Thanks for your comments!!