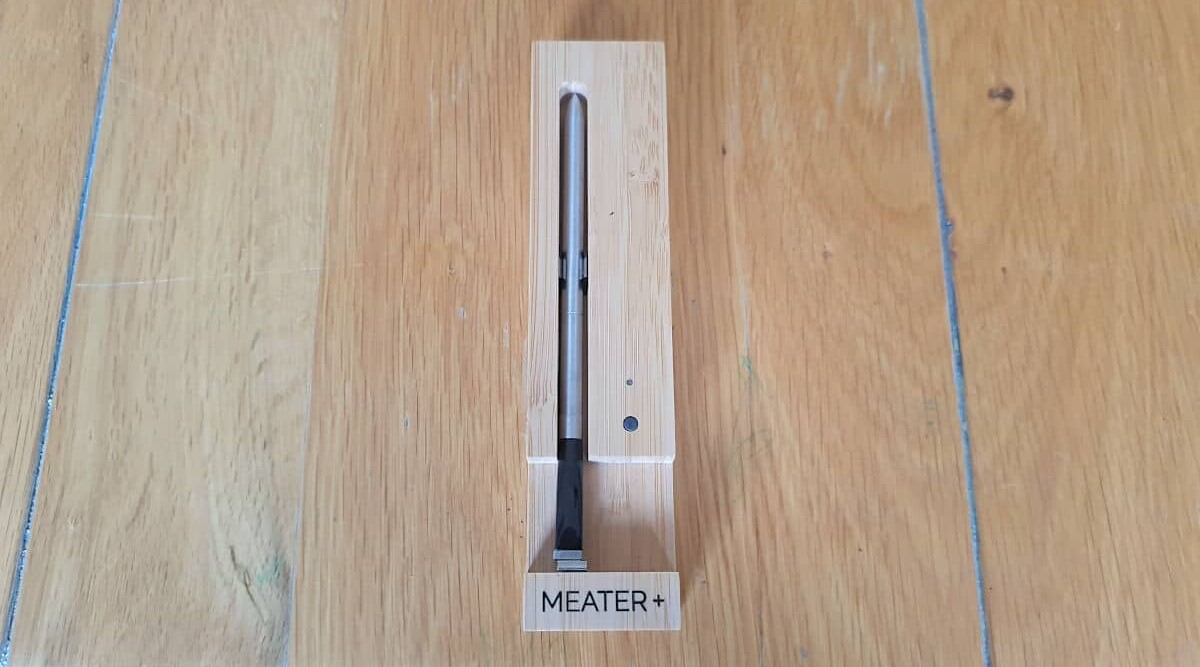
For accurate barbecue we need a way to know what the internal temperature of our meat is, and the ambient temperature we’re cooking at inside the barbecue.
For years, that meant probes with wires. The wires came out through holes in the barbecue, or between the lid and the firebox, and out to a thermometer.
Next came the ability to monitor thermometers remotely with a receiver unit or your phone. But, you still had the wires to contend with.
The people at Meater decided to do something about that, and that’s what we’re going to look at today in my Meater review.
Bottom line up front: The Meater is the ONLY true wireless BBQ thermometer I’ve seen, I’m a huge fan, and own and use two regularly.
There are — and I own — many thermometers that are wireless between a transmitter and receiver, but there is ALWAYS a wire from the temperature probes to the transmitter.
So what?! You might be thinking. And so did I until I realized the potential for rotisserie temperature monitoring! More on that in a minute.
So yes, here’s my review of the Meater and the Meater+, the first completely and truly wireless barbecue thermometers.
Jump to:
- 1 Overview of the Meater Wireless Barbecue Thermometer Range
- 2 Summary of Pros and Cons
- 3 What’s in the Box?
- 4 Features and Manufacturer’s Specifications
- 5 A Look at the Meater Plus Probe
- 6 A Look at the Charger
- 7 Speed and Accuracy
- 8 Range
- 9 Design and Build Quality
- 10 Mobile App
- 11 Overall Ease of Use
- 12 Warranty and Support
- 13 It’s the ONLY Thermometer to Buy for Rotisserie
- 14 Final Verdict
- 15 Is The Meater Plus a Recommended Product?
Overview of the Meater Wireless Barbecue Thermometer Range
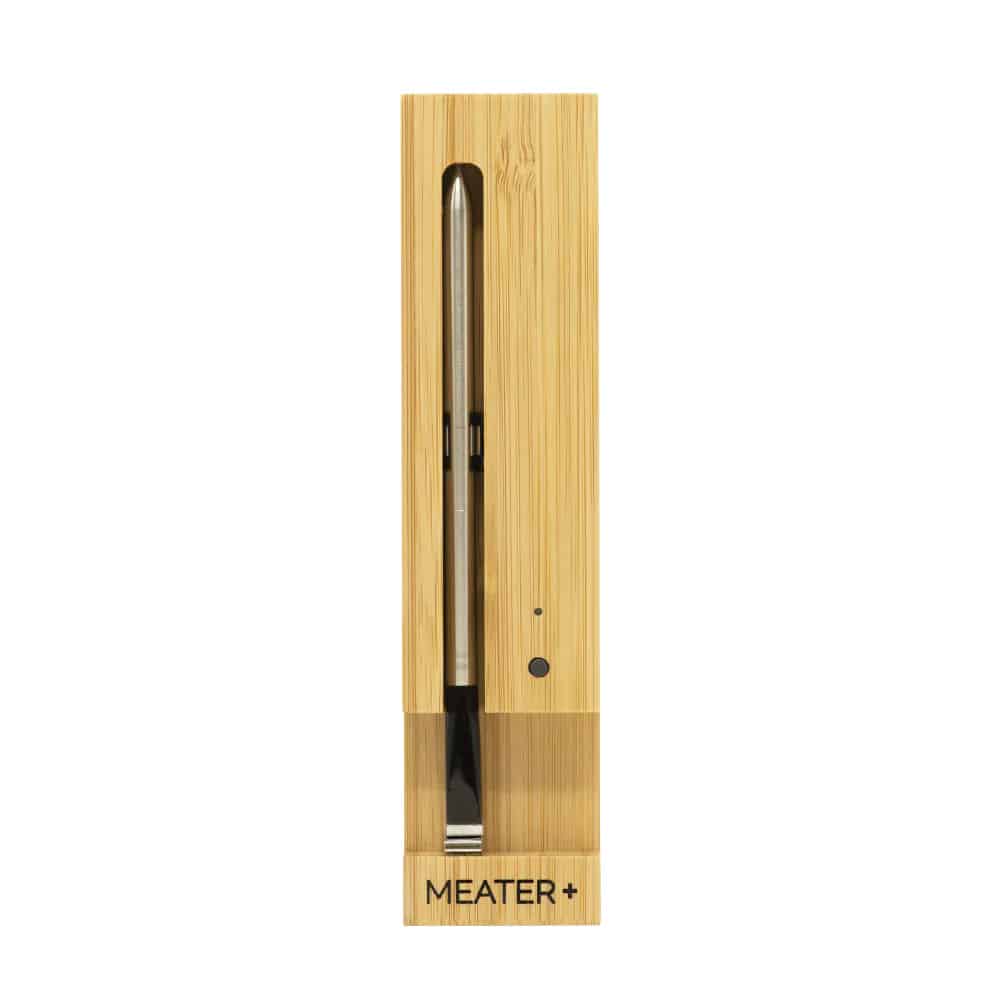
A dual thermometer in a single probe that is truly wireless and can be used with grills, smokers, and even with rotisseries.
Providing real-time temperature monitoring of both your food and your cooker, it has a wireless range up to 165 feet, displaying information on your cook right on your smartphone via an app. In the app, you’ll also find detailed cooking instructions and recipes to follow, along with time estimations left for your current cook.
These thermometers free you up to walk away from your grill or smoker while you’re waiting for meat to cook. You insert the single probe into your meat, and it sends a steady stream of data via Bluetooth to your smartphone.
There are sensors at both ends of the probe, simultaneously reading the temperature in the meat and the ambient temperature of your grill or smoker.
You’ll need to install the free Meater app from either the Google Play Store or the Apple App Store before you get to cooking.
Inside the probe is a rechargeable battery. Between uses, insert the probe into the base/charger, and the AAA battery in the base recharges the probe.
Again, no wires. This means you could take the Meater with you camping, tailgating, caravanning, RVing, or whatever.
With the app, you’ll be able to track internal and ambient temperatures, select your meat type and doneness level for your target temperature, and see approximately how long remains until your food is ready.
Summary of Pros and Cons
Pros
- Truly wireless — Not a single wire in sight!
- Dual sensors in a single probe to measure both food and pit temperatures
- Accurate Temperature readings
- Comprehensive, well designed, and easy to use smartphone app
- Charges while packed in its storage case
- Long battery life
- Programmable cooks, with time to cook, 5 minute warning, and resting time alarms
- Possibly the only thermometer you can use with rotisserie (no wires!)
Cons
- Relatively expensive compared to other digital thermometers
- 165 foot range is ambitious! Metal BBQ walls severely reduce this
- Max internal temp of 212 degrees F can lead to damage if the probe is not fully inserted!
- Screaming hot searing can damage the ambient pit end of the probe
What’s in the Box?
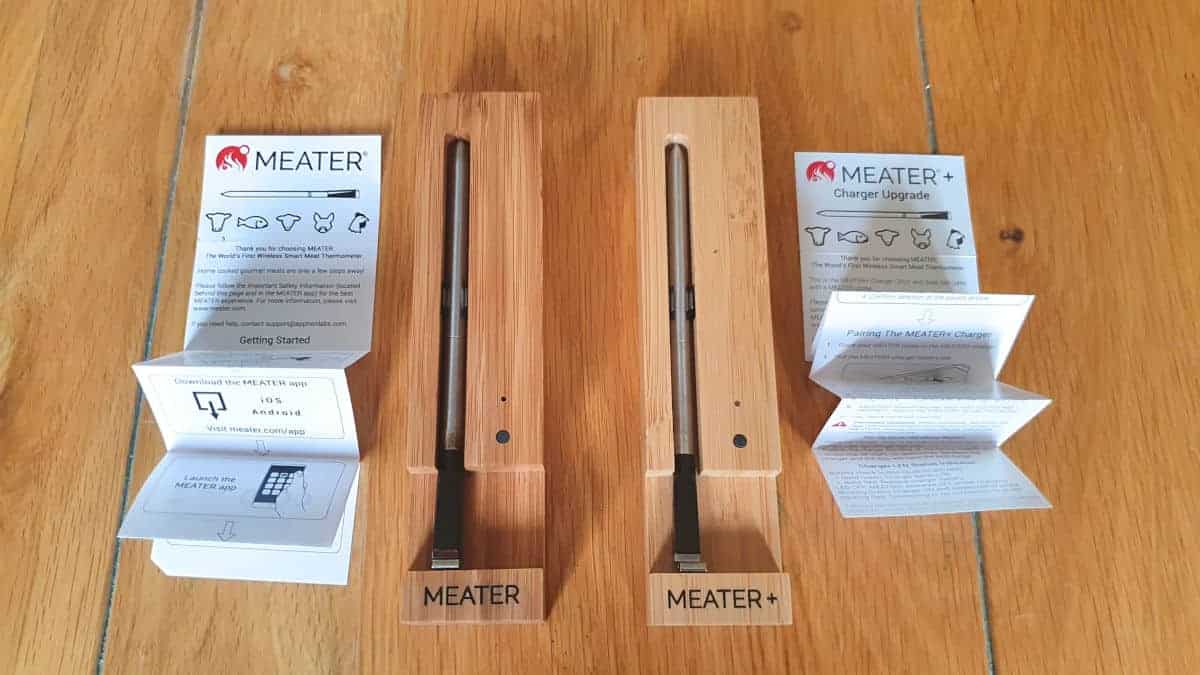
There’s not an awful lot, but there’s exactly what you need.
- 1 probe
- 1 charging block
- 1 AAA battery
- 1 tiny instruction manual
Note: the contents are exactly the same whether you buy the Meater or the Meater+.
The short manual you can see in the pic above has all the instructions you need to get going: How and where to download the app, basic instructions to get started and so on. And there are far more detailed instructions, that are very easy to follow, once you open up the app.
Features and Manufacturer’s Specifications
On the face of it, it’s a simple bit of kit, but it’s clever in how it works. What it’s made to do, it does well!
How it Works — The Basics
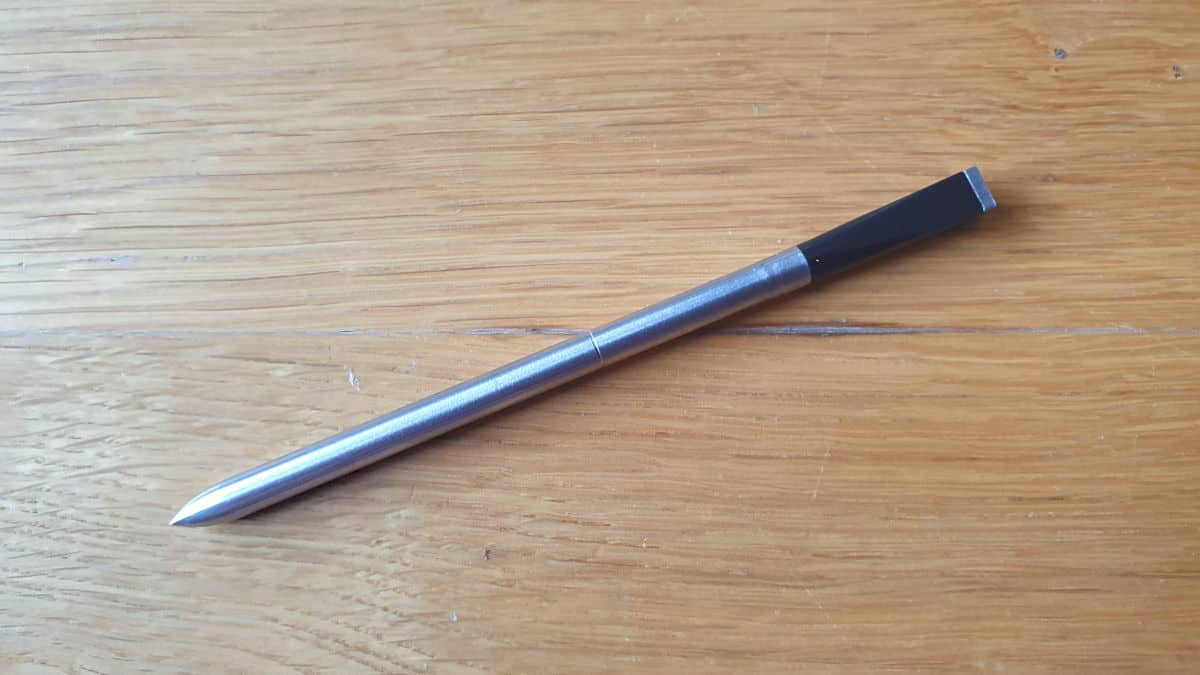
The Meater probe is actually two thermometers in one, separated by the line you see in the image above.
The longer, metallic end to the left of the line is the probe end to insert into the food you are cooking, with a thermometer in the tip that will measure and report the internal temp of your food.
The shorter black end contains a second thermometer that is used to measure and report the internal temperature of your grill or smoker.
To use the Meater, you insert the probe into your food, right up to the dividing line. You can then monitor, TRULY wirelessly, the internal temperatures of your food and your pit. And this is why the Meater+ took top spot in our roundup of the best wireless meat thermometer.
The single probe then sends the dual temperature information to your phone across a Bluetooth connection, where it’s interpreted and displayed on the app. (Note: The Meater+ Also featured highly in our best Bluetooth thermometer guide.)
Meater Link and Meater Cloud
You also have the option to set up what’s called MEATER Link.
Using this system, the probe sends the signal to a phone, the phone sends it through your home Wi-Fi, and then you can monitor your cook from any Android or Apple device you want, from anywhere on the network.
If that’s not enough, there’s also MEATER Cloud. With this enabled, you can keep tabs on your cook from anywhere in the world you have Internet connectivity, and you can use a Windows or Mac browser.
The app is set up for easy use. You can choose your food type and preset doneness level, or set a custom target temperature. Additionally, you can set a variety of countdown timers and custom label them.
Preset Timings for Perfection
When you select a meat type, target temperature, and set up your cook in the app, there is an initial waiting period while your phone receives information on the internal meat temp, the pit temp, and how they are changing.
Then a clever algorithm lets you know roughly how long the cook will take.
BONUS: The app takes into account carryover cooking! (If you’re unsure what that is, check out our article, what is carryover cooking?)
After you take your meat off the grill or smoker, the outer layer is hotter than the middle, and as the temperature stabilizes, the internal temperature rises. You, as a cook, have to account for and plan for this. Unless you have the Meater!
An algorithm in the app can see what temp the pit is at, what your meat is at, how fast it is rising and so on, and tells you to remove your meat at a temperature that’s UNDER your target temp, so while resting the meat will come up to the correct temp you desire. It even tells you how long to rest!
In my experience using the Meater for nearly a year, it’s pretty darn accurate as long as you maintain your pit at a constant temperature. This is a great feature that will help you achieve perfect doneness with far less — or any — guesswork.
Good for Grills, Smokers or Both?
The Meater is at its best on a standard grill, helping you cook meat and poultry cuts to safe and perfect temperatures. It’s also effective with larger cuts you’re roasting over a longer period.
However, if you’re planning on using one in a smoker, I would recommend upgrading to the ‘Plus’ model.
In my experience, the signal from the standard one is just not strong enough to penetrate far past thick walls of high-end smokers, the thicker materials used for heat retention block the Bluetooth signal.
However, with the Meater+ repeater block, I haven’t had any problem with the probe inside my thick Kamado Joe Version 3, Weber Smokey Mountain or kettle grills, with me monitoring temperatures on my phone in my living room, through a window and a clear 50 foot of clear space between us. Of course, your mileage may vary.
Alexa! Check my Meat!
One last feature to point out: If you’re using Meater in Cloud mode, and you own an Amazon Alexa device, you can “talk” to your Meater.
For example, you could ask Alexa how long it’s going to be before your roast is finished, and your device will read out the estimated remaining time.
Specs
- Probe length: 5.1”
- Probe diameter: 0.24”
- Maximum internal temperature: 212F (100C)
- Maximum ambient temperature: 527F (275C)
- 24+hours of continuous use on a single charge
- LED battery indicator
- Block dimensions: (L × W × H): 6.2” x 1.5” x 1.1”
A Look at the Meater Plus Probe
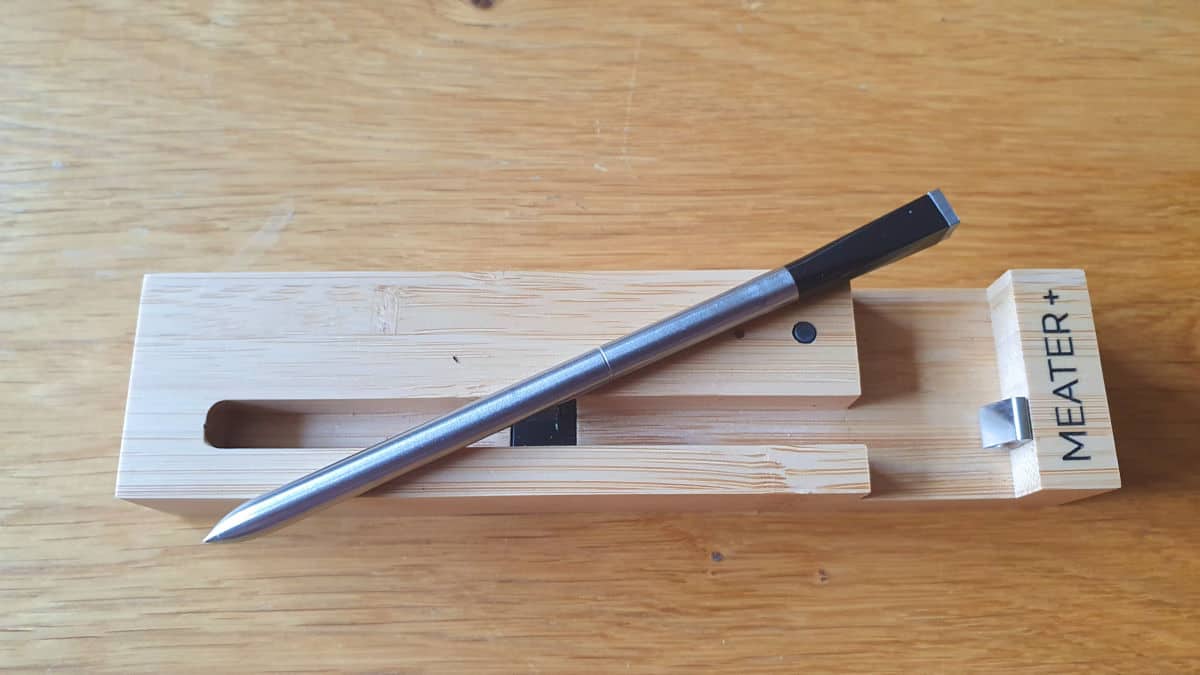
The stainless steel probe looks a bit like a dart without the fins on the end. Near the “pointy end” (that’s literally what it’s called on the app!), about 1/3 of the way up, is the internal sensor. At the wide end is the ambient sensor, and on the flat end is the charging contact.
You’ll notice a small band at about the midpoint of the probe. This is called the “safety notch”.
The idea is if you can still see the notch with the probe inserted, then you haven’t put it in far enough, and you won’t get an accurate reading, and may damage the probe on the ‘pointy end’ that can only be subjected to lower temperatures.
To clean the probe, just rinse it under the tap and wipe it off with a sponge. You can use mild dish soap, too.
Make sure you get the charging contact end perfectly clean, or it won’t take a charge I’ve noticed (only happened once, but it was VERY cruddy! Lol.)
The probe is water-resistant, but should never be submerged as it’s not waterproof, so take care with it. As I say, I’ve had two probes for a year nearly now, and they are still going strong.
A Look at the Charger
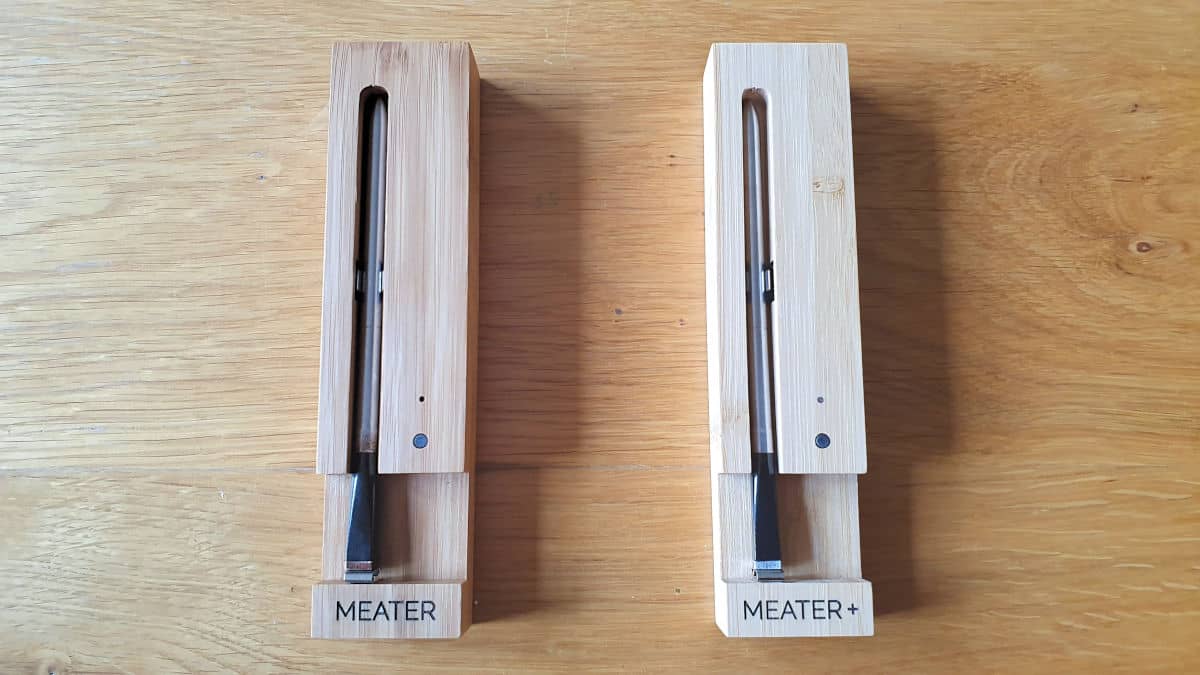
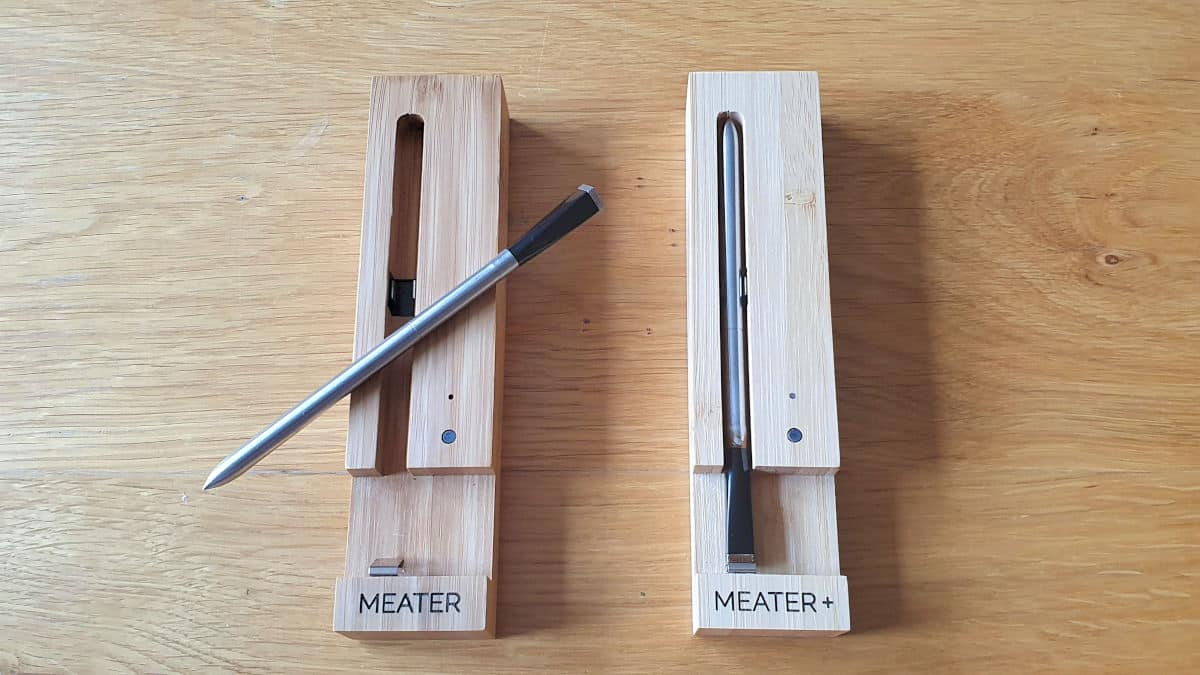
The difference between the Meater and the Meater+ is in the charger block. Let’s look at each one separately.
Original Charging Block
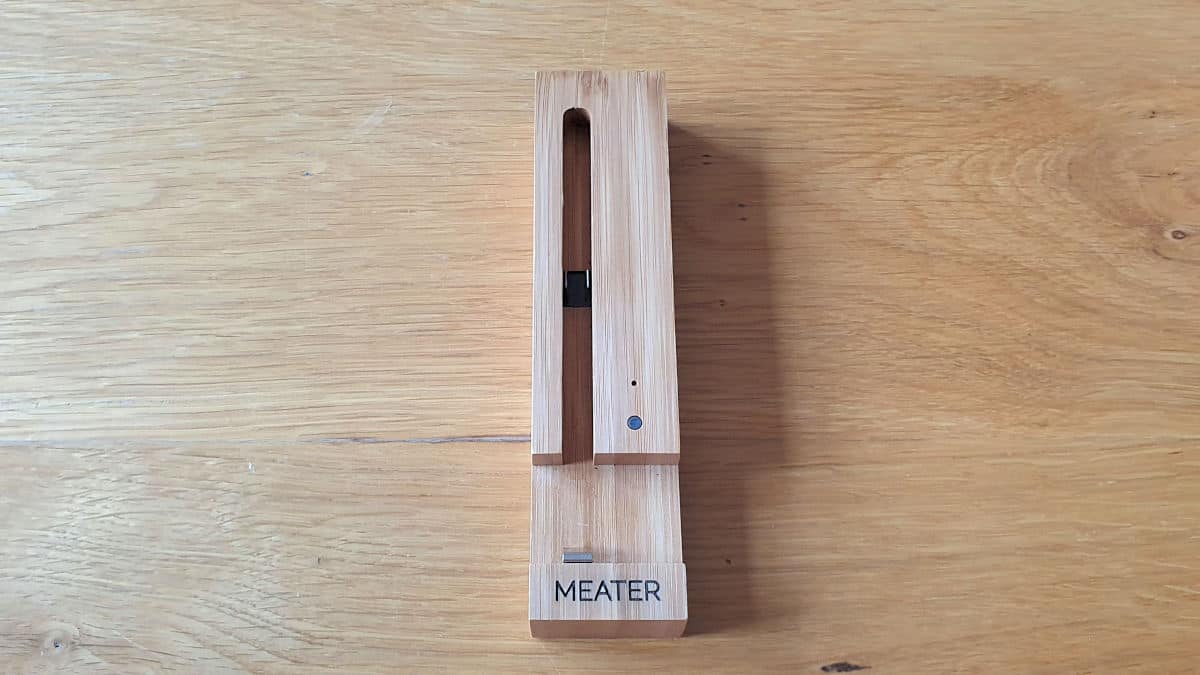
Attractively designed, the charging block is made from real wood. There’s a very obvious slot the probe fits into and a notched out area to make it easy to pick up the probe.
On the front of the block are a single button and an LED light. Pressing the button lets you know if the probe is charged or not; the LED lights green if it’s ready, and won’t light up if the battery level is low.
Moving to the reverse side of the block, you’ll find the cover to the battery compartment.
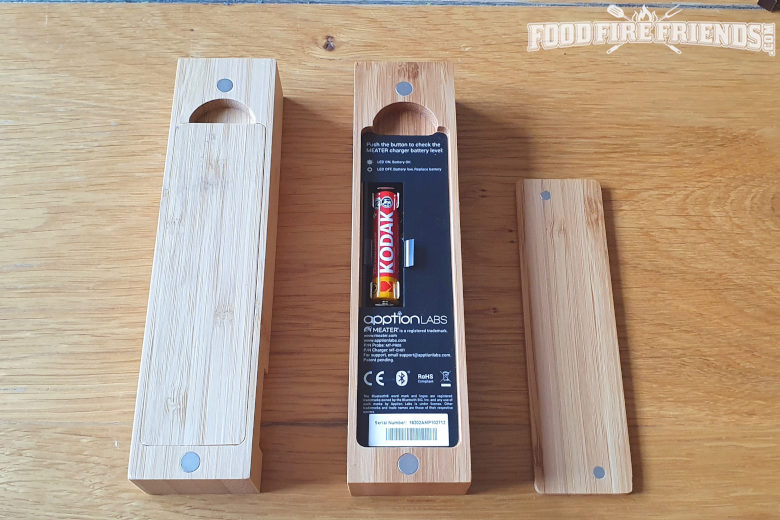
It, too, is made from real wood. Lift it up to expose the AAA battery. Expect to get about 100 charges out of one battery.
On the back you’ll also find a pair of magnets, allowing you to mount it to any metal surface if you desire.
Meater Plus Charging Block
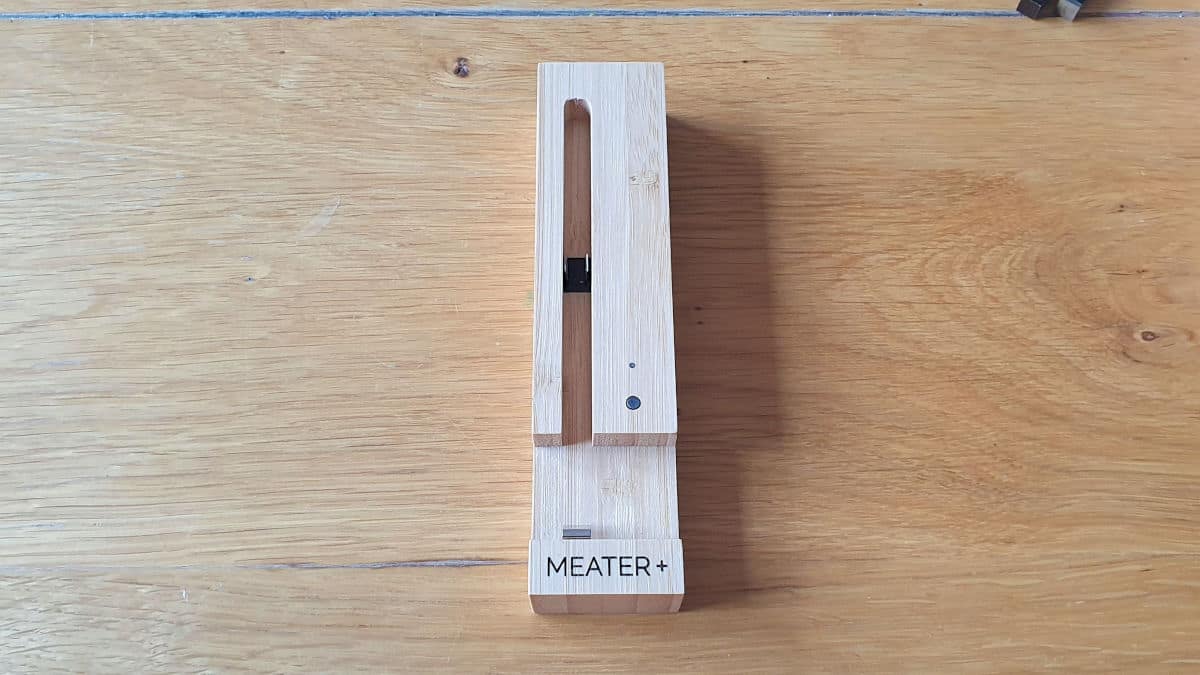
From the outside, the Meater+ charger looks exactly the same as the original’s. However, the + block also functions as a signal repeater to extend the range of the Bluetooth signal.
The marketing says this will allow you to get up to 5x further away than you can with the Meater.
I’ve not done any scientific tests, but the Meater probe inside my Kamado Big Joe will only reach my phone up to about 20 foot away. This is a ceramic grill and a bit less ‘signal blocking.’ In my kettle or Weber Smokey Mountain, this drops to probably 8 or 10 foot!
With a probe in any of these cookers, and the Meater+ block a few feet away repeating the signal, I can still monitor my cooks on my phone inside my house, through a window / wall and a good 50 foot of clean air to boot! So the Meater+ range has a significant advantage!
Pressing the button with the probe docked activates the LED battery indicator. If it’s flashing green, it means it’s charged; no light means it isn’t. If you see a red flashing light, it’s time to replace the AAA charging battery.
With the probe out of the dock, a green light means the probe and dock are connected, and red means they are not.
Speed and Accuracy
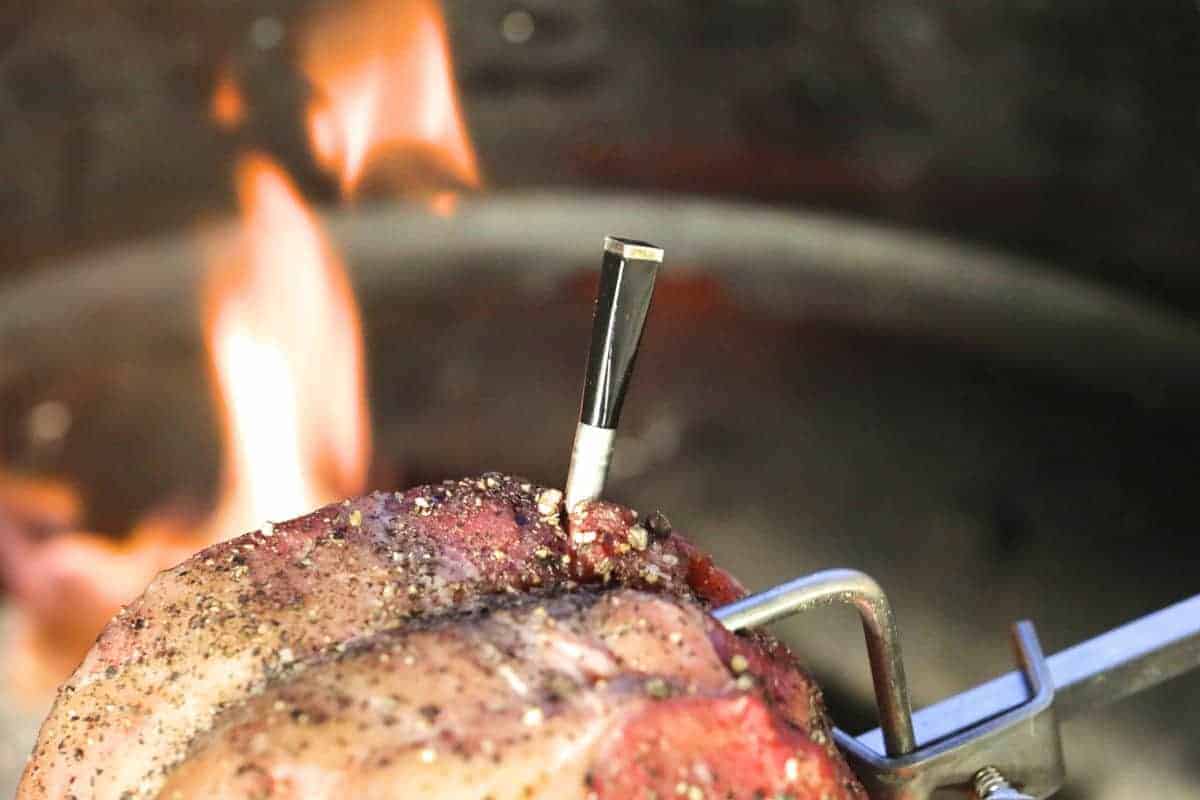
Well, the speed of connecting the probe to the app is undoubtedly impressive. Pull thermometer out of the dock and, if it has already been paired, it’ll connect to your phone faster than you can say “one Mississippi”. The Meater continues to perform quickly when the heat is on, giving temperature readings within a few seconds.
According to the manufacturer, Apption labs, the probes are accurate to better than +/- 1F. This is exceptional accuracy — many of the best on the market offer accuracy of +/- 1.8F. I have no reason to doubt their claim and have had no issues.
Where you might get into trouble is with the ambient sensor.
Wrong Readings at the Start of a Cook
With a dual-probe thermometer, your ambient probe clips to the grate and sits just above it, well away from the ‘cool pocket of air’ created by refrigerated meat.
With the Meater, wherever it protrudes from the meat, that’s where you’ll get your reading. So, if you stick it right in the top of a turkey, it’ll tell you how warm it is close to a cold turkey, and this will be way below the actual, correct temp of your grill.
First: Whatever you’re cooking, make sure to insert the probe in such a way that the ambient sensor is as close to the cooking grate as possible and 90 degrees to the meat surface if you can, so it’s as far from the meat as possible.
In the early stages of cooking, while the meat is still fresh out of the fridge, because of the closeness of the probe to the cold meat surface, it will show a temperature that is far below the actual ambient air temperature of your grill or smoker.
Please do keep this in mind and do not rely on the ‘ambient air temperature’ reading until the meat surface has had a good few minutes to warm up to the point where it barely affects this reading.
In my mind, this is not a fault or something to be put off by. It’s to be expected and is a symptom of how the unit works. It doesn’t bother me, and nor should it you so long as you know to expect it.
The ambient air temperature reading can be incorrectly low right at the start of a cook and should be ignored, particularly if the meat starts at fridge temperatures. However, there is a cheap workaround:
The Sacrificial Potato Trick
When you fire up your grill or smoker and want to measure the ambient temperature, so you know what temp you are cooking at, you can still use the Meater by inserting it into a sacrificial potato.
A potato will be room temperature. Insert the meat end into the potato, and there will be no ‘cool pocket of air’ to throw off the ambient air reading.
Get your cooker up to temperature and stabilized, then remove the Meater, throw away the potato, insert it into your meat, and off you go.
Maybe this is not ideal, but a potato is darn cheap, so it’s not going to break the bank each time, and this is a good workaround.
Range
How far you can wander from your barbecue or smoker will depend on your set-up and on which Meater you choose.
Let’s discuss the manufacturer specs when it comes to the range:
Using just Bluetooth and a standard Meater, you’ll have a range of between approximately 10 to 33 feet — the lower end is for smokers and kettles, and the upper for ceramic grills, gas grills and open grills and rotisseries.
Your environment also makes a difference; walls and fences can limit your range for example. For additional range, opt for MEATER Link using Wi-Fi for up to 165 feet, or buy the + model.
Using the signal repeater, the Meater+ has a Bluetooth range of up to 165 feet.
With either unit, you can set up MEATER Cloud and monitor your cook from anywhere in the world. Almost useless, but still cool.
Personally, though I have zero doubt on their range claims as I am sure if they have tested it to death, I seem to manage about 80% of the range they claim with the MEATER, and the MEATER+ I’ve not tested for full range, I just know it’s never failed me yet, across 50 foot, through a wall, from my garden to my sofa. It works well!
Design and Build Quality
As barbecue gadgets go, this is a pretty good-looking one.
The real wood used for the block is a classy touch; they could easily have made it out of plastic and called it a day. It’s the kind of thing you could leave out in the kitchen without it being an eyesore.
Because it’s wood, including the battery cover, there’s not much that can go wrong here. It shouldn’t fade, and it won’t chip easily.
Obviously, it can’t get wet, but that’s not a huge issue. And, thanks to the fact it’s wireless, including the charging system, there are no cables to detach, crimp, fray, or otherwise deteriorate.
Mobile App
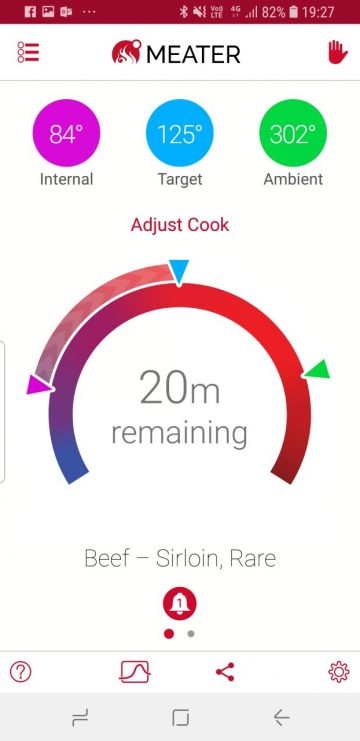
One of the key features of the Meater system is the mobile app.
This versatile platform is the nerve center for your next cook. You can grab it for Android (5.0 and later) or iOS (10.3 and later), but BlackBerry users are out of luck, I’m afraid. (My condolences to all three of you :p)
Activating the app triggers a brief tutorial and helps you get set up. Once your probe and app are connected, you can begin a new cook.
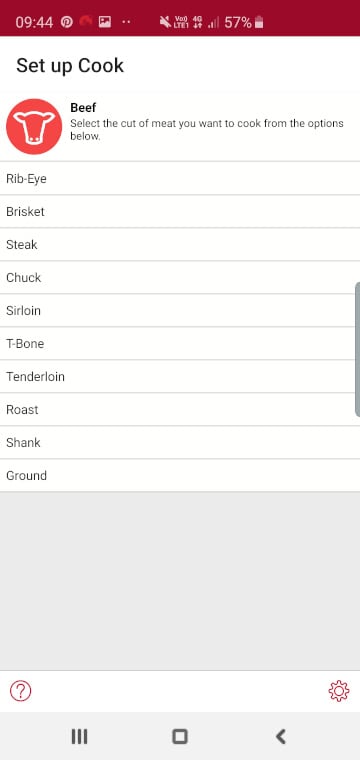
Begin by selecting one of the 5 meat categories: beef, pork (worst icon ever), poultry, lamb, and fish.
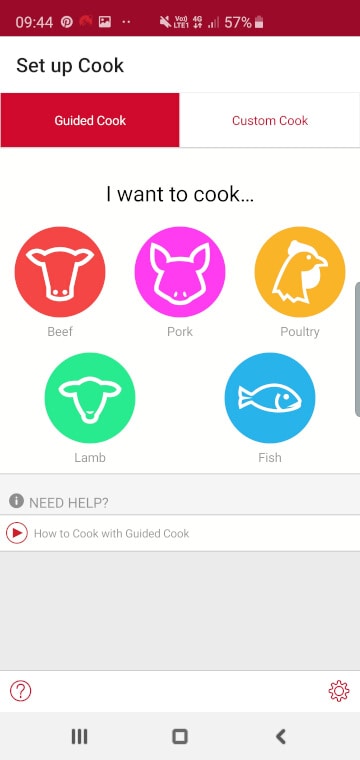
Next, choose the specific cut you’re about to cook.
For example, if you’re having beef, your options are rib-eye, brisket, prime rib, chuck, sirloin, T-bone, tenderloin, round, shank, and ground.
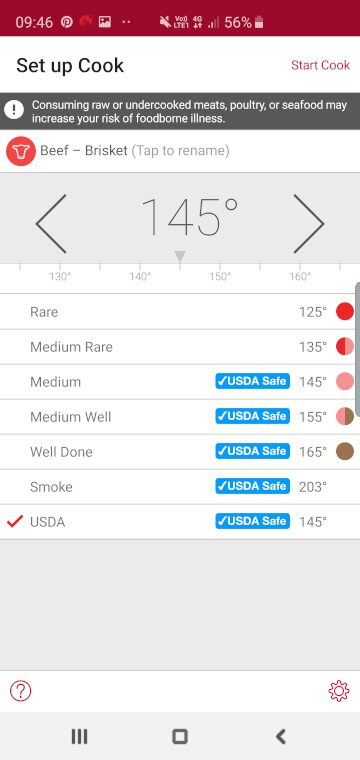
This will bring up a range of doneness options to choose from, with USDA recommended safe temperatures highlighted.
There’s even a little color icon to let you know what the inside your meat will look like when it’s finished, just in case you’re not familiar with the terms. The target temperature is customizable, too.
Although we always cook to temperature and never to time, it is nice to have an idea of how long it’s going to take before you get to eat. The Meater app can estimate the time remaining until the cook is over. Though you can always check out our guide to the most common average smoking times and temperatures.
As discussed before in this review, somewhat brilliantly, the app prompts you to remove the meat from the heat before it’s up to temperature. Why is this brilliant? Because it’s allowing for resting time to compensate for carryover cooking.
You smokers will appreciate the inclusion of “smoke” as a doneness setting for the appropriate cuts, such as brisket.
Once selected, you can set alarms for minimum and maximum internal and ambient temperatures, plus notifications for a specific amount of time since the cook began or until it ends. Name the alarm anything you want, such as, “Wrap the brisket” or “Add more wood”.
If you prefer to skip the presets, opt for a custom cook from the main menu and set the temperature you want. You can also set alarms for specific times during the cook.
Let’s say you want to toss the salad before your meat is ready so that you can serve everything at once. Set an alarm for, say, 15 minutes after the start of the cook and custom label it “salad”. A quarter of an hour later, the alarm will sound, and you’ll get a push notification on your phone.
Overall Ease of Use
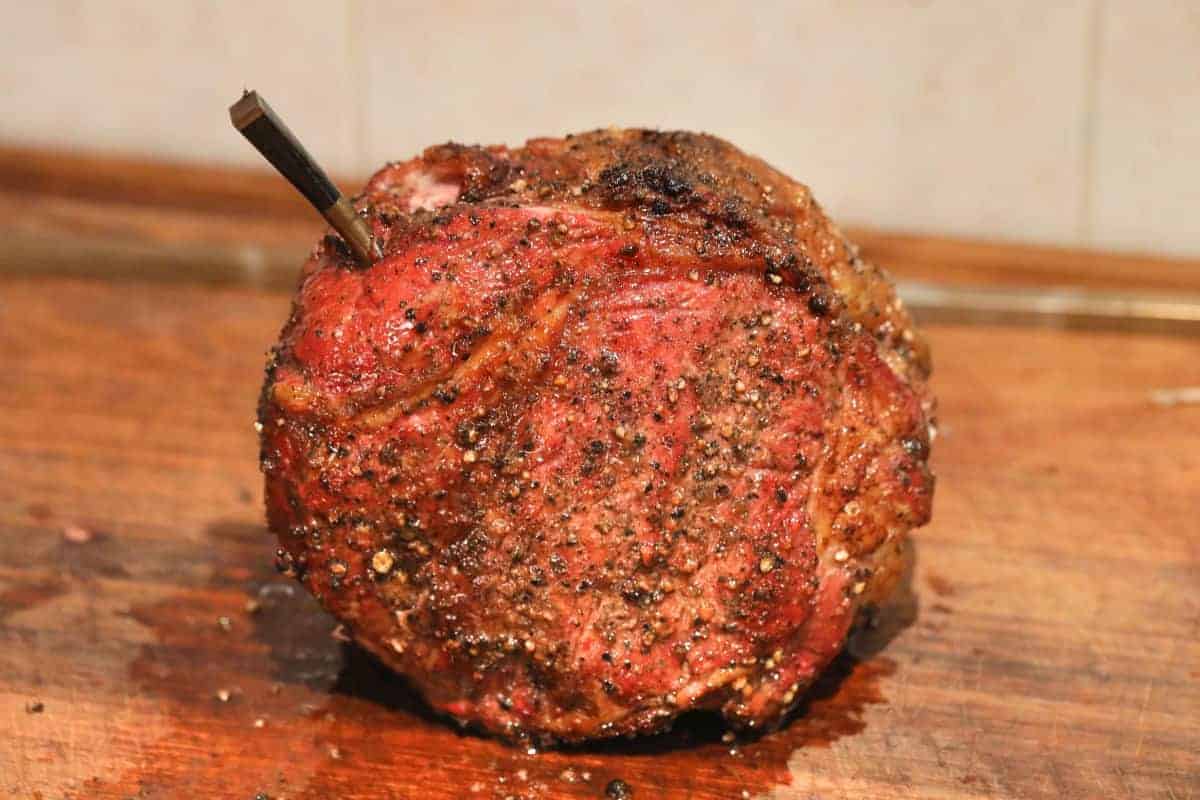
The probe is a cinch to operate since there’s really nothing to it. It’s a bit thicker than some other probes, making it a little tougher to insert, but the chunky end helps — just put a thumb on it and push. The safety notch takes the guesswork out of insertion; when it’s gone, it’s good.
Replacing the probe in the block is very easy. You really can’t put it in the wrong way, and it turns off and starts charging automatically. Remove the probe from the block, and it’s on, no buttons to push. Despite the additional function as a signal repeater, the Meater+ base doesn’t require any extra effort to “operate”.
When it comes to mobile apps, there are good ones and bad ones. This is one of the good ones. It’s an incredibly intuitive app, or at least it is if you’re even a casual smartphone user. It offers a huge range of features and configurations, and yet it’s all so easy-to-use thanks to clear labeling and a logical setup.
Warranty and Support
Apption Labs, the makers of Meater, give you a 1-year limited warranty against manufacturer’s defects. If you have an issue, just contact the “Customer Happiness Team” (I kid you not) via email or regular mail for assistance. They’ve got teams in California for North America, NSW for Australia and New Zealand, in the UK for the rest of the world.
Online, they offer an extensive list of FAQs, all categorized by main issue. It’s actually quite simple to navigate if you need any help. Plus, there’s a mini-library of helpful videos to show you how to use your Meater.
Should you decide Meater is not for you, you’ve got 30 days to return it for a full refund, minus a 15% restocking fee.
Like most companies these days, Meater has a newsletter you can subscribe to, and a blog you can follow.
Additionally, you can connect with and interact with other product users on Facebook, Instagram, YouTube, and Twitter. I searched all through the website and found special forms you can fill out if you’re with the press or identify as an influencer. Not sure what those lead to, but there you go.
It’s the ONLY Thermometer to Buy for Rotisserie
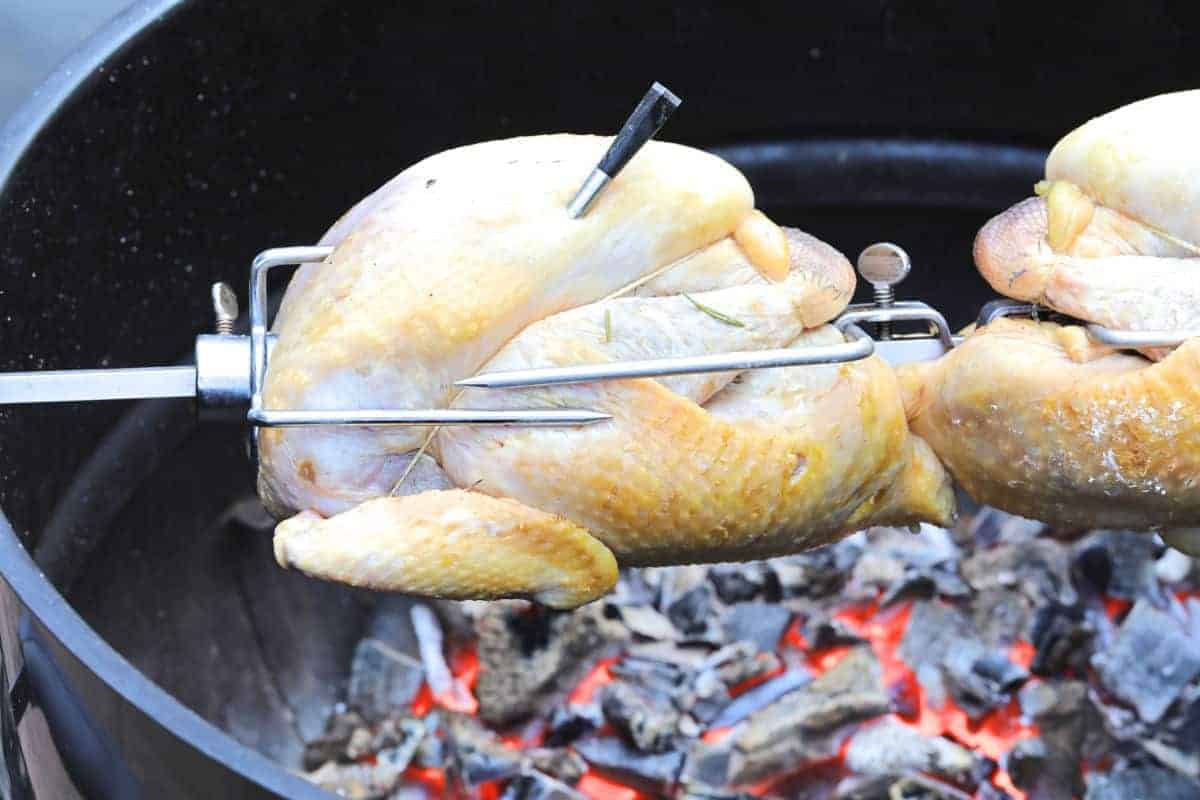
If you do a lot of — or even occasional — rotisserie grilling, then the Meater just might be the only thermometer probe you should consider. I’ve yet to see another probe that isn’t attached to a transmitter by wire.
A rotisserie spins and as it does so, wires attached to traditional probes get twisted, tangled and wrapped tightly, getting ever more knotted and shorter…shorter…shorter…until the inevitable disaster happens.
The Meater does away with this worry. There are no wires.
The Meater is the only truly wireless BBQ thermometer on the market. I’m not sure why they don’t market its benefits for rotisserie cookers more strongly, but it really is the only thermometer you can use to remotely monitor a rotisserie cook. I know of no other. For this it’s indispensable and highly recommended.
Final Verdict
Time to wrap it up! Is the Meater the real deal or just a bunch of hype?
What We Like
One of the best features is the ability to extend the range with either model. No more losing the connection just because you walked around to the front of the house. (Get off my lawn!)
Also, totally in love with the app. It’s incredibly simple to use, and is loaded with options. No matter what you cook or how you cook it, you’ll be set up in no time, whether you’re a first-timer or a pit boss.
Obviously, we love not dealing with wires. Threading them through holes is a nuisance; having to drill new holes is an even bigger nuisance.
Not to mention, this is the only leave-in thermometer you can use on a rotisserie. How awesome is that? It truly is one of the best smoker thermometers on the market right now.
What Could Be Improved
Overall, the probe is a little more challenging to put into tough cuts of meat than others I’ve tried. But, that’s a small complaint when compared with everything it does.
Also, it would be nice to have the option of plugging the charger into an outlet and not rely on the battery. Of course, then it wouldn’t be totally wireless, would it? A new AAA battery once a year isn’t the end of the world.
Will I Get Value for My Money?
There’s about a $30 difference between the Meater and the Meater+. Which one you choose is up to you, but either way, you’re getting great value.
Neither is priced out of competition with dual-probe digital thermometers (if you want to compare apples-to-apples, you have to look at dual-probes, since the Meater reads both internal and ambient temperatures), but the benefits of being totally wireless makes this is an awesome deal.
Personally, I would get the + version for the extra range. It’s definitely worth it.
Is The Meater Plus a Recommended Product?

A dual thermometer in a single probe that is truly wireless and can be used with grills, smokers, and even with rotisseries.
Providing real-time temperature monitoring of both your food and your cooker, it has a wireless range up to 165 feet, displaying information on your cook right on your smartphone via an app. In the app, you’ll also find detailed cooking instructions and recipes to follow, along with time estimations left for your current cook.
I certainly recommend trying the Meater, but which version will depend on your needs.
Either option is an excellent choice, but if you use a kettle grill or metal smoker, I’d suggest going with the Meater+ for the improved range.
For regular charcoal and gas grills, or if you pretty much always cook ‘lid open’, then the Meater will do just fine.
I have both, and you will see them feature regularly in my recipe and cooking snaps on this site 😉
Thank you for making it to the end of my Meater review. Hopefully I covered all the bases, and you’re now all the wiser on what I think is a marvelous product.
If you have any questions on the Meater range, please do get in touch in the comment section below, I will answer every comment.
Happy ‘truly wireless’ grilling!



Hi, Mark. Great review, thanks.
Do you know how long the battery in the probe lasts? And how much a replacement probe would be?
Rob.
Hi Rob,
They are rated to ‘1000 cycles’, so you should be able to fully charge it, and fully discharge it, 1,000 times. So 1,000 uses all in all as a minimum, which could be 5 days a week, for 4 years I suppose? I’m not sure if the battery degrades over time like most do, for example in a mobile phone or laptop, but I would assume they do?
Not sure what a replacement probe costs as not able to find that on the website. You could perhaps shoot them a quick e-mail?
For me, I think if it lasts a good 3 years, that’s value enough for me, and I’d be happy. My probes are going strong still after a year and quite some use in that time, so they seem solidly built and reliable.
(Hi Mario. I edited your comment and reposted after running it through Google Translate):
Hello Mark
I’m about to buy 2 Meater pro plus I can use them with the same app on my tablet. Or is it justified to buy the Meater block with 4 probes, which is a serious surcharge. Your opinion Mark.
Thanks for the effort Messelis Mario
Kind regards and happy and healthy 2020.
Hi Mario,
It depends on if you will ever need or want 4 probes. The Meater block is basically 4x Meater units, but in a single block. So you need to compare the price of the number of individual Meater units you want, to the price of the block, and purchase whichever is cheaper. Though you should also factor in that with the block, there is only one unit you need to manage batteries within, one unit to connect to, etc. So it’s also more convenient.
But yes, no right or wrong answer really. If you need 3 or 4 Meater probes, buy the block. If you need 1 or 2, and are price conscious, then buy one or two separate Meater units.
I’m glad you pointed out the mistake of readings at the start of a cook. It’s a big problem. It makes thermometer useless for setting up your grill at all.
How do we get the cooking temperature right? The Meater meat end cannot exceed 215 °F, so it must be in something colder than the BBQ temp. But when placed in the meat, then the black end is near the cold meat surface and reads wrong. So then you turn up the temperature of your barbecue, and then the food gets overcooked.
So how would you recommend we set up the barbecue temperature before putting the meat in? Apparently we need another thermometer just to get the cooking temp set before we can add any food and use the Meater.
Disappointing.
Hi Roxanne,
I can understand your disappointment, and it’s a valid point. Sadly, this is just how the thing works, so is what it is.
I have just added a workaround to the article, a method I have used a few times after I picked up the tip from a Facebook post some months ago. ‘The sacrificial potato’ trick.
Please have a re-read above, it will solve your issue for the cost of a single potato each time.
I hope this helps!
Mark.
Nice article! I guess you have another option for Rotisserie. How does this one compare to ‘The Meat Stick’?
Never used the MeatStick. The Meater was first, so it’s a bit of a copy. Whether it’s good, bad, better … I’ve no idea. I’ve seen it pop up a lot — particularly in CountryWoodSmoke Facebook group — but I’ve never seen or used one, so am not able to pass comment really. I’ll try to nab one and give it a few uses.
Can I sear my meat on a gas grill over direct heat with the probe inserted?
Hi Angela,
Not over a direct flame like that, no. It would almost certainly burn the end, and if not likely take it over its highest recommended operating temperature if over a direct flame. You can use it inserted into meat when searing over a solid surface (a skillet for example.)
Great review Mark. I already purchased one, but your review did a great job spelling out the details. Thanks!
Thanks, David.
They’re a great thermometer once you get over the initial erroneous readings right at the start of the cook. I use mine a hell of a lot!
Mark — both of the “laws” you state at the beginning of your article are not (always) true. BBQ is often cooked to doneness, which can’t be determined by time or temperature (and often time is a better indicator than temperature). Furthermore, the adage “if you’re looking you’re not cooking” is also not true. While it is true that excessive “looking” can affect the cook. Not enough looking can also affect the cook. Sometimes you need to look, and in a long cook, opening the lid once in a while makes almost no difference in the cook time or final product, especially if you open the lid for a relatively short amount of time (look at rebound data for both the meat and the temp inside the BBQ). Thank you, for the review, however; there’s a lot of good information in it. I came looking for spec differences between the Meater and Meater .
Hi Michael,
Thanks for taking the time to comment … You’re right on both counts 🙂
While cooking to temperature is super important and true of things like steak, chicken, pork chops, smaller cuts of lamb and more; cooking large cuts low and slow where rendering of fats and connective tissues is important, I agree that you do cook to ‘doneness’ and feel. I do actually discuss this in every article I have on ribs, brisket, pulled pork, etc. So I’m somewhat contradicting myself across the site! And rendering out the connective tissues is absolutely a function of time and temp, and is why I’m not a huge fan (still a fan, just not huge) of ‘hot and fast’ ribs or brisket. They can be good, but often just aren’t as tender and not rendered out properly IMO. And also ‘done’ temperature for large low and slow cuts can vary wildly. A brisket can be ‘done’ to my preference at anywhere between 200 and 213F (Yes, I’ve had to take some that high before!)
With the ‘not cooking if not looking’ — again, yes. It’s not something I ever think about while cooking. If I need to look and check temp, I do. It’ll only add 30 seconds to the cook if that. That time loss is not going to kill me!
(I’ve removed the parenthesized ‘and they are’ from it to leave it a little more open ;-))
Hey, this is pretty slick review. Good stuff!
Thanks, Ukko 🙂
Hi Mark, enjoyed your article, thank you. Question. I have a Napoleon prestige with rear infrared burner which I use regularly for rotisserie. Wondering if the flames that come out of there will damage the tip of the Meater plus (sensor) when it turns and the tip is facing the flames. I know it is only for seconds, but will it be ok? Thanks, Pierre
Hi Pierre,
For rotisserie, you would come in from the side, parallel to the spit, into the thickest part. You would not come through the surface of the rotating meat that will be close to — then far from — then close to — the flames as it turns. Then there are no issues unless you go super, super hot.
I’ve used it regularly with my rotisserie, but I’m a charcoal man. Never had any issues. But for times I want to ‘really ramp up the heat’ at the end of a cook, perhaps to crisp up pork skin or whatever, I remove thermometer anyway. I get very close to my target internal target temp, remove Meater, dump in a half chimney of pre-lit coals, sear super hot for just a few minutes and remove.
With the “Meater “, I’d like to be able to use 2 probes at the same time, (such as cooking a filet and Rib-eye at the same time.) Can you do that? If so, can you purchase a separate probe?
Hi Bob. The Meater charging block only connects a single probe, so You will need two Meater charging blocks (single probe each), or the Meater block in order to connect them via Bluetooth. You cannot buy just a probe, without a charger or block to connect it to. The standard app will allow you to view 2 on your smartphone once you have the correct kit.
Hey Mark, Great article. I just received a model as a gift. I downloaded the app and charged it up. Now ready for use. My question is you mention that you can use it with Alexa, what about Google Assistant? Thank you.
Hi Mike. To my knowledge it doesn’t. There was talk of them developing the ability for it to work with Google Assistant a couple of years back, but it seems to have been forgotten. Not sure if they ever did implement it.
EDIT: Just did a check, and the words “Google home” or “Google Assistant” do not appear anywhere on the meater.com website, which makes me believe they have indeed not implemented this yet.
Mark, Your review covering the Meater thermometers is absolutely excellent. Thank you, for your research and passing along such informative information. Without a doubt I will buy the Meater . Now I must return to the original review you wrote concerning charcoal grills. My guess is that review will be as well written at the one I just completed.
Thank you,
John Dibble
Thanks, John.
Mark — great review, thanks very much!
Is there any way to get around smaller cuts of meat? The line seems too high up unless it is a long piece of meat. No issues with ribeye, etc. but I have issues with the meater being way too long for baseball steaks and filets. Thank you!
Hi Johnny. If a cut of meat is too small for a leave in thermometer to use, I just go back to doing it manually, using an instant-read thermometer intermittently to check internal temp.
want to use this only for oven use. no grill etc ok for ovens??
Yes, just be mindful of the manufacturers stated operating temperatures.
Great review! Can I ask a question please?
Am considering buying the 4 probe Meater for BBQ (Kamado Big Joe) and in kitchen using an AGA. Will the probes work with these cooking devices?
Thanks,
Carl
Hi, Carl.
I use my Meater with a Big Joe all the time, so that will be fine, yes. With an AGA I cannot say I’m afraid as I’ve no got one. It should be fine, though I would think the Bluetooth range will be limited somewhat by the thick metal walls?
Michael,
I too want to know the main differences between the Meater and Meater ; however, I do not see that you addressed the differences? The original Meater had lots of complaints about the range. Then the PLUS came out, but there is NO PLUS BLOCK? I’d like 4 probes, but must I wait for a PLUS BLOCK?
Mark I really appreciate your review. I received one of these as a gift and I’m just not sure that I can find a good use case for it. I don’t rotisserie and I don’t use a traditional grill with a cover. I have a flat-top grill (the char-broil Vibe) which gets *searing* hot but isn’t ideal for long, slow cooks. It’s perfect for me, since I primarily sous-vide larger cuts and finish them on a ripping hot surface. I primarily use my instant read thermometer for smaller cuts where precision temperature is important – fish, pork chops, lamb chops, etc.
This presents 3 problems for me. 1) I can’t use the probe in the sous vide since it isn’t water proof 2) I can’t use the probe on my grill since the ambient temperature gets north of 700 degrees when I’m searing, and 3) the “safe depth” distance on the probe is so long (looks like 3.5″) that I don’t think it is usable on the typical cuts that I am measuring.
It seems like a great product, its sleek and well-made. I definitely see how it is useable for a rotisserie. I hate returning a gift so I’m just wondering if you think it’s a product someone like me could find a use for?
Hi Graham,
You can also use it for roasting cuts in your kitchen oven, assuming this is something you occasionally do? It can still be used in the kitchen, not just for outdoor cooking.
Not mentioned is the small-print warning to keep your phone plugged in. After I looked over the app, I left the Meater app running (it doesn’t turn off unless you force stop it) and my phone was completely dead in a few hours
Hey there… awesome article. I’m still trying to figure out proper probe positioning with my Meater. I had one issue with a huge roast, It turned out really rare in the middle. I put the probe in the end and I’m thinking, maybe I should have put it in the top? (Cooked on BBQ)
Anyway, one thing I’m loving is using with my iPhone paired with my Apple watch. I can monitor the cook directly on my wrist which of course, leaving my phone behind, gives me even better range 😁
Hi Kevin,
You want to place the probe in to the center of the thickest part of the meat, as that is where the heat takes longest to get to and will be the last to measure to the doneness level you are aiming for.
great review, Mark! Did you happen to test the Meater (not ) with the Meater Link? I’m purchasing this for rotisserie, and if the Link works well, I don’t see the need for the Meater Plus….
Am I missing something?
thanks! Frank P
Hi Frank. The only difference is a Bluetooth repeater in the Meater block, that increases line of sight Bluetooth connection from 30 feet to 165 feet, (However, in reality it is hard to achieve these perfect condition distances!). So if you were to use the Meater with a ‘smart device’ right at the grill, then there will be no difference. The probes are the same, it is the block that is different.