
In this Kamado Joe Junior review, I walk you through every feature, show you what it’s like to cook on, and provide an honest assessment of its performance, highlighting what makes it a significant contender in the portable grill market.
Having owned this grill for nearly two years and used it at least 50 times, I’ve experienced first-hand how it handles everything from slow smoking to high-heat searing.
But is this the right grill for you?
I know, I know. Go big or go home. The bigger, the better. Making the big time. There’s an obsession with all things big in this world. I fall victim to it myself — I like more burners, cooking racks, and square inches. More, more, more.
Sometimes, though, a smaller solution is the right one. That’s the way I approached my testing and review of the Kamado Joe Junior ceramic grill.
Read on to learn what I thought of its performance, who I think it’s best suited to, and in what situations.
Jump to:
Ratings and Final Verdict

The Kamado Joe Jr. is a testament to the idea that good things come in small packages. Ideal for the solo griller or a couple, this portable ceramic grill is great at cooking everything from slow-smoked pulled pork to perfectly seared steaks, because it has a wide temperature range and is highly efficient.
This grill has versatility in spades. It can grill, smoke, sear, bake, and roast, from a low 225°F to a scorching 750°F, and maintain a steady temperature in even the windiest conditions.
You can tell that I love it, but it does have some flaws or drawbacks.
It is a portable grill but weighs 68 pounds. So you will need a buddy to help you carry it over any kind of distance. And keep in mind it is ceramic, so if it takes a hard knock or tumble, it is not as durable as a metal grill will be.
Also, its stainless steel grate could have been cast iron for improved performance, and I would have liked to see a slide-out ash drawer included. These were probably consciously decided trade-offs to keep the weight down for the ‘portable’ tag, though.
In summary, if your grilling parties are small or your adventures grand, the Kamado Joe Jr. delivers a big flavor in a small package, making it a wise investment for serious grillers. It’s more expensive than most other portable grills and smokers, but it does have the backing of a lifetime warranty, so it may even work out cheaper over many years.
Pros
- Replicates full-size kamado experience in a portable unit.
- Versatile: grills, smokes, sears, roasts, and bakes.
- Excellent build quality, so will last a long time.
- Well insulated, so holds a steady temperature for consistent results.
- Fuel efficient for reduced running costs.
- Easy to clean by simply brushing ashes out of the lower vent.
- Cast iron stand with built in handles keeps it off the ground for safe use, and a way to carry for moving.
- Lifetime warranty on the ceramics.
Cons
- Somewhat expensive compared to competing ceramic grills (but you are paying for higher quality!)
- Heavy for a portable grill, but is due to the great build quality.
- Lacks a slide-out ash drawer found in larger models.
- Stainless steel grate not as premium as expected.
- Requires a learning curve for temperature control.
- Weighs 68 pounds, challenging to move alone.
- Handles could be more comfortable for carrying.
Who is the Kamado Joe Jr. Best Suited to?
This is not a cooker for hardcore smokers or anyone cooking for a large group. For that look at full-sized kamado smokers. But that’s not to take anything away from it — it’s just too small for big jobs.
As a backyard grill, it’s ideal for couples or anyone who lives alone. It’s especially suited to anyone who fits in one of those categories who also has a small outdoor space.
Where the Kamado Joe Junior shines, though, is on the road. It’s built with weekend campouts, tailgating, fishing trips, and cottage escapes in mind. If you and your partner like getting back to nature, this grill is just the right size.

31 Kg, with a 13.5″ diameter cooking surface. Small but mighty, and incredibly versatile being capable of grilling, smoking, searing, baking and roasting.
Our Ratings Explained
Here is why I gave the scores I did for the categories and factors on which I rated the Kamado Joe Jr.
Performance and Versatility
The Kamado Joe Jr. shines with its versatility and performance, packing a big punch in a small package. Despite its compact size, it offers a wide temperature range from 225°F to 750°F, so it’s capable of grilling, smoking, searing, baking, and roasting, making it a Swiss army knife of portable cookers.
I’ve cooked on it all these ways multiple times — except for never baking — and I’ve found it does them all very well.
However, its small cooking surface limits the amount of food that can be prepared at once, which doesn’t suit any gathering more than 4. Compared to other portable grills, its ability to maintain consistent temperatures and its versatility is impressive, but its size can be a limiting factor for those looking to cook larger meals.
Score: 9/10.
Ease of Use
The Kamado Joe Jr. is user-friendly, but only after overcoming the initial learning curve of starting the fire and controlling the temperature. I’ve had Kamados for years, so it was second nature to me, but I do remember the learning curve with my first one.
Its design includes a built-in temperature gauge and easy-to-adjust vents for precise temperature control. It is simple to assemble, easy to get going and start cooking. But you must put in some practice and gain experience to hit and hold a steady temp every time. And if you go too high, it takes sweet time to come back down because it is so thick-walled and efficient. So, it loses a point here.
Score: 8/10.
Build Quality
The Kamado Joe Jr. boasts exceptional build quality, with a thick-walled, heat-resistant ceramic shell that performs exceptionally well in maintaining temperature and is long-lasting.
The use of high-quality materials like stainless steel for the cooking grate and cast iron for the air vent and stand underscores the premium build.
This grill is built to last, reflecting its higher price point compared to some competitors. The only minor drawback is the stainless steel cooking grate, which, while durable, could be improved by being cast iron with its higher heat retention and improved searing capabilities.
Score: 9/10.
Size and Portability
Designed for portability, the Kamado Joe Jr. offers a compact solution for grilling on the go. Its small footprint makes it ideal for tailgating, camping, or beach cookouts. However, its weight of 68 pounds requires two people to move, and even then, the thin metal handles hurt my hands after only a few short minutes. I say hurt, more a minor irritation than a pain, but you know what I mean.
So, while it’s more portable than full-sized grills, there are lighter alternatives available that are more convenient.
Score: 8/10.
Temperature Control and Range
The Kamado Joe Jr. has excellent temperature range and control, from 225°F to 750°F. This wide range allows for a variety of cooking styles, from low and slow smoking to high-heat searing.
The ceramic construction and design of the vents provide excellent insulation and airflow management, enabling precise temperature adjustments. I can easily pick a temp, get it there, and hold it there. And I believe anyone can learn to do so, but there is a learning curve for those new to Kamado-style grilling, so I have to deduct half a point.
Score: 9/10.
Cleaning and Maintenance
Cleaning the Kamado Joe Jr. is relatively straightforward, thanks to its simple design and the inclusion of tools like an ash tool and grill gripper. However, the lack of a slide-out ash drawer, a feature found in Kamado Joe’s larger models that I own, means that cleaning out the ash can be more cumbersome than it needs to be: You need an ash vac or scrape and brush.
Despite this, it’s easy to maintain with little regular care.
Score: 8/10.
Smoking Efficiency and Flavor
The Kamado Joe Jr. is a highly efficient and effective little smoker. I am easily able to maintain the low temperatures required for extended periods of time. And its design helps lock in smoke and moisture, enhancing the flavor of the food.
Because it’s so small, though, the fire burns cooler, producing slightly heavier smoke compared to larger smokers that can hold a hotter fire. However, the quality and flavor of the smoke are still outstanding.
Score: 9/10.
Value for Money
The Kamado Joe Jr. offers good value for money because of its build quality, versatility, and performance. However, it’s priced higher than most portable grills, so I cannot say it offers excellent value for money.
For me, its performance justifies the investment. I’m passionate about grilling and smoking and felt I needed this portable option. But I have to knock off a point because more affordable options are just as capable.
Score: 8/10.
General Overview and Core Features

Starting with the basics, the Joe Jr. Is a portable ceramic kamado grill. It runs on charcoal, and you can use it for both grilling and smoking food.
As I’ve already mentioned, it’s a small grill; the cooking grate measures 13.5” in diameter, providing 148 square inches of cooking space. To put that size in perspective, many standard gas grills have upper warming racks bigger than that.
For such a small grill, the Kamado Joe Junior has a wide temperature range. You can smoke low and slow at 225F, or you can crank it up to a screaming 750 °F for an epic sear in just minutes.
Now, don’t get me wrong on its size — this is meant to be a portable grill. At under 20” across and about two feet tall without the stand, the Joe Jr. Is easy to stow and go. Fair warning, though: it weighs 68 pounds empty, so you might want a hand loading and unloading. It’s a 2-person job for sure.
Manufacturer Specs
- Width: 50.165 cm
- Height: 68.58 cm (w/ stand)
- Depth: 52.705 cm
- Temperature range: 107 °C — 399 °C / 225 °F to 750 °F
- Weight: 30.8443 kg / 68 lb
- Cooking surface: 34.29 cm / 13.5”, diameter 375.92 sq. Cm. / 58.3 sq. In
Why Trust Us and Our Review
I’ve been hands-on with the Kamado Joe Jr for over two years now, using it to grill and smoke a variety of dishes. This experience, combined with my years of BBQing since 2005, gives me a unique perspective on how it compares to other grills I’ve used.
I’ve tested, cooked on, and written about 100s of pieces of equipment, making me well-versed in what makes great BBQ equipment.
Also, my review is backed by extensive research, including reading up on professional critiques and scouring social media and forum threads for feedback from fellow BBQ enthusiasts, ensuring a well-rounded view.
31 Kg, with a 13.5″ diameter cooking surface. Small but mighty, and incredibly versatile being capable of grilling, smoking, searing, baking and roasting.
In-Depth Review and Test Results
I’m an experienced Kamado user, as this Joe Jr is my third one (I also have the classic 1 and the Big Joe 3.) I have owned and used Kamados for many years now. So for me, there was no learning curve, and I was able to produce excellent food right away on this unit.
But how does it compare to other grills and smokers? And how would it be for new users to the Kamado world?
Let’s find out.
Unboxing and Assembly

Do you have to be a handy person with hours to spare to put together your new Kamado Joe Junior?
Let’s find out.
What’s In the Box?


The KJJ comes in a single box, and it’s expertly packed with Styrofoam and cardboard inserts. Inside the cooker’s body, you’ll find the stainless steel grate and heat deflector, the fire ring, and the firebox.

Outside the cooker, we’ve got the stand, the top vent, and the lid-mounted thermometer.
Kamado Joe kindly provides an ash tool for cleaning out ash from the bottom and a grill gripper for moving your hot grate when you need to add more charcoal.
Ease of Assembly
Putting the grill together is very easy indeed. In fact, it arrives pretty much assembled with the main body of the grill in one piece, the lid and base already joined by a hinge and the metal banding on each half.
To assemble, you just need to unwrap things, then place a few items inside the grill in the correct order.

Take everything out of the crate, and rip away all the plastic wrap. You can now place the Joe Jr into its stand.
Now open the grill, and place the components inside in this order:
Place the firebox into the grill, making sure to line up the cutaway with the bottom vent door, so you get good airflow and can scoop ash out after a cook.
Place the fire ring on top of the firebox, with the little notches at 2, 6, and 10 o clock so when the grate is in place, the hinge is at the front and most accessible for adding smoking wood or coal if you wish to.
Now place the cast iron fire grate into the bottom of the firebox, with the flat surface up.

Put the heat deflector into the rack, and then place the rack onto the fire ring, with the rack sitting in the three notches of the fire ring.

Finally, place the stainless steel grate onto the rack, with the hinge facing forward.

For the final step, you now simply close the grill lid, and place the top vent over the chimney.

And that’s it! This whole process takes about 10 minutes.
First Impressions
In a world of black, maybe bronze, and, if you’re lucky, stainless steel, the fiery red of the Joe Jr. Is a sight for sore eyes. Buying one of these in its striking red livery not only means you own a quality grill, but it also means you want people to notice you own a quality grill.
The Kamado Joe Junior looks like a scale model of a full-size ceramic grill. It’s only 27” on the stand! I suppose that’s basically what it is? It’s a classic design, and the black accents and stainless steel vent badge really set it off.
Can a thing look both small and robust at the same time? There’s no doubt this is a tiny grill, but it seems solid. Even the stand, which is simply made of metal rods, has every appearance of being tip-proof.
Time to get up-close-and-personal and see what makes the Kamado Joe Junior tick.
Build Quality
Like all Kamado Joe grills, the Joe Junior is a very solidly built premium product using high-quality materials. It’s tough to beat ceramic for heat retention, and it’s one of the things I love about cooking on a kamado. Yes, it’s also the reason why such a small grill weighs almost 70 pounds. But, the quality of the cook compensates for the extra exertion when you’re moving it around.
Additionally, the fire grate is made from solid cast iron and should last essentially forever.
The Cooking grate is stainless steel, as is the bottom vent. Even the lid hinge is top-drawer; it’s a breeze to lift the spring assisted dome, and it stays in place as you tend your food or the charcoal.
The stand is made from powder-coated cast iron, which gives a good stable base that will last a long time. The grill does sit very low on the stand, though, so you will need to bend over to use it or place it on a raised surface. The base of the grill sits high off the ground, though, when in the stand, so putting it on a table is fine and will not be a fire hazard.
The handle to lift the dome is HDPE, doesn’t get hot during use and is comfortable and easy-to-use.
Overall Ease of Use

There is a bit of a learning curve for new users in starting the fire, bringing the grill up to temp, then learning how to control the events to stabilize the temperature at the heat you want to cook with. But as long as you are patient, follow the guidelines, it’s actually straightforward.
Getting to grips with using the Kamado Joe Jr is no more complicated than using any charcoal grill. And in fact, because it is so well insulated, the temperature swings are way less severe than with a typical charcoal grill, so it’s easier to use than, say, a weber Kettle.
I reverse seared a large 1KG+, 45 day dry-aged porterhouse steak for illustration purposes to discuss different elements of the grills’ use and performance. Here it is, heavily salted and waiting to go on at 250 °F for a quick smoke before being seared later.

So here’s how I got on for this two-part cook and how the grill performed in use.
Lighting the Grill
The best way to light a kamado grill is to start a small fire and allow the grill to come up to temp slowly. Do not overshoot, as it’s then hard to bring the temperature back down.
So my preferred method is to use a single firelighter in among the charcoal. I bank the coals up toward the back, and dig a natural firelighter into the coals before setting it alight.

Let it burn for 5 minutes with the lid open, then I spread the coals about a bit more evenly across the fire grate:

I then place the cooking grate in, and for now place the heat deflector on top of the cooking grate, so it can heat soak and come up to temp with the grill, without restricting the airflow.

Now close down the bottom vent to about halfway, and the top daisy wheel fully open, so the grill can slowly up to temp with less chance of overshooting. Be patient with it while it comes up to nearly your target temperature, (in my case here, 225 to 250 °F.)
You want all the components, the grill walls, grates, deflector, everything, to heat soak and be at your cooking temperature before you start. I typically allow about half an hour.

Once you get to your final target temperature, dial the vents down further to stabilize it. There’s more on this a little later.
So as you see, it’s very easy to get lit in my opinion. Just start small, and be patient.
Temperature Range, Control, and Accuracy
The manufacturer specs state this grill can be held between 225 °F and 750 °F. However, I’m able to hold it at about 180 °F successfully, and have had it way over 750 °F (by accident.)
I’ve had this grill settled at 225 °F for low n slow smoking for up to 5 hours. I’ve seared at 600 °F. I’ve even had it blow right off the scale during a burn-out self-clean, where it exceeded 900 degrees Fahrenheit!
I do not recommend doing this high a heat ever, as it can lead to drying out and reducing the lifetime of the felt gaskets between the lid and body. I just had the vents wide open and forgot about it…so it happened.

For me, temperature control is easy because I’m experienced with these grills (unless I forget all vents are wide open! Lol.) For a new owner, it is something you need to learn.
The great thing about ceramic grills is they are so well insulated, they hold temperatures well. So once you learn vent control, achieving and maintaining a steady cooking temperature is easy indeed.
It’s a process that is too long to detail here. But I have a highly detailed guide to using a kamado grill. Temperature control is explained in depth there. And fear not, it’s not at all difficult!
The one issue most people have with any Kamado — and this is true for the Joe Jr — is overshooting your target temperature and then being unable to bring the temperature back down.
Make sure you start a small fire and allow a good half hour to come up to cooking temp, slowly controlling things with the vent. If the fire gets too big too quickly, it will get too hot, the ceramic will absorb the heat, and then dropping temp can be slow and difficult. Understand and avoid this, and then things are straightforward.
For a cooking temperature of approximately 250 °F, I had the top vent daisy wheel about one-third open and the bottom vent open about a finger width.

The grill then held a steady temp of about 235 °F for the hour it took to bring my steak up to 120 degrees Fahrenheit internal. The temperature fluctuated only by single digit degrees during this time.
I used a Meater wireless thermometer probe to measure temps during this cook, as can be seen inserted into the steak here:

Smoking Performance
It works well.
I used a single piece of cherry wood for my steak, as it’s mild and gives a good color. To do so, simply place the smoking wood atop the burning charcoal, and wait for the worst of the heavy white smoke to finish before placing your meat on.

The grill held a steady 235 °F for the duration of my low n slow phase of the cook, and the smoke, although white, wasn’t heavy.
Kamado grills do tend to give a slightly heavier, whiter smoke than the most desirable ‘blue smoke’ you often hear about, but that’s the nature of the beast, having such a small and not too hot fire inside. It’s unavoidable, but perfectly acceptable.

This smoke from a Kamado isn’t heavy, bitter, creosote flavor producing. It’s just a little heavier and whiter than you’d get from a pellet grill or an offset smoker. Still good and very tasty!
This is my steak after the low n slow, indirect heat smoking stage:

Grilling Performance
Once my steak had hit 120 degrees Fahrenheit internal, I removed it to rest uncovered while I brought the grill up to a grilling temperature.
I removed the heat deflector, opened the bottom and top vents wide, and then just waited. Within 20 minutes, all the coals were glowing red and white-hot, the ambient temperature (as measured with a digital smoker thermometer) peaked at about 550 degrees Fahrenheit.

The grill can go hotter, but it would require more fuel. And this is plenty hot enough for searing.
I then seared my steak until it had a nice Maillard crust, and the internal temperature had reached 130 °F, so it would come up closer to 135 °F after resting again.

Ease of Cleaning
Cleaning the Kamado Joe Jr requires either an ash vacuum or scraping ash out of the bottom vent using the supplied ash raking tool. I do have an ash vacuum, but it’s just easier to scrape it out, in my opinion.
What I tend to do, is if there’s much charcoal left, I close the vents and let the fire go out, because I can reuse the fuel on the next cook. If there is little charcoal left, open all vents wide and let it burn right out, which helps clean the insides. I can then let it cool before cleaning.
To empty out the ash:
- If you burned all the fuel, remove the fire grate and empty all ash into the bottom.
- If you have fuel remaining, stir it so that ash falls through the fire grate into the bottom, leaving unburned fuel still in the firebox.
I now place a metal bucket over the bottom vent and use the ash rake tool from the inside to first push all ash down the sides into the bottom, and then toward and out of the vent door. I then use the ash rake tool to scrape the ash out from the outside into the bucket.
This can be made easier by having the grill on a table, with the vent just overhanging the edge, so ash can fall into the bucket, as seen in the pics below.


Portability
I have taken my Joe Jr camping before and to the beach a couple of times, so I have experience of ‘grilling on the go’ with it. It weighs 30KG, so two people need to carry it and move it to where you wish to cook. So it’s heavy, but it is still portable and earned a well deserved place in my list of the best portable charcoal grills.
There are two handles, one on each side, and they are OK to carry it with, but not great. In my opinion, they are a bit on the thin side and hurt the palm of your hand or fingers a little if you need to carry it for anything more than a minute or two.
What we have done when moving it is to wear ‘winter gloves.’ Something with a bit of padding. This solves this issue.
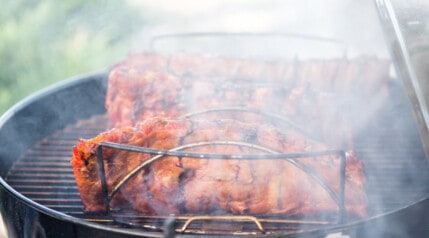
But anyway, in all honestly, I now only take the Joe Jr traveling if I want to smoke something, such as these three racks of baby back ribs you can see I smoked in my friend’s backyard.

If I only to want to grill while away, I would take a much lighter unit, such as my Weber Go Anywhere charcoal grill, or one of my portable gas grills.
But for smoking on the go, the Joe Jr is great and my go-to device. And if you do not have multiple options for travel grilling like I do, or are looking for something that can do both jobs of grilling and smoking, this is a very capable product.
Charcoal Consumption

The Joe Jr is fuel-efficient. You can see in the photos in previous sections how much charcoal I added to start a reverse sear of my steak, about half a basket full. And the photo directly above is what remained after about an hour of low n slow cooking at 250 °F.
I was then able to crank up the heat and perfectly sear the 1KG steak without adding any extra fuel.
You can see the baby back ribs in the previous section, I managed to smoke for 4.5 hours using a single load of charcoal, and there was approximately half of the fuel remaining when I finished. So to find out fuel consumption, I continued to let it run until all fuel was burned through and the temperature dropped.
On a single load of charcoal, the Joe Jr managed to hold a temp between 225 °F and 250 °F for a little over 8.5 hours. This is impressive!
Your mileage may vary and depend on the quality, density, and energy contained in the different charcoals you might use. I used a ‘mixed hardwood blend.’ But either way, 8.5 hours on a single load of charcoal is impressive, considering how little you can get in the small basket!
Quality of Food Produced
Amazing. This is all I can and need to say really.
The Kamado Joe Jr. holds temp well, can smoke and grill, maintains a moist cooking chamber during use, and produces wonderfully moist, flavorsome food.
It is a highly capable little grill, and so long as you have some cooking chops and know how to make great BBQ, you will produce great food on the Joe Jr.
What Others Say: Reviews from Around the Web
At the time of writing, this is the sum of customer feedback from various online retailers:
- Kamadojoe.com: 4.6/5 from 258 reviews.
- Walmart.com 4.6/5 from 332 reviews.
- Homedepot.com: 4.8/5 from 202 reviews.
The review of the Kamado Joe Jr. on Kitchen Exile is highly positive. The author, Thérèse, shares her personal journey of switching from Big Green Egg to Kamado Joe, emphasizing that the decision was not made lightly.
Thérèse praised the KJ for its superior airflow, temperature control, and ability to cook a variety of foods perfectly for a small group. It comes as a complete package with essential accessories included, making it a great value for its price, especially when compared to BGE.
Thérèse says the cooking experience is straightforward and enjoyable, with the grill quickly reaching and maintaining the desired temperature. Although mastering temperature adjustments requires some learning, she found it versatile for both direct and indirect cooking. The only additional accessory purchased was a kick ash basket for easier cleanup, suggesting the initial offering was largely sufficient.
The review strongly endorses the Kamado Joe Jr. for those considering a reliable, high-quality grill for smaller cooking needs.
Warranty and Support
You got to love a company that stands behind their workmanship; every Kamado Joe grill comes with a lifetime warranty against defects on all the ceramic parts, five years on metal parts, three years on the heat deflector, and one year on the gaskets and thermometer.
There’s a good selection of FAQs on the Kamado Joe website should you run into trouble. They also provide tips and guides for operation, and there are over 450 videos on their YouTube channel.
You won’t be able to call KJ, but they have a highly detailed contact form on the website. You can even attach photos to help explain your issue.
They have a strong presence on social media, too, including Facebook, Instagram, and Twitter. They’re a great place to find real-world answers to your burning questions. And, why not join one of the many unofficial groups too?
Summary of What We Learned

Phew! That was a lot to get through. But we’ve finally made it to the end. Here is a summary of what we like, what we think could be improved, and whether or not we are happy to recommend this grill.
What We Like
It’s impressive how Kamado Joe has virtually duplicated the full-size kamado experience in a portable unit.
Functionally, it’s the same, including the lower sliding vent and the rotating top vent. And you can also smoke low n slow, roast, bake, grill, and sear. It can do it all, a true Swiss army knife of a portable cooker.
Temperature control is easy (after a learning curve), and it holds a steady temperature with ease.
The drop-in cast iron stand makes setup simple no matter where you’re cooking, and its built-in handles take a lot of the strain out of moving the Kamado Joe Jr. Around.
What Could Be Improved
About my only criticism is the lackluster stainless steel cooking grate. You can purchase a cast iron grate separately, of course. But, given the grill’s overall quality and price point, I’d like to see it included in the box.
You could complain about the heavy weight, for what is ostensibly a portable grill and smoker. But I won’t because the thickness and quality of the ceramic that makes up the weight is precisely why it’s such an efficient, stable, and effective outdoor cooker.
Do We Recommend this Product?
You bet we do! …but ONLY if you want a pint-size portable grill and smoker.
Like I said before, invest in a Kamado Joe Junior if you’re cooking at home for two people, max, or you want to take it camping to smoke and grill, or to smoke your catch of the day — even if you only “caught” some burgers at the store.
If you’ve got more than two people at home, if you like to host, or if you don’t feel the need to bring a ceramic grill on your travels, skip the Joe Junior in favor of the larger Kamado Joe Classic.
31 Kg, with a 13.5″ diameter cooking surface. Small but mighty, and incredibly versatile being capable of grilling, smoking, searing, baking and roasting.
Alternative Products
What? After reading the above, are you still looking for something else?
Fair enough. In that case, here are two alternatives that might float your boat.
Junior Charcoal Primo

The Primo is the largest portable ceramic grill that I know of. It’s portable thanks to accessories like the Primo GO cradle and base.
With its unique oval shape, the Primo Junior Charcoal Grill enhances cooking efficiency and versatility, offering more grilling space than the Kamado Joe Jr. at 210 square inches, enough for 3 whole chickens, or 1 small turkey, or 4 steaks, 8 burgers, 4 racks of ribs, or 6 ears of corn simultaneously.
Also, Primo users argue that the oval shape allows ‘true indirect cooking’ by banking coals to one side instead of simply putting a deflector plate between the coals and food like in the KJ.
Its various setup options and capacity to cook large quantities of food make it ideal for outdoor cooking enthusiasts who still wish to host medium sized gatherings.
MiniMax Big Green Egg

You simply cannot talk about Kamados without mentioning Big Green Egg.
The MiniMax Big Green Egg offers a compact, powerful grilling solution with a portable carrier, ideal for people who like to take their grill travelling.
Its 13-inch grid and 133 square inches of cooking space allow for various meals, balancing portability with capacity.
Made from high-quality ceramics, it promises durability and superior grilling, and is backed by a lifetime warranty.
It supports various EGGcessories for enhanced versatility. Often more affordable than alternatives, it provides great value and performance for grillers on the go.
Conclusion
I was already a fan of Kamado Joe before I ever bought the Joe Junior. And with this third addition to my collection, I was not disappointed.
The Kamado Joe Junior does a lot of what the bigger Joes do, but it does it on a smaller footprint, and it’s not limited to my backyard. Just be ready to answer lots of questions from gawking grillheads if you take it on the road!
If you decide to buy one of your own, let me know what you think! Did it live up to your expectations? You can send a message through the site or join us on Facebook and share your thoughts with the crowd.
Thanks for reading for my Kamado Joe Jr review — and if this is your point of entry into the world of kamado cooking, welcome!


I’ve owned a Big Joe for 5 years and love it. Just bought a Joe Jr., but haven’t used it yet. I was surprised that there’s not an ash tray to clean out ashes. I searched the box and thought it had been left out, but checked the contents list and saw it wasn’t included. Would it be impractical to have one in such a small smoker?
Hi Jim. I had similar thoughts! I’ve a classic I, and a Big Joe III, that each have a slide out ash drawer, so I was expecting one with the junior, and feel that one would be handy. But I also feel that maybe it would clog too easily, restrict airflow, maybe be harder to insert and remove in the smaller space compared the larger grills in the line? Unsure, but I wish there was one.
Great review and breakdown, this has me sold, getting one right now for the condo and camping.
I enjoyed your review. I and my wife have really enjoyed the Joe Junior. I am new to this type of grilling as gas bbq’s are common in NZ. I use the Joe Junior a couple of times a week. We have owned it for nearly 2 years. I tend to use OONI cast iron and do not add the deflection plate. Mainly for roasting a piece of meat or chicken and then grilling vegetables or roasting potatoes, etc I usually add a piece of cherry, apple or hickory. And have even tried manuka a NZ classic smoking wood. It is a great grill and using hardwood lump charcoal I find it gets up to roasting or higher in about 25-30 minutes. I usually cook the meat with some veges then roast more veges and then finish off with a dessert. Typically a rhubard or peach sponge. The food lasts us 3-4 days. It is very efficient with lump charcoal. The main type I use is Vitex species from Indonesia sold here under the heat beads brand. I nearly bought the classic recently but common sense got the better of me, We have a steep driveway and wheeling it around would be difficult. I use a simple dolly for the Joe Junior and lift it on or off and pull it to the back yard or wherever we decide to cook.
Sounds like you’re doing great with the KJ Jr, Kevin. And yes, the classic is heavy and not one you want to be dragging up and down a slope for sure!
Thank you Mark. We have been enjoying the Youtube channel and having fun experimenting. Brined chicken and Tandoor chicken are two recipes we are having fun with lately. A friend now owns the larger 18 inch classic.
Purchased Kamado Joe Jr via Amazon. When received, Fire Ring was cracked.
Tried to contact Kamado Joe at their phone #. Got a recording everything is done via
their email/website.
Registered grill at website. Got a note from Shannon Snead that all was in order and Fire Ring would be replaced under warranty. Said I will receive it in 7-10 days. Today is 8 days. Got an email stating they are still waiting for something from me. Didn’t say what. I again sent them purchase receipt and picture of the cracked Fire Ring.
Still no response from them and haven’t received the new Fire Ring yet.
Not being able to contact anything but an email is frustrating. So far NOT impressed by their warranty OR customer service.
Can’t return to Amazon, because after opening, NO WAY to repackage.
Would be nice if they had a customer support team one could contact.
Excellent review of the Joe Jr. One question, How big of a brisket or Boston Butt can you safely smoke with it? 2 lbs? 4? or larger?
Hi, Charlie.
Sorry, but I’m not sure! Obviously, anything you wish to cook on it has to be equal to or smaller than the cooking space, which happens to be 13.5 inches. So anything must be 13.5 inches maximum in width or length. But The dimensions of a brisket (flat or point), or a Boston butt, is not something I’ve actively ever measured, sorry.
Mark, You did a great job telling about the Kamado Joe Jr.
I am now considering buying either a Kamado Jr or Classic.
Your article helped me a lot toward making the decision on which
grill buy first.
My best regard,
Henry Milligan.
For long smokes, I missed the part how the hot heat deflector got relocated from the top of the cooking grate to underneath. Please explain. Thanks!
Hi, Glenn. I like to ‘heat soak’ the heat deflector sitting on top of the grates, before using heat proof gloves to then arrange it as it should be when smoking, as seen in the images below this heading: https://www.foodfirefriends.com/kamado-joe-jr-review/#ease-of-assembly. I do this because if I put the heat deflector in as it should be when smoking, airflow is low and heating up takes more time. And also, if you put the heat deflector in right from cold, there’s a chance of fracturing due to instantly going from cold (outside the grill) to just a couple of inches above the hot coals, so it prevents damage.
Brilliant write up and very informative ……. Just what I needed.
I’m currently sat in my car with a box in the back, can’t wait to get it home and unboxed 🙂
Thanks Stu.